In this article
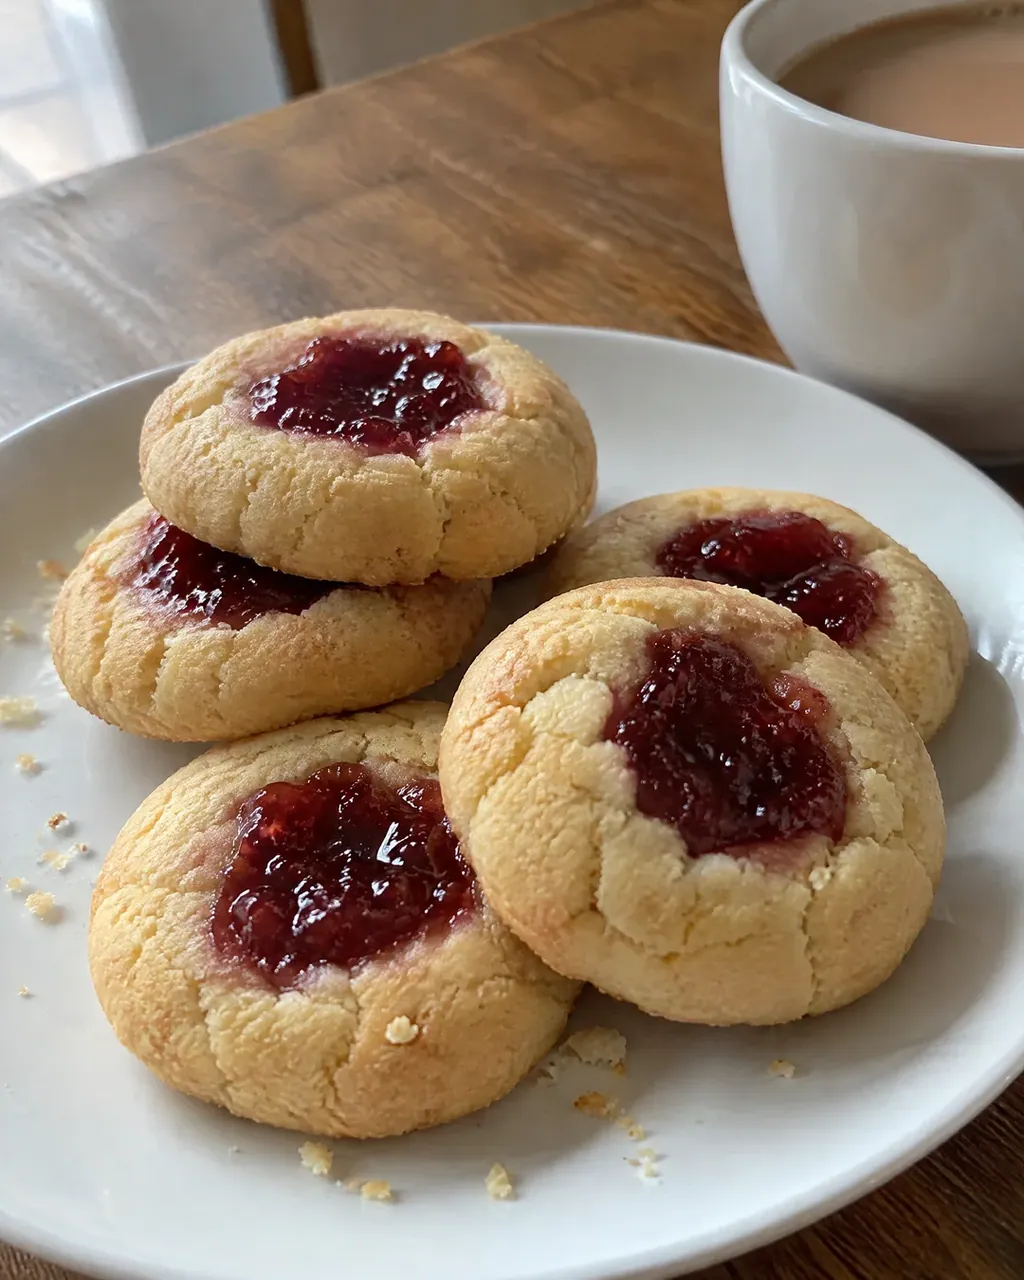
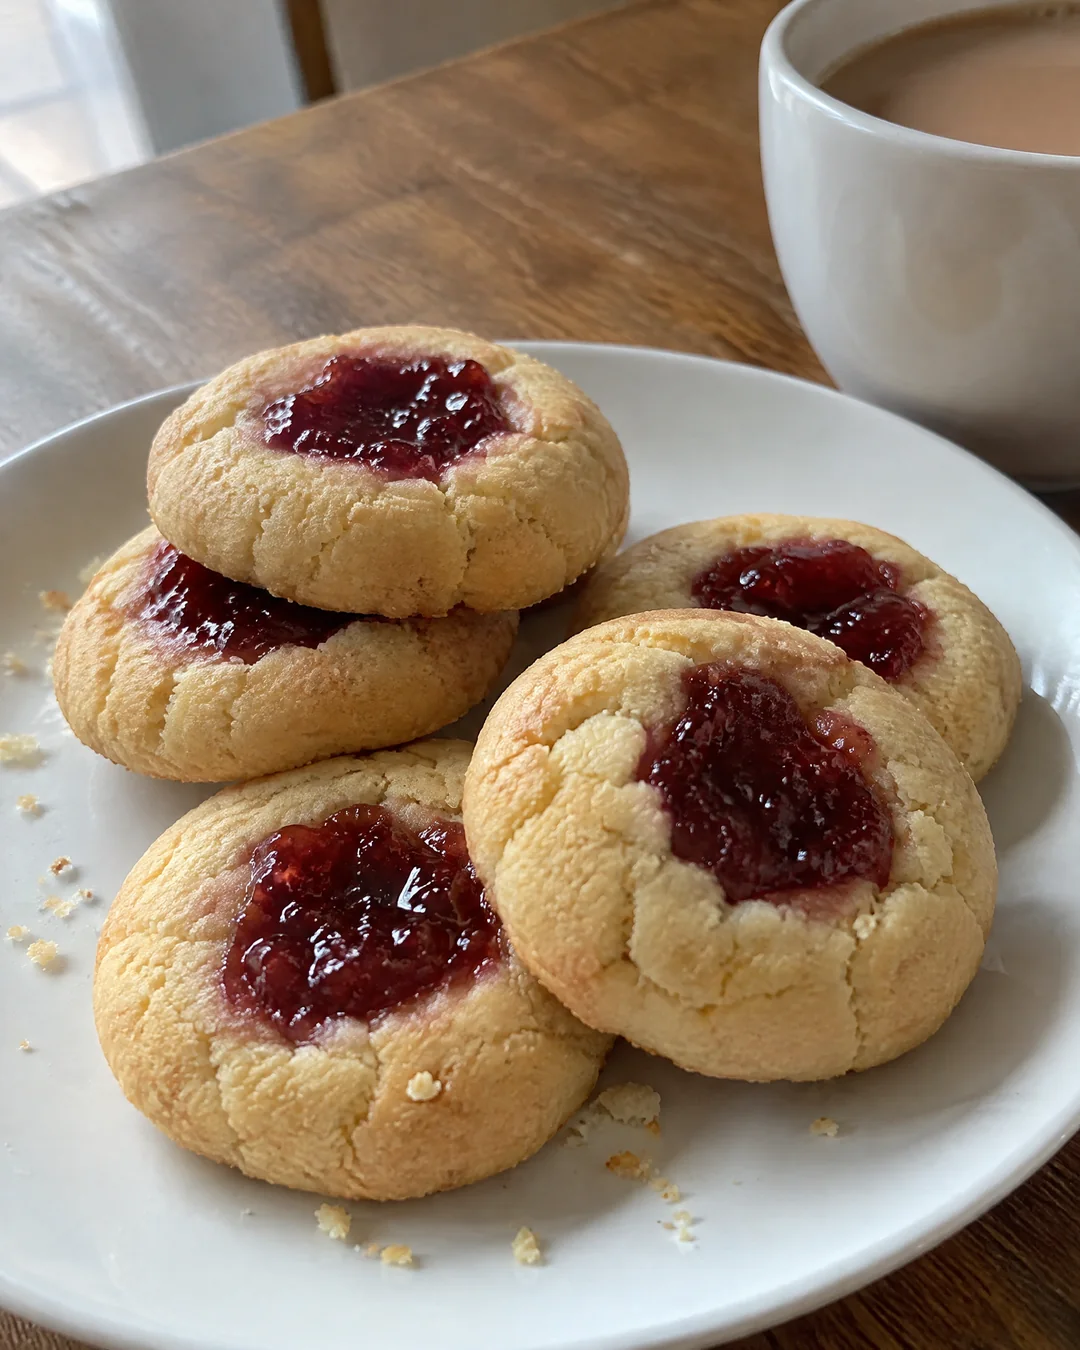
A great many Australian grandmothers kept jam drops in the biscuit tin, and people who grew up there can tell you exactly what that tin looked like. They are small, plain butter biscuits with a spot of dark red jam baked into the middle. Over here we would call them thumbprint cookies, but there are two differences, and both matter. The hole is not made with a thumb. It is pressed with the floured handle of a wooden spoon, which makes it deeper and neater. And the jam goes in raw, before the oven, not spooned in afterward.
That second step looks like a mistake the first time you do it. You expect the jam to boil over and burn. It does bubble, but if the hole is the right depth and not too full, the jam bakes down into a dark, chewy, shiny centre that never runs, even when the biscuits are stacked in a tin. Below are the measurements, and the two things everybody wants to know: how full to fill the hole, and how to stop the biscuits from spreading flat on the tray.
Why this jam drops works
- A firm butter dough. There is just enough egg to bind and plenty of flour, so the biscuits keep their round shape and the walls of the hole stand up.
- The handle of a wooden spoon. It makes a deep, narrow, even hole with straight sides, which holds the jam far better than the shallow dent of a thumb.
- Jam baked in. The heat drives off water and the jam thickens into a chewy centre that sets firm when it cools.
- A short chill. Twenty minutes in the refrigerator firms the butter so the biscuits hold their shape in the oven.
- A moderate oven. The biscuits should stay pale gold. A hot oven browns them before the jam has had time to set.
Ingredients
Makes about 28 small biscuits (cookies). The measurements are in US cups with grams in brackets.
For the biscuits
- 1/2 cup butter (115g), softened
- 1/2 cup granulated sugar (100g)
- 1 large egg, at room temperature
- 1 teaspoon vanilla extract
- 1 2/3 cups all-purpose flour (210g), plus a little for the spoon handle
- 1 1/2 teaspoons baking powder
- 1/4 teaspoon salt
For the filling
- 1/3 cup raspberry jam (about 100g)
In Australia these are made with self-raising flour. If you have it, use 1 2/3 cups (210g) and leave out the baking powder and salt. Choose a thick jam or preserves, with or without seeds. Jelly is too thin and runs, and low-sugar spreads boil over. Raspberry is the classic; apricot and strawberry are the other old favorites.
How to make jam drops
Make the dough
- Line two baking sheets with parchment.
- In a large bowl, beat the butter and sugar together with a wooden spoon or a mixer for 2 to 3 minutes, until pale and creamy.
- Beat in the egg and the vanilla until smooth.
- Stir the flour, baking powder and salt together, then add them to the bowl and mix just until a soft dough forms that does not stick to your fingers. If it is sticky, work in another tablespoon of flour.
Shape and fill
- Roll level tablespoons of the dough into balls about 1 inch (2.5cm) across and set them 2 inches apart on the baking sheets.
- Dip the round end of a wooden spoon handle in flour and press it straight down into the middle of each ball, about three quarters of the way through, wiggling it a little to widen the hole. If the edge cracks, pinch it back together.
- Stir the jam hard with a spoon until it is smooth and loose. Using a small spoon, fill each hole to just below the rim, about 1/2 teaspoon of jam. Do not heap it.
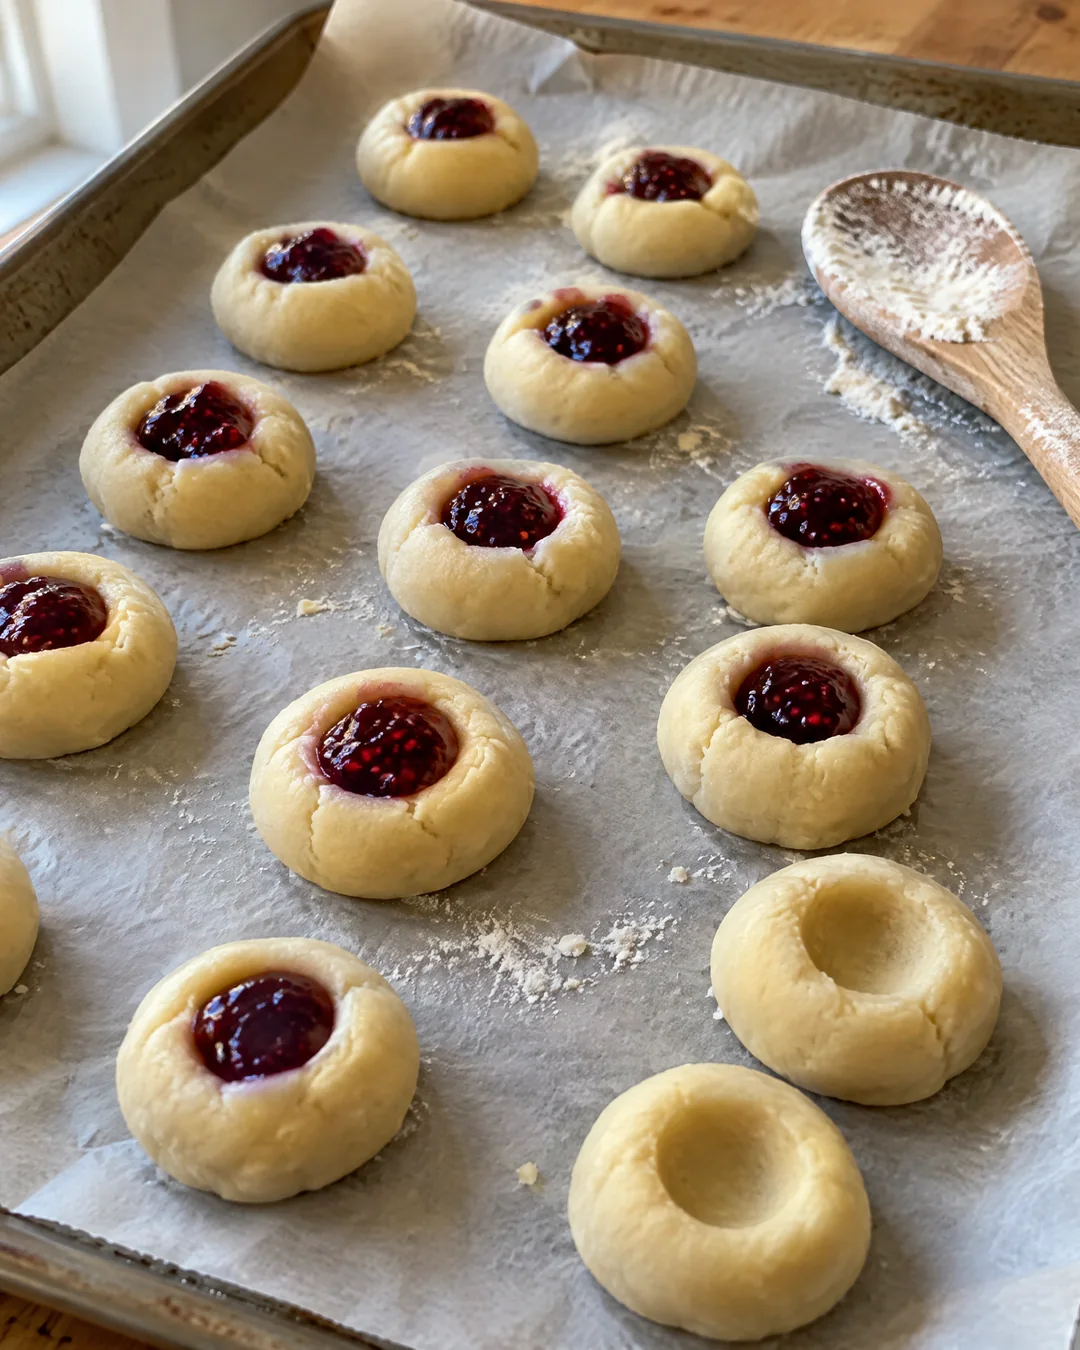
- Put the trays in the refrigerator for 20 minutes. Meanwhile, heat the oven to 350 degrees (180°C).
Bake
- Bake one tray at a time on the middle shelf for 12 to 15 minutes, until the biscuits are pale golden at the edges and the jam is bubbling.
- Leave the biscuits on the tray for 5 minutes. The jam is very hot and still soft. Then move them to a wire rack and let them cool completely, so the jam sets, before you stack them.
Tips that make the difference
- Fill the holes to just below the rim and no higher. Jam swells as it boils, and an overfilled hole spills down the side and burns on the tray.
- Press the hole deep. A shallow dent closes up as the biscuit puffs and pushes the jam out.
- Chill the shaped biscuits before baking. Warm dough is the usual reason jam drops spread flat.
- Measure the flour generously. A dough that is too soft and buttery cannot hold its shape, however long it is chilled.
- Let the jam cool and set completely before the biscuits go into the tin, or they will glue themselves together.
Variations
- Apricot jam drops. Fill the holes with thick apricot jam. Many families bake half a tray of each.
- Coconut jam drops. Roll the balls of dough in fine shredded coconut before you press the holes.
- Lemon jam drops. Beat the grated zest of one lemon into the butter and sugar and fill the holes with lemon curd, which is added after baking, not before.
- Custard powder biscuits. Replace 1/4 cup of the flour with custard powder or cornstarch for a shorter, more tender, pale yellow biscuit.
Storage and make-ahead
Jam drops keep in an airtight tin at room temperature for up to a week. Put a sheet of parchment between the layers.
They soften a little after the second day as the jam gives moisture to the biscuit. Many people like them best that way.
To freeze, pack the cold biscuits in a container with parchment between the layers and freeze for up to 2 months. Thaw at room temperature. The balls of dough can also be frozen unfilled; thaw, press, fill and bake.
Frequently asked questions
How full should I fill the hole in a jam drop?
To just below the rim, which is about half a teaspoon of jam in a hole pressed three quarters of the way through the ball of dough. The jam rises as it bubbles and settles back as it cools. Any more than that and it boils over.
Why did my jam drops spread flat?
The butter was too soft, the dough was not chilled, or there was too little flour. Chill the shaped biscuits for 20 minutes, bake on a cool tray lined with parchment, and add a spoonful more flour next time if the dough felt sticky.
Do you put the jam in before or after baking?
Before. That is what makes a jam drop. The jam bakes with the biscuit, loses some of its water and sets into a chewy centre that does not smear when the biscuits are stacked.
Are jam drops the same as thumbprint cookies?
They are close cousins. Jam drops are plainer, with no nuts or coating, the hole is made with a spoon handle instead of a thumb, and the jam is always baked in.
Bake a batch, let the jam set, and fill a tin. They are meant to be there whenever somebody lifts the lid.
Australian Jam Drops (Old-Fashioned Thumbprint Cookies with Baked-In Jam)
Old-fashioned Australian jam drops: small butter biscuits rolled into balls, pressed with the floured handle of a wooden spoon and filled with raspberry jam before baking, so the jam sets dark and chewy in the middle of each cookie.
Ingredients
- 1/2 cup butter (115g), softened
- 1/2 cup granulated sugar
- 1 large egg, at room temperature
- 1 teaspoon vanilla extract
- 1 2/3 cups all-purpose flour (210g), plus a little for the spoon handle
- 1 1/2 teaspoons baking powder
- 1/4 teaspoon salt
- 1/3 cup raspberry jam
Instructions
- Line two baking sheets with parchment.
- In a large bowl, beat the butter and sugar together with a wooden spoon or a mixer for 2 to 3 minutes, until pale and creamy.
- Beat in the egg and the vanilla until smooth.
- Stir the flour, baking powder and salt together, then add them to the bowl and mix just until a soft dough forms that does not stick to your fingers. If it is sticky, work in another tablespoon of flour.
- Roll level tablespoons of the dough into balls about 1 inch (2.5cm) across and set them 2 inches apart on the baking sheets.
- Dip the round end of a wooden spoon handle in flour and press it straight down into the middle of each ball, about three quarters of the way through, wiggling it a little to widen the hole. If the edge cracks, pinch it back together.
- Stir the jam hard with a spoon until it is smooth and loose. Using a small spoon, fill each hole to just below the rim, about 1/2 teaspoon of jam. Do not heap it.
- Put the trays in the refrigerator for 20 minutes. Meanwhile, heat the oven to 350 degrees (180°C).
- Bake one tray at a time on the middle shelf for 12 to 15 minutes, until the biscuits are pale golden at the edges and the jam is bubbling.
- Leave the biscuits on the tray for 5 minutes. The jam is very hot and still soft. Then move them to a wire rack and let them cool completely, so the jam sets, before you stack them.