In this article
Introduction and Getting Started
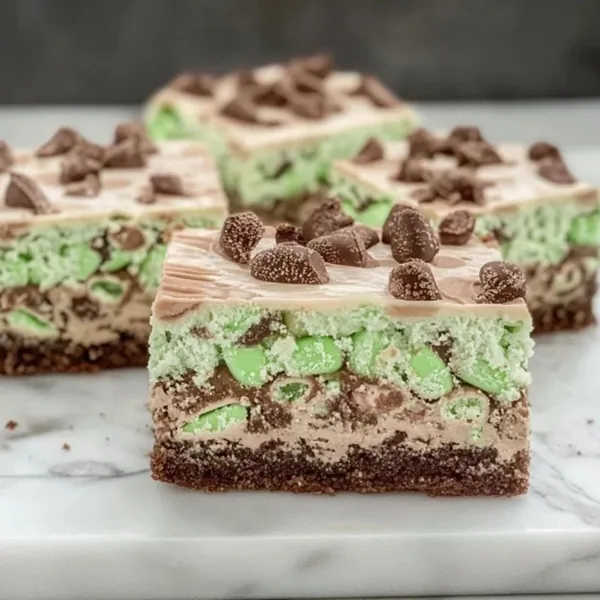
If you’re anything like me, there’s nothing better than a little taste of nostalgia – and this Mint Aero Traybake is the ultimate retro treat! 🍫🌿 Every bite is pure heaven: a rich chocolate sponge, cool and creamy mint buttercream, and the magic of bubbly Mint Aero bars scattered on top. It’s the kind of thing you make “for the kids” and somehow half of it mysteriously disappears into your mouth before anyone else gets a look!
I first made this traybake for a bake sale at my kid’s school, and let me tell you, it was gone before the bell even rang! I had teachers asking for the recipe and kids begging for second helpings. It’s a winner for birthdays, afternoon tea, or even just when you need a little chocolate-minty pick-me-up. Plus, it’s super simple to make—no fancy equipment or complicated steps.
Alright, let’s jump straight into making this delicious Mint Aero Traybake. Here’s what you’ll need:
Ingredients
For the Sponge:
-
200g butter, softened
-
200g caster sugar
-
4 large eggs
-
1 tsp vanilla extract
-
200g self-raising flour
-
30g cocoa powder
-
2 tbsp milk
For the Mint Buttercream:
-
150g butter, softened
-
300g icing sugar
-
1 tsp peppermint extract (adjust to taste)
-
Green food colouring (optional, but so fun!)
For the Topping:
-
2 x 45g Mint Aero bars, chopped
-
100g dark or milk chocolate, melted
Step-by-Step Instructions
Step 1:
First things first: preheat your oven to 180°C (fan). Grease and line a 20x30cm baking tin with parchment paper. (I like to leave a bit of extra paper over the sides—it makes lifting the traybake out so much easier later.)
Step 2:
In a large mixing bowl, cream the butter and sugar together until it’s light, fluffy, and pale in color. You can use an electric mixer to make life easier, but a little elbow grease works too!
Step 3:
Beat in the eggs one at a time, making sure each is fully incorporated before adding the next. Stir in the vanilla extract.
Step 4:
Sift in the self-raising flour and cocoa powder. Gently fold everything together—you want to keep as much air in the batter as possible for that lovely soft sponge.
Step 5:
Add the milk to loosen the batter slightly, then spread it evenly into your prepared baking tin.
Step 6:
Bake for 20–25 minutes. The sponge should spring back when lightly pressed in the center. Once baked, let the cake cool completely in the tin.
Tip: Don’t rush the cooling! If the cake is even slightly warm, the buttercream will melt into a slippery mess.

Making It Minty and Finishing Touches
Now for the best part—the minty, chocolatey toppings!
Making the Mint Buttercream
Step 7:
While the sponge cools, whip up the mint buttercream. Beat the butter until it’s soft and creamy, then gradually add the icing sugar a few spoonfuls at a time. (Trust me, a dust cloud of sugar is not the kitchen vibe you want!)
Step 8:
Once the mixture is smooth and fluffy, mix in the peppermint extract. Start with a teaspoon and add more if you want a stronger minty kick. If you’re feeling playful, add a tiny drop of green food colouring to make it look as minty as it tastes!
Step 9:
Spread the buttercream over the cooled sponge in an even layer, right to the edges.
Adding the Toppings
Step 10:
Scatter your chopped Mint Aero pieces generously over the buttercream. You want a little bit of chocolatey bubble goodness in every single bite!
Step 11:
Finally, drizzle the melted chocolate over the top. I like to use a fork or a piping bag for a fancy zigzag effect, but honestly, messy drizzles look just as gorgeous and rustic.
Optional tip: If you want to go extra minty (and who wouldn’t?), you can also crush a few After Eight mints and sprinkle them on top.
Pro Tips for the Perfect Mint Aero Traybake
-
No Aero Bars? Don’t worry—you can swap them for Maltesers, Crunchies, or even mint chocolate chips. It’s all about the texture!
-
Making Ahead: This traybake keeps really well in an airtight container for up to 3 days.
-
Serving Hack: For clean slices, dip your knife in hot water and wipe it between each cut.
-
Mint Level: Adjust the peppermint extract to your taste—start small, then build up.
FAQs and Wrapping It Up
Frequently Asked Questions
Q1: Can I freeze Mint Aero Traybake?
Yes! Slice it first, then freeze the pieces individually wrapped. Thaw at room temperature.
Q2: What if I don’t have self-raising flour?
You can make your own: for every 200g plain flour, add 2 tsp baking powder.
Q3: Can I make it gluten-free?
Absolutely! Use a good quality gluten-free self-raising flour blend.
Q4: How strong is the mint flavor?
It’s refreshingly minty but not overpowering. Feel free to adjust the peppermint extract to your liking!
Q5: Can I use different Aero flavours?
Definitely! Try the caramel or orange Aero for a fun twist.
Q6: Do I have to add food colouring?
Not at all. It’s purely for a little pop of minty green fun!
Q7: How long does it stay fresh?
It’s best within 3 days, but honestly, it never lasts that long around here!
Conclusion
And there you have it—your new favorite go-to treat: the Mint Aero Traybake! 🍫🌿 It’s simple, it’s nostalgic, and it’s so delicious. Whether you’re whipping it up for a bake sale, a party, or just because (my favorite reason!), you’re guaranteed to wow everyone who gets a slice.
If you give this recipe a try, I’d love to hear how it goes! Did you stick with the classic mint or try a crazy chocolatey twist? Let me know in the comments—and don’t forget to share a picture of your masterpiece!
Happy baking, friends! 💚
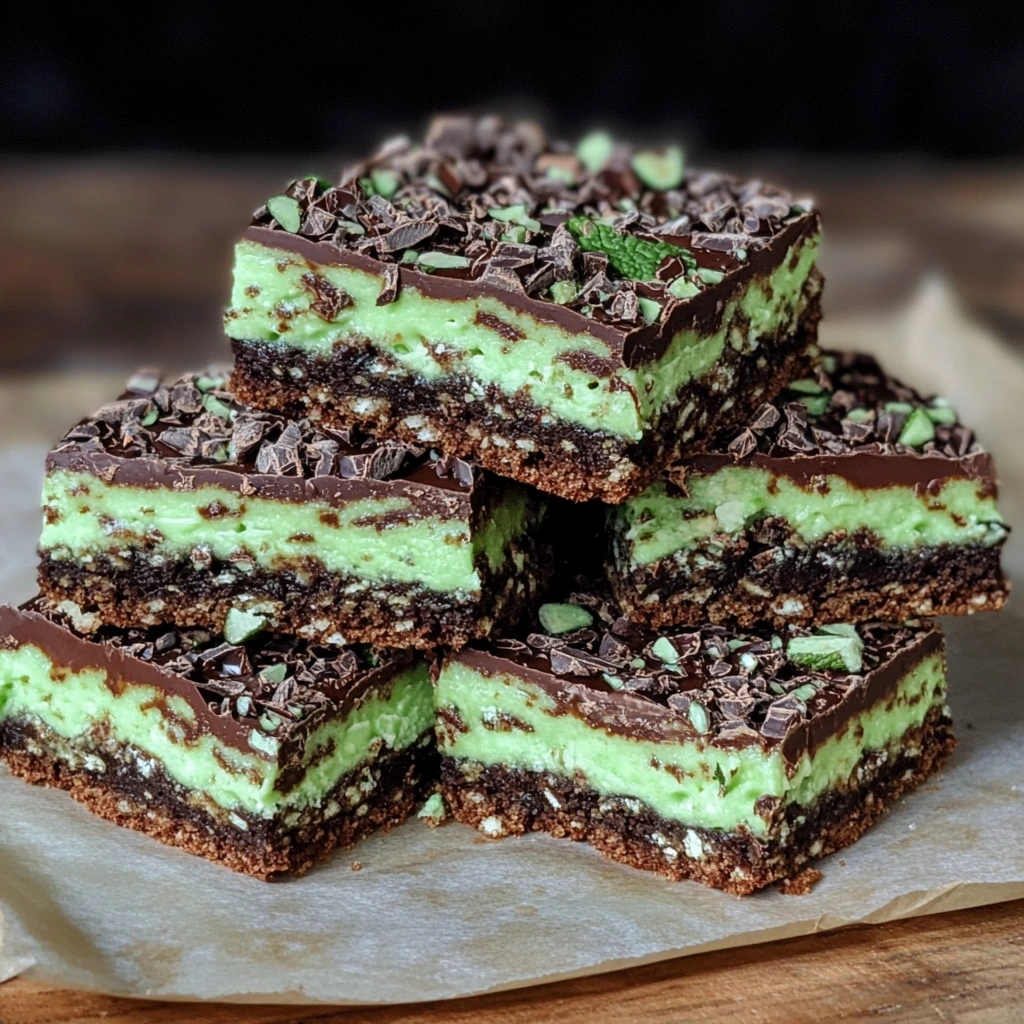
Mint Aero Traybake Recipe: A Retro Chocolate Mint Dream!
This Mint Aero Traybake Recipe is the ultimate retro-inspired treat, combining a rich chocolate sponge, cool peppermint buttercream, and loads of bubbly Mint Aero chocolate. It's simple to make, beautifully minty, and perfect for birthdays, bake sales, or a cozy afternoon snack. Customize it with different toppings and enjoy a nostalgic blast from the past with every bite!
Ingredients
- 200g butter, softened
- 200g caster sugar
- 4 large eggs
- 1 tsp vanilla extract
- 200g self-raising flour
- 30g cocoa powder
- 2 tbsp milk
- 150g butter, softened
- 300g icing sugar
- 1 tsp peppermint extract (or to taste)
- Green food colouring (optional)
- 2 x 45g Mint Aero bars, chopped
- 100g dark or milk chocolate, melted
Instructions
- Preheat the oven to 180°C (fan). Grease and line a 20x30cm baking tin.
- Cream the butter and caster sugar until light and fluffy.
- Beat in the eggs, one at a time, then stir in the vanilla extract.
- Fold in the self-raising flour and cocoa powder, then mix in the milk to loosen the batter.
- Spread the batter evenly in the tin and bake for 20–25 minutes until springy to the touch. Cool completely.
- Prepare the buttercream by beating the butter until smooth. Gradually add icing sugar, then mix in peppermint extract and a drop of green food colouring if desired.
- Spread the mint buttercream over the cooled sponge.
- Scatter the chopped Mint Aero bars on top.
- Drizzle melted chocolate over the traybake for a decadent finish.
- Slice into 12 squares and serve!