In this article
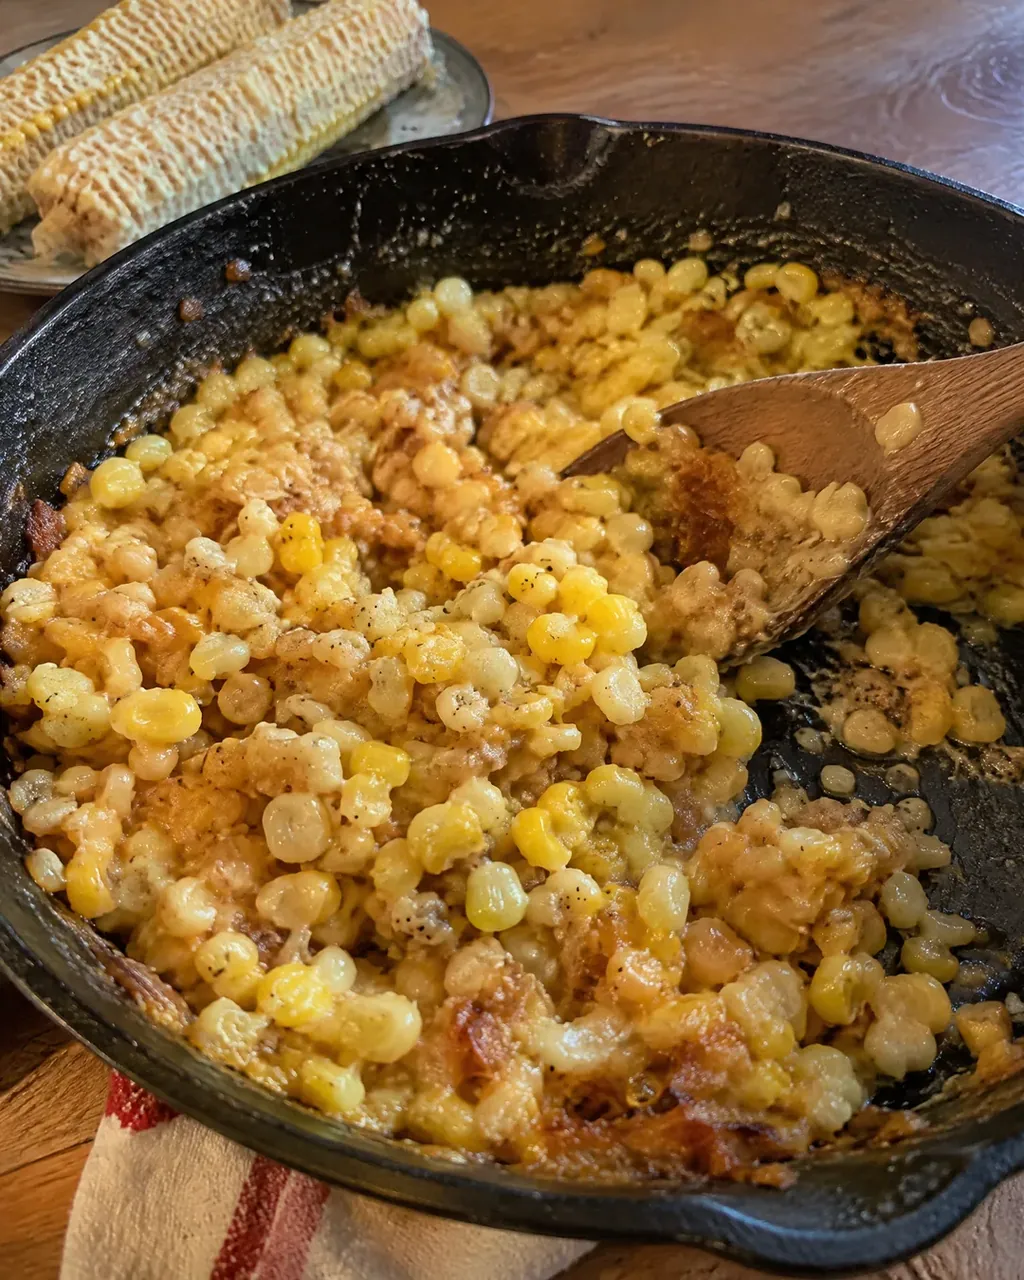
Fried corn is one of those Southern dishes with a name that tells you nothing true about it. Nothing is fried. There is no batter and no deep fat. What there is, in August and September when the corn comes in faster than a family can eat it, is a black skillet, a stick of butter and eight ears of corn worked down into something thick, sweet and creamy that people who did not grow up with it take for creamed corn. It is better than creamed corn, and there is no cream in it at all.
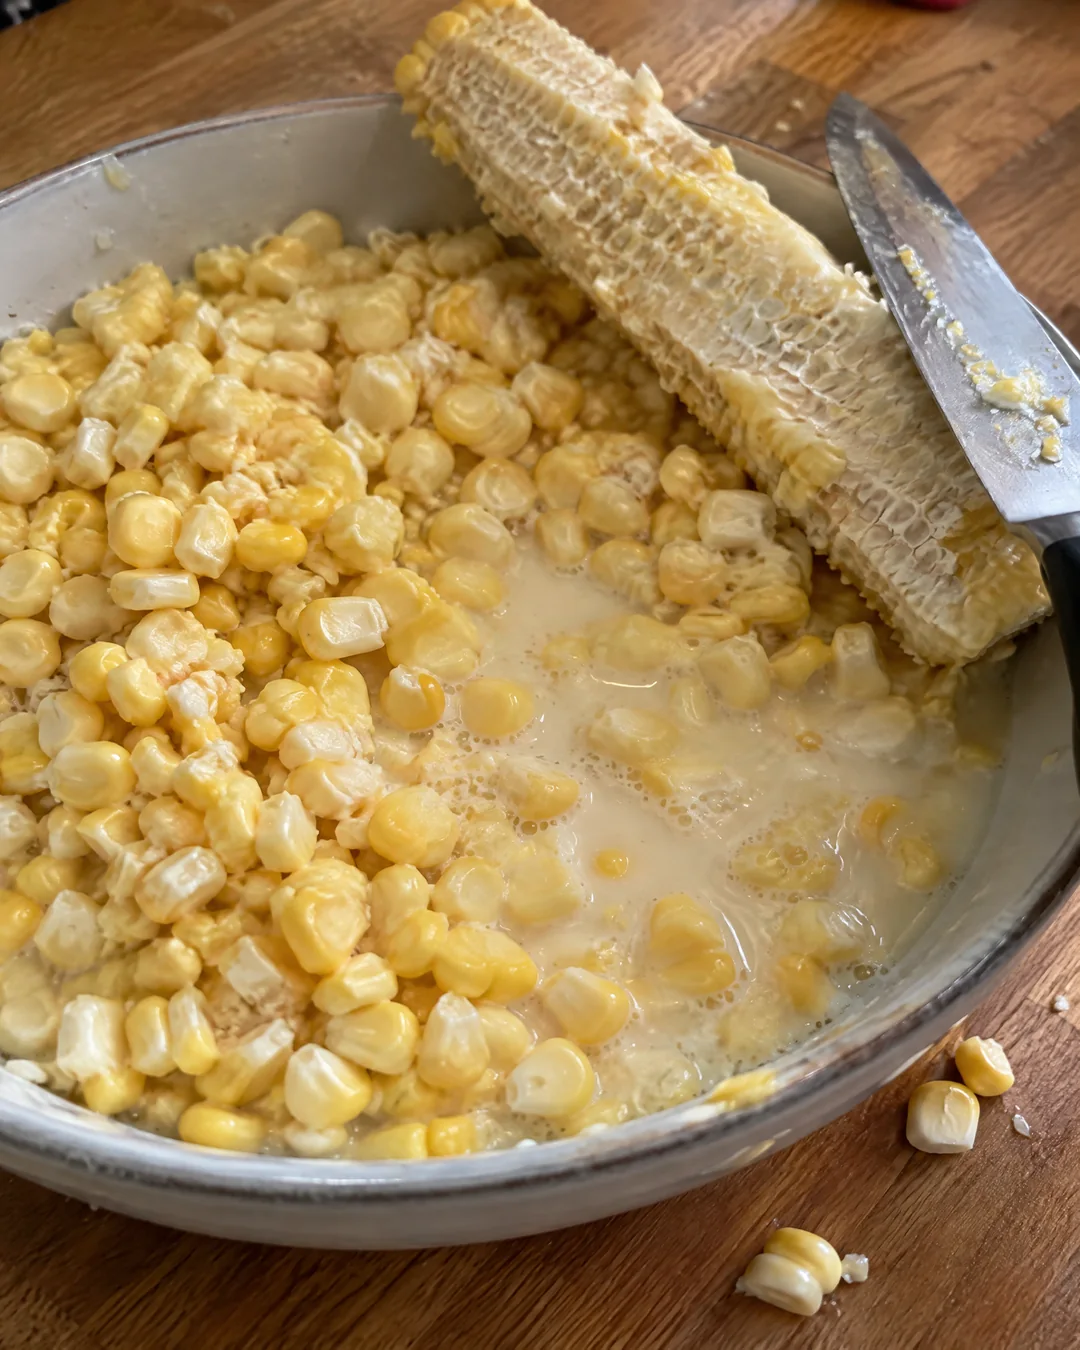
The whole dish lives in one step that most modern recipes skip. When you cut the kernels off the cob, you cut shallow, taking the tops of the kernels and leaving the bottoms behind. Then you turn the knife over and scrape the bare cob hard, top to bottom, and a thick milky white starch comes running off it into the bowl. That cob milk is what thickens the skillet and what makes the corn taste as if it had been cooked in cream. Skip it and you have buttered corn. Do it and you have fried corn.
The old cooks also knew that the bottom is supposed to catch. Not burn, but brown, so a spoon dragged across the skillet brings up golden bits that go back into the corn. Whether that is flavor or burning has been argued at family tables for a hundred years. We are on the side of flavor.
Why this fried corn works
- Cut shallow, scrape hard. Taking only the tops of the kernels leaves the starchy bottoms on the cob, and scraping brings out the milk. That milk thickens the corn without cream or flour.
- Butter in cast iron. Iron holds a steady low heat and browns the bottom evenly. Butter carries the sweetness of the corn and browns along with it.
- Low heat and 20 to 25 minutes. The corn has to cook long enough for the cob milk to thicken and the liquid to cook down. Rush it and it stays soupy.
- Letting the bottom catch. The golden layer on the skillet, scraped up and folded back in, is what separates fried corn from a pot of boiled corn with butter on it.
Ingredients
Serves 6 as a side dish, from 8 ears of corn. The measurements are in US cups with grams in brackets.
- 8 ears fresh sweet corn, husked and silked (about 5 to 6 cups of kernels and milk, 800g)
- 1/2 cup unsalted butter (1 stick, 113g)
- 1/4 cup water (60ml), plus a spoonful more if needed
- 1 teaspoon fine salt, plus more to taste
- 1/2 teaspoon black pepper
- 1 to 2 teaspoons granulated sugar, optional, only if the corn is not sweet
Use the freshest corn you can get, picked within a day or two if at all possible. Older corn has less milk in the cob and a starchy taste. Yellow, white or bicolor all work.
How to make fried corn
- Husk the corn and pull off the silks. Stand each ear on its end in a wide shallow bowl or a rimmed baking sheet. With a sharp knife, cut the kernels off shallow, taking only the top half to two thirds of each kernel and leaving the bottoms on the cob. Work around each ear in long strokes.
- Now turn the knife over. Holding the ear upright, scrape the bare cob hard with the back of the blade from top to bottom, all the way around. Milky white starch and the pulp from the kernel bottoms will run down into the bowl. Scrape every cob. You should have 5 to 6 cups of kernels and milk together, and the milk is the recipe, so do not lose a drop of it.
- Melt the butter in a 10 or 12 inch cast iron skillet over medium heat until it foams.
- Add the corn and all of its milk, the water, the salt and the pepper, and stir well. Taste a spoonful of the raw corn first: if it is not sweet, add the sugar now.
- Turn the heat down to medium-low and cook, stirring every few minutes and scraping the bottom, for 20 to 25 minutes. For the first ten minutes the corn will look loose and soupy. Then the cob milk thickens, the liquid cooks down and the corn turns creamy and heavy on the spoon.
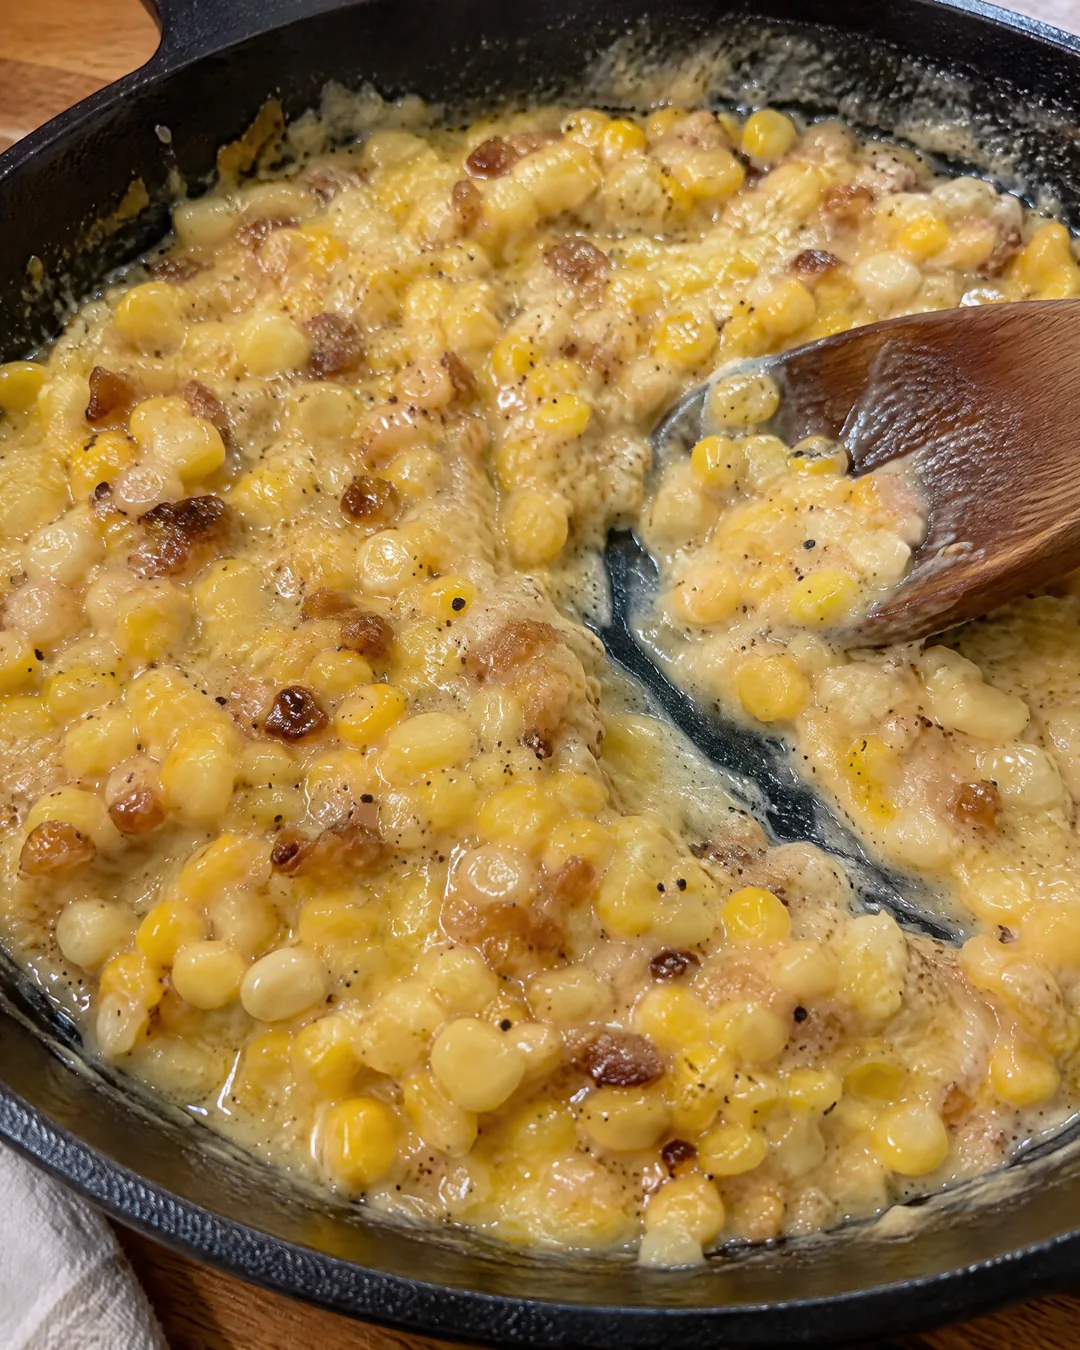
- In the last 5 to 10 minutes, leave it a little longer between stirs so the bottom catches. You want a thin golden brown layer on the skillet, scraped up and stirred back in each time. If it gets too dry before it is done, add a spoonful of water.
- It is ready when the corn is thick enough to hold a trail from the spoon, tender all the way through, with little browned bits stirred through it. Taste for salt and serve hot from the skillet.
Tips that make the difference
- Cut the corn over a bowl big enough to catch the spray. A tube pan works well: stand the ear on the center tube and the kernels fall into the ring.
- Do not cut deep. Kernels cut to the cob bring hard bits with them and leave no milk to scrape.
- Keep the heat low once the butter is in. Butter burns before corn browns if the skillet is too hot.
- Taste before you salt at the end. Corn varies in sweetness, and this dish should taste of corn first, salt second.
Variations
- With green onion. Stir in 3 sliced green onions for the last 5 minutes for a fresher, sharper skillet.
- With bell pepper. Cook 1/2 cup finely chopped red or green bell pepper (75g) in the butter for 3 minutes before the corn goes in.
- With tomato. Fold in 1 cup chopped fresh tomato (180g) for the last 10 minutes. A late summer supper with cornbread.
- From frozen corn. Out of season, use 5 cups frozen corn kernels (700g), thawed, and stir in 2 tablespoons of milk mixed with 1 teaspoon cornstarch to stand in for the cob milk. Good, but not quite the same.
Storage and make-ahead
Fried corn keeps in a covered container in the refrigerator for 4 days. Reheat it in a skillet over low heat with a spoonful of water, stirring, until hot through. It freezes well for up to 3 months.
You can cut and scrape the corn a day ahead. Keep the kernels and milk together in a covered bowl in the refrigerator and cook them the next day.
Frequently asked questions
Why is it called fried corn if nothing is fried?
Because it is cooked in fat in a skillet, which in an old Southern kitchen was frying, whether or not anything got crisp. The name stuck long before anybody worried about what it meant.
Is fried corn the same as creamed corn?
It tastes and looks similar, but true fried corn has no cream, no milk and no flour. The creaminess comes from the starchy milk scraped off the cobs and cooked down in butter.
What if I do not get much milk from the cobs?
The corn was probably old or cut too deep. Scrape harder, all the way around each cob. If the skillet still looks thin after 15 minutes, keep cooking. It thickens as the water cooks off.
Can I use canned corn?
It will not make fried corn. Canned corn has no cob milk and turns mushy. Frozen corn, with the trick in the variations, is the better substitute.
Cut shallow, scrape hard, cook it low and let the bottom catch. Then put it on the table and wait for somebody to say it tastes like there is cream in it.
Southern Fried Corn (No Cream in It, and No Frying Either)
Old-fashioned Southern fried corn the way it was made every August: fresh kernels cut shallow off eight ears, the bare cobs scraped hard for their milk, and everything cooked slow in butter in a cast iron skillet until thick, creamy and catching on the bottom. No cream, no flour, cups and grams.
Ingredients
- 8 ears fresh sweet corn, husked and silked
- 1/2 cup unsalted butter
- 1/4 cup water (60ml), plus a spoonful more if needed
- 1 teaspoon fine salt, plus more to taste
- 1/2 teaspoon black pepper
- 1 to 2 teaspoons granulated sugar, optional, only if the corn is not sweet
Instructions
- Husk the corn and pull off the silks. Stand each ear on its end in a wide shallow bowl or a rimmed baking sheet. With a sharp knife, cut the kernels off shallow, taking only the top half to two thirds of each kernel and leaving the bottoms on the cob. Work around each ear in long strokes.
- Now turn the knife over. Holding the ear upright, scrape the bare cob hard with the back of the blade from top to bottom, all the way around. Milky white starch and the pulp from the kernel bottoms will run down into the bowl. Scrape every cob. You should have 5 to 6 cups of kernels and milk together, and the milk is the recipe, so do not lose a drop of it.
- Melt the butter in a 10 or 12 inch cast iron skillet over medium heat until it foams.
- Add the corn and all of its milk, the water, the salt and the pepper, and stir well. Taste a spoonful of the raw corn first: if it is not sweet, add the sugar now.
- Turn the heat down to medium-low and cook, stirring every few minutes and scraping the bottom, for 20 to 25 minutes. For the first ten minutes the corn will look loose and soupy. Then the cob milk thickens, the liquid cooks down and the corn turns creamy and heavy on the spoon.
- In the last 5 to 10 minutes, leave it a little longer between stirs so the bottom catches. You want a thin golden brown layer on the skillet, scraped up and stirred back in each time. If it gets too dry before it is done, add a spoonful of water.
- It is ready when the corn is thick enough to hold a trail from the spoon, tender all the way through, with little browned bits stirred through it. Taste for salt and serve hot from the skillet.