In this article
There was a time when every kitchen kept a stack of brown paper grocery bags under the sink, and on Saturday one came out for the chicken. Flour, salt and a heavy hand of black pepper went into the bag. The chicken pieces, wet from a dish of milk with an egg beaten into it, went in two at a time. The top was rolled shut and the bag was shaken, hard, and every piece came out coated into every crevice, with no flour on the counter and none on the cook.
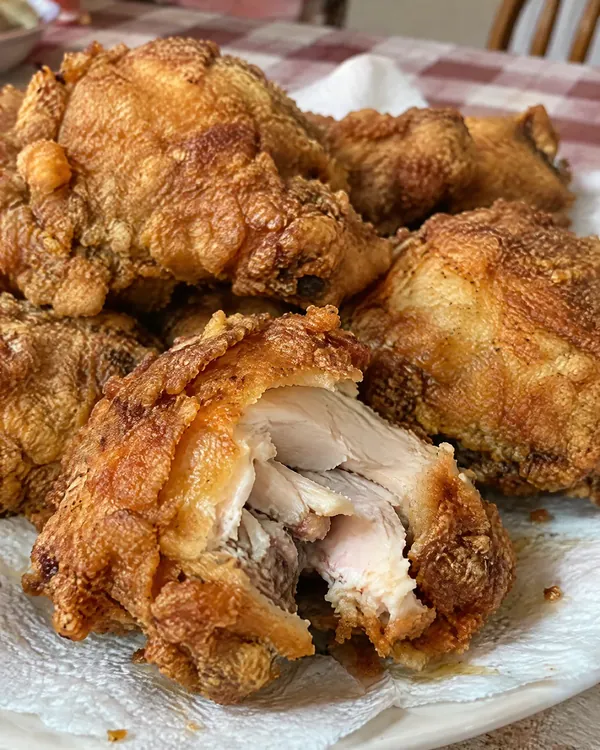
It makes better chicken than a plate of flour does. The dry flour tumbles over the wet chicken from all directions, so the coat is even and complete, and a rest on a plate lets it set, which is why this crust does not fall off in the skillet. Then comes the lid, and the argument. It goes on for the first side and comes off for the second. Covered, the skillet traps steam and cooks the meat through to the bone while the bottom fries; uncovered, the crust goes properly crisp. Backwards, you get a soggy crust or a pink bone.
Why this paper bag fried chicken works
- Milk beaten with an egg. The egg makes the dip cling, so the flour has something to grab and sets into a shell.
- The paper bag. Shaking coats every side and every crevice with a thin, even layer, with no lumps of wet flour.
- A rest before frying. Fifteen minutes on a plate lets the coating set, so the crust stays on the chicken instead of in the oil.
- Lid on, then lid off. Covered for the first side, the skillet steams the meat cooked to the bone. Uncovered for the second, the crust crisps and darkens.
Ingredients
One 3 1/2 to 4 pound chicken, cut into 8 pieces, serves 4. The measurements are in US cups with grams in brackets.
For the chicken
- 1 whole chicken (3 1/2 to 4 pounds, 1.6 to 1.8kg), cut into 8 pieces
- 1 cup whole milk (240ml)
- 1 large egg
- 2 cups all-purpose flour (250g)
- 2 teaspoons fine salt
- 1 1/2 teaspoons freshly ground black pepper
- 1 teaspoon paprika
- 1 clean brown paper grocery bag
For frying
- About 3 cups vegetable oil or vegetable shortening (700ml), enough for 1 inch in the skillet
- A brown paper sack, split open, for draining
Cut very large breasts in half crosswise so every piece cooks in the same time. A 12-inch cast iron skillet with a lid holds 8 pieces; a 10-inch needs two batches.
How to make paper bag fried chicken
Coating
- Pat the chicken pieces dry with paper towels. In a wide dish, beat the egg into the milk with a fork until no streaks of egg remain.
- Put the flour, salt, pepper and paprika in the paper bag and shake to mix.
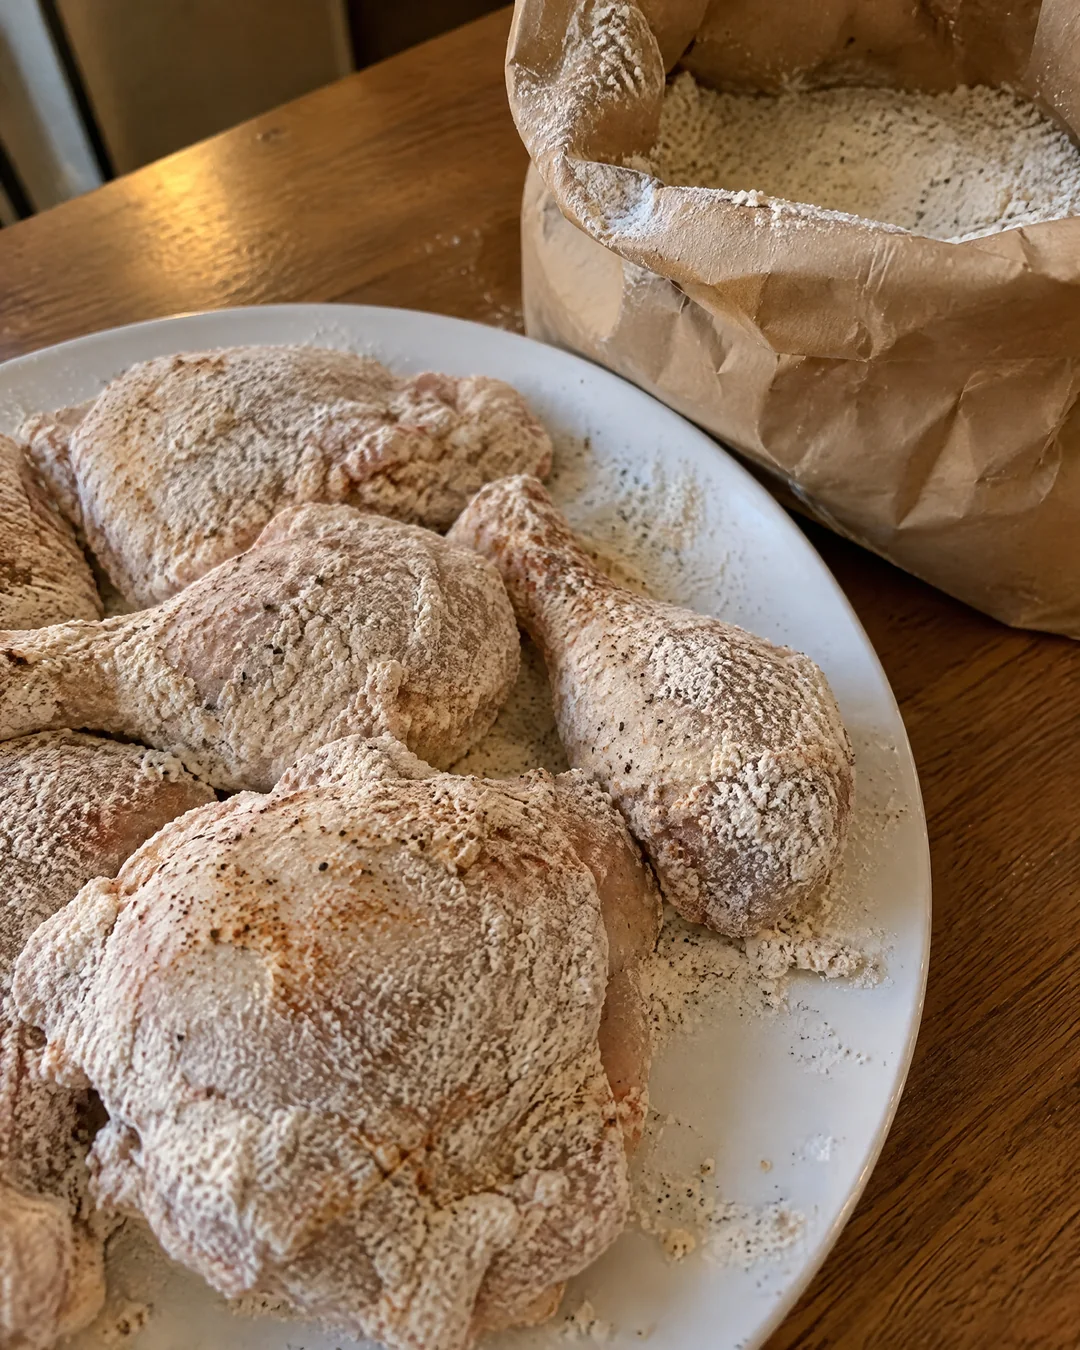
- Dip 2 pieces of chicken in the milk and egg, let the extra drip off and drop them into the bag. Roll the top shut in your fist and shake hard for 10 to 15 seconds, turning the bag over, so the flour tumbles over the chicken from every side.
- Lift the pieces out, shake off the loose flour and set them on a large plate. Repeat, 2 at a time, until all 8 are coated. Let the chicken rest for 15 minutes while the oil heats. The flour goes from dusty to slightly pasty; that is the coat setting.
Frying
- Pour the oil, or melt the shortening, into a 12-inch cast iron skillet to a depth of about 1 inch, enough to come halfway up a thigh. Heat it over medium-high to 350°F (175°C). Without a thermometer, a pinch of flour should sizzle at once without smoking.
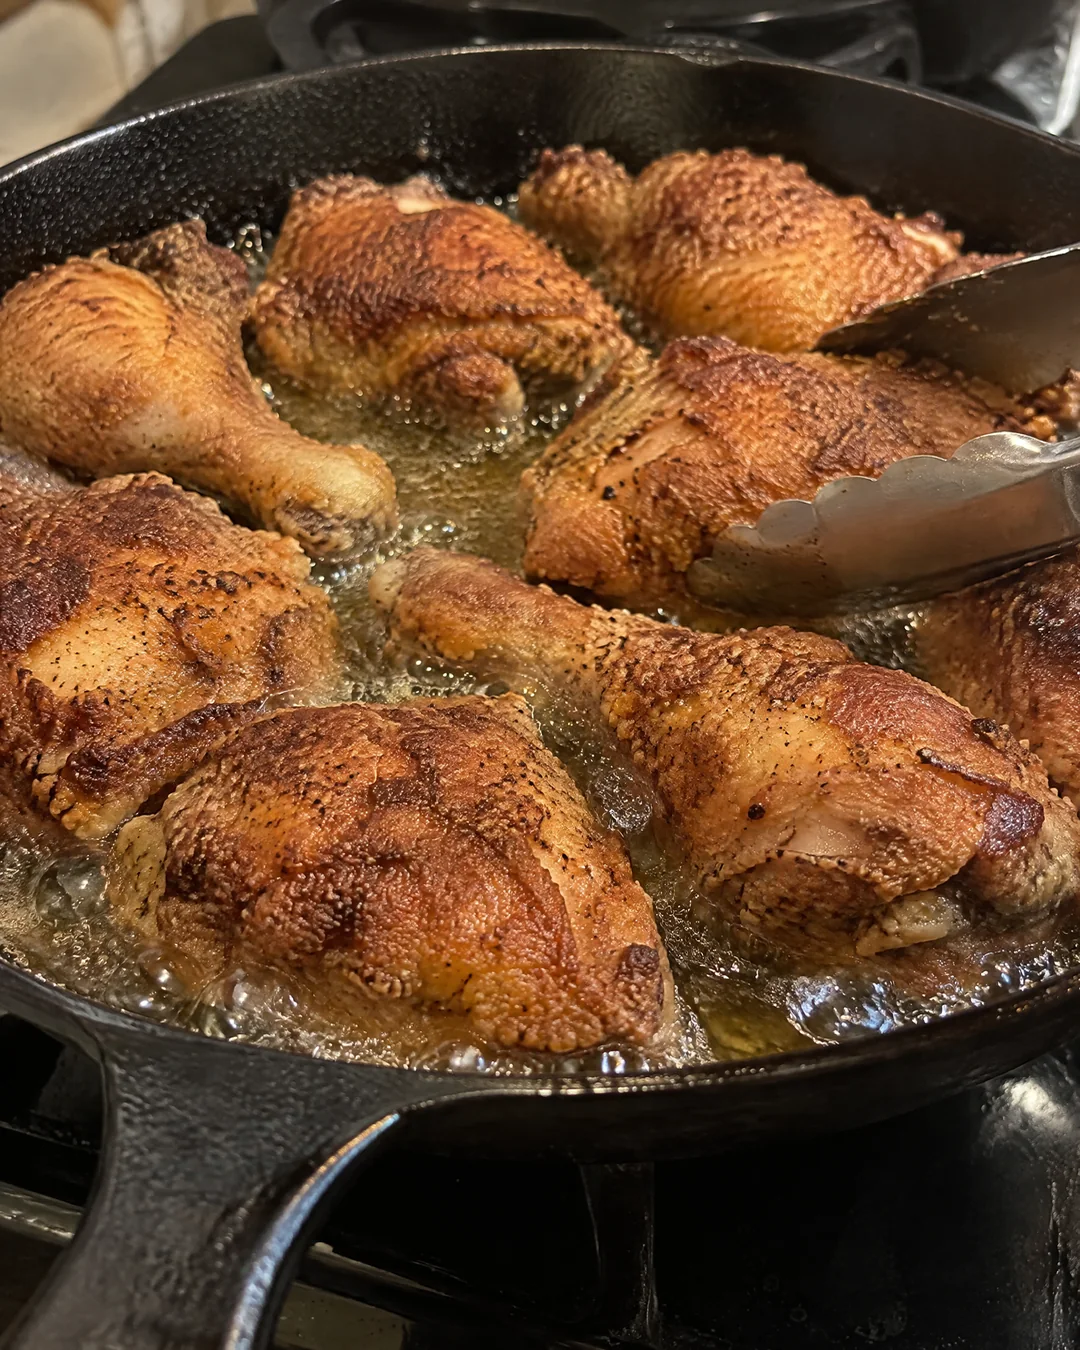
- Lay the chicken in skin side down, thighs and drumsticks first, breasts and wings last, without crowding. The oil will drop in temperature; adjust the burner so it sits between 325 and 350°F (160 to 175°C). Put the lid on and fry, covered, for about 12 minutes, until the underside is deep golden brown.
- Take the lid off and leave it off. Turn each piece with tongs and fry the second side, uncovered, for 10 to 12 minutes more, until the crust is deep brown and crisp all over and a thermometer in the thickest part, away from the bone, reads 165°F (74°C). Wings finish a few minutes early.
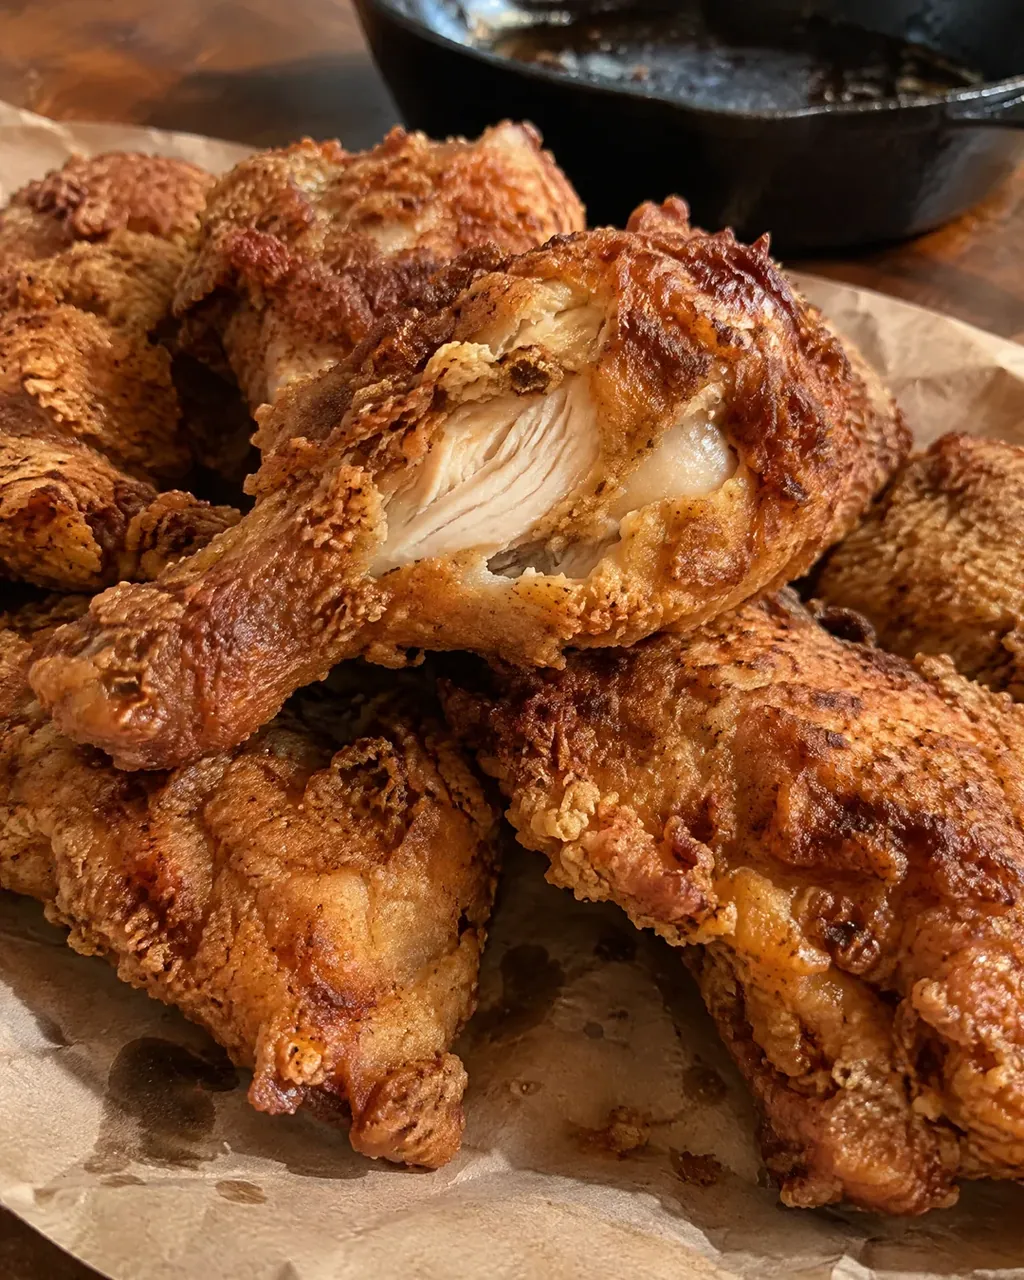
- Lift the chicken onto the split paper sack and let it rest 10 minutes before anyone touches it. The crust crisps as it stands, and the paper takes the grease without steaming the bottom soft.
Tips that make the difference
- Do not rush the oil. Under 325°F the chicken drinks up grease and the crust turns heavy; over 350°F the crust browns before the inside is cooked.
- Shake the bag with the top rolled tight in your fist. A loose top puts flour on the ceiling.
- Leave the lid alone once it is on. Every peek lets the steam out and the first side loses time.
- Dark meat takes longer than white, so the thighs and drumsticks go in first.
Variations
- More pepper. Many old cooks used a full tablespoon of black pepper in the bag. It is the seasoning this chicken is known for.
- A little heat. Add 1/2 teaspoon cayenne to the bag with the paprika.
- Garlic and onion. Add 1 teaspoon each of garlic powder and onion powder to the flour.
- Oven-finished. For a crowd, fry as written but only 5 minutes on the second side, then finish on a rack in a 350°F oven for 15 to 20 minutes.
Storage and make-ahead
Fried chicken keeps 3 days in the refrigerator, loosely covered so the crust does not sweat. Cold, the next day, it is a meal of its own.
To reheat with the crust intact, set the pieces on a rack over a baking sheet in a 375°F oven for 15 to 20 minutes. The microwave makes it soft.
It freezes for 2 months. Thaw in the refrigerator and reheat in the oven as above.
Frequently asked questions
Why a paper bag instead of a bowl or a plate?
Because shaking coats the chicken from every direction at once, into every fold, evenly and thinly, and the kitchen stays clean. The bag is then thrown away.
Why does the lid go on for the first side and come off for the second?
The lid traps steam, so the meat cooks through to the bone while the first side browns. That steam would soften the crust if it stayed, so the lid comes off and the dry heat crisps the second side. Lid on both sides gives soggy chicken; lid off both sides, a pink bone.
What oil temperature is right?
Start at 350°F and keep it between 325 and 350°F once the chicken is in. The temperature drops when the cold chicken lands, so adjust the burner as you go; a thermometer clipped to the skillet takes the guessing out.
Can I fry it in two batches?
Yes. Fry the dark meat first, as written, and keep it on the paper sack in a 200°F oven while the breasts and wings fry. Let the oil come back to 350°F between batches.
Milk and egg, the bag, the rest, an inch of hot oil, lid on for the first side and off for the second. Let it rest on the paper sack, and stand between the platter and the family until the last piece is out.
Paper Bag Fried Chicken (Lid On, Then Lid Off)
Skillet fried chicken the paper bag way: pieces dipped in milk beaten with an egg, shaken in a brown paper grocery bag with seasoned flour, and fried in cast iron with the lid on for the first side and off for the second.
Ingredients
- 1 whole chicken (3 1/2 to 4 pounds, 1.6 to 1.8kg), cut into 8 pieces
- 1 cup whole milk
- 1 large egg
- 2 cups all-purpose flour
- 2 teaspoons fine salt
- 1 1/2 teaspoons freshly ground black pepper
- 1 teaspoon paprika
- 1 clean brown paper grocery bag
- About 3 cups vegetable oil or vegetable shortening (700ml), enough for 1 inch in the skillet
- A brown paper sack, split open, for draining
Instructions
- Pat the chicken pieces dry with paper towels. In a wide dish, beat the egg into the milk with a fork until no streaks of egg remain.
- Put the flour, salt, pepper and paprika in the paper bag and shake to mix.
- Dip 2 pieces of chicken in the milk and egg, let the extra drip off and drop them into the bag. Roll the top shut in your fist and shake hard for 10 to 15 seconds, turning the bag over, so the flour tumbles over the chicken from every side.
- Lift the pieces out, shake off the loose flour and set them on a large plate. Repeat, 2 at a time, until all 8 are coated. Let the chicken rest for 15 minutes while the oil heats. The flour goes from dusty to slightly pasty; that is the coat setting.
- Pour the oil, or melt the shortening, into a 12-inch cast iron skillet to a depth of about 1 inch, enough to come halfway up a thigh. Heat it over medium-high to 350°F (175°C). Without a thermometer, a pinch of flour should sizzle at once without smoking.
- Lay the chicken in skin side down, thighs and drumsticks first, breasts and wings last, without crowding. The oil will drop in temperature; adjust the burner so it sits between 325 and 350°F (160 to 175°C). Put the lid on and fry, covered, for about 12 minutes, until the underside is deep golden brown.
- Take the lid off and leave it off. Turn each piece with tongs and fry the second side, uncovered, for 10 to 12 minutes more, until the crust is deep brown and crisp all over and a thermometer in the thickest part, away from the bone, reads 165°F (74°C). Wings finish a few minutes early.
- Lift the chicken onto the split paper sack and let it rest 10 minutes before anyone touches it. The crust crisps as it stands, and the paper takes the grease without steaming the bottom soft.