

Introduction and Getting Started
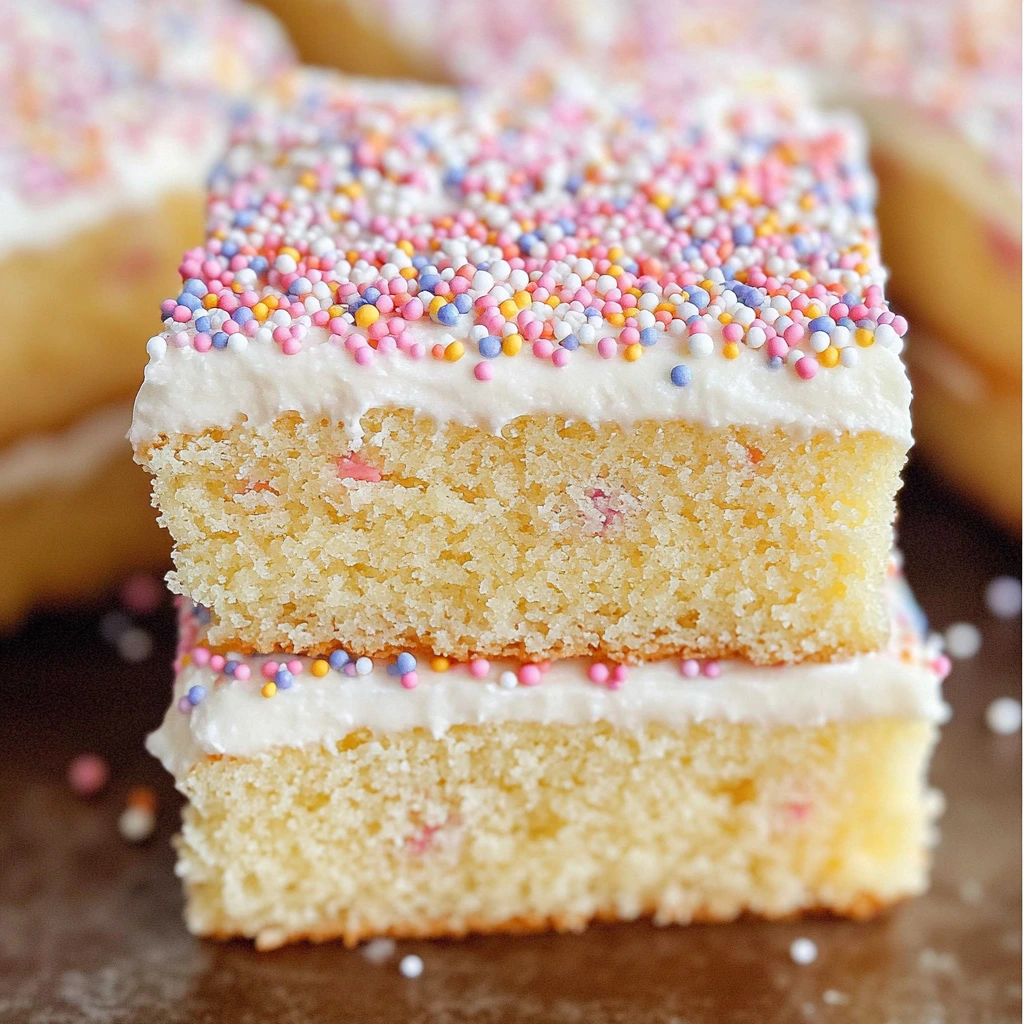
There are some desserts that just hit you right in the heart with memories—and Classic School Cake is one of them! 🍰🌈 Just the thought of that soft sponge, sweet glaze, and cheerful sprinkles takes me straight back to school lunchrooms, where dessert was the highlight of the day. If you grew up in the UK, you know exactly what I’m talking about!
I recently made this for my family, and seeing their faces light up after one bite… well, let’s just say it reminded me why some recipes are timeless. It’s incredibly simple, doesn’t require fancy ingredients, and it’s a perfect bake for teatime, birthdays, or any day you just want to treat yourself to a little nostalgia.
Ready to bake some happiness? Let’s dive in!
Ingredients
For the Sponge:
-
200g unsalted butter, softened
-
200g caster sugar
-
4 large eggs
-
200g self-raising flour
-
1 teaspoon vanilla extract
-
2 tablespoons milk
For the Icing:
-
250g icing sugar
-
3–4 tablespoons water
-
Sprinkles, as much as you like
Step-by-Step Instructions
Step 1: Preheat and Prepare
Preheat your oven to 180°C (160°C fan). Grease and line a 23x30cm rectangular baking tin with parchment paper. I always leave some parchment hanging over the sides—it makes lifting the cake out a breeze later!
Step 2: Cream the Butter and Sugar
In a large mixing bowl, beat the butter and caster sugar together until light, fluffy, and almost mousse-like. This step is key to a soft, airy sponge!
Step 3: Add the Eggs
Add the eggs one at a time, beating well after each addition. Don’t worry if the mixture looks a little split—it’ll come together once the flour is added.
Step 4: Fold in the Flour
Sift in the self-raising flour and gently fold it into the mixture with a spatula or large spoon. Stir in the vanilla extract and milk until you get a smooth, creamy batter.
Step 5: Bake the Sponge
Pour the batter into your prepared tin, smoothing it out so it’s nice and even. Bake for 25–30 minutes, or until a skewer inserted into the center comes out clean. Let the cake cool completely in the tin before icing.

Icing and Decorating the Cake
Now comes the fun part: icing and decorating!
Step 6: Make the Icing
In a mixing bowl, gradually add water to the icing sugar, stirring as you go, until you get a thick but spreadable glaze. Go slow—you can always add more water, but you can’t take it out!
Step 7: Decorate
Spread the icing all over the cooled sponge, using the back of a spoon or an offset spatula to get an even layer.
Step 8: Sprinkle Time!
Before the icing sets, scatter a generous handful of sprinkles all over the top. Don’t be shy—this cake is all about fun!
Step 9: Slice and Serve
Allow the icing to set for about 30 minutes, then slice into neat squares or rectangles. Serve with a cuppa for the full old-school experience!
Pro Tips for the Perfect School Cake
-
Let the cake cool completely before icing to avoid a melted mess.
-
Don’t overmix the batter after adding flour; gentle folding keeps the sponge light and fluffy.
-
Customize your sprinkles! You can go traditional rainbow, pastel, or even themed colors for special occasions.
-
Make ahead: The sponge stays fresh for up to 3 days if stored in an airtight container.
-
Serving tip: Slightly warm slices are dreamy with a scoop of vanilla ice cream!
FAQs and Conclusion
Frequently Asked Questions
Q1: Can I freeze School Cake?
Yes! Freeze slices individually wrapped in plastic wrap and thaw at room temperature when needed.
Q2: What if I don’t have self-raising flour?
You can make your own: just add 2 teaspoons of baking powder to 200g of plain flour.
Q3: Can I use different types of sprinkles?
Of course! Feel free to use whatever sprinkles you love—metallic, themed, pastel, anything goes.
Q4: How do I know if my sponge is cooked through?
Insert a skewer into the center; if it comes out clean, your sponge is ready!
Q5: Can I flavour the icing?
Definitely! A few drops of vanilla or even a splash of lemon juice can add a fun twist.
Q6: How long does the cake last?
Stored properly, your School Cake will stay fresh and moist for up to 3 days.
Q7: Can I make this into cupcakes?
Yes! Simply divide the batter into cupcake cases and bake for about 15–18 minutes.
Conclusion
There you have it—your guide to baking the perfect Classic School Cake! 🍰✨ It’s sweet, it’s simple, and it’s packed with that nostalgic charm that never goes out of style. Whether you’re making it for a party, a bake sale, or just because, this cake is guaranteed to bring smiles all around.
If you try this recipe, I’d love to hear how it turned out! Did you stick with the classic rainbow sprinkles, or did you put your own twist on it? Drop a comment and let’s swap baking stories!
Happy baking, friends! 🎉
Print
Classic School Cake Recipe: A Sweet Trip Down Memory Lane
- Total Time: 50 minutes
Description
Bring back childhood memories with this Classic School Cake Recipe! Featuring a light, fluffy sponge topped with a thick, sweet glaze and rainbow sprinkles, this nostalgic treat is perfect for parties, teatime, or just because. Easy to make and guaranteed to make everyone smile!
Ingredients
For the Sponge:
-
200g unsalted butter, softened
-
200g caster sugar
-
4 large eggs
-
200g self-raising flour
-
1 teaspoon vanilla extract
-
2 tablespoons milk
For the Icing:
-
250g icing sugar
-
3–4 tablespoons water
-
Sprinkles, to decorate
Instructions
-
Preheat the oven to 180°C (160°C fan). Grease and line a 23x30cm rectangular tin.
-
Cream butter and sugar until light and fluffy.
-
Beat in eggs one at a time, then fold in flour.
-
Stir in vanilla extract and milk.
-
Pour into the tin and bake for 25–30 minutes.
-
Cool completely before icing.
-
Mix icing sugar with water to form a thick glaze.
-
Spread glaze over the sponge and add sprinkles.
-
Allow to set for 30 minutes before slicing and serving.
Notes
-
Let the cake cool fully before icing.
-
Customize with different sprinkle colors for themed occasions.
-
Store in an airtight container for up to 3 days.
-
Freeze individual slices for up to 2 months.
-
Try adding vanilla or lemon to the icing for extra flavor.
- Prep Time: 20 minutes
- Cook Time: 30 minutes


")