

Zesty Lemon Blueberry Cake: A Sweet-Tart Masterpiece
There’s something undeniably joyful about the combination of tangy lemon and sweet blueberries. This Lemon Blueberry Cake isn’t just dessert—it’s a celebration of bright, zesty flavors and juicy bursts of berry goodness. Whether you’re planning a party, brunch, or just indulging in a little baking therapy, this recipe is your ticket to cake nirvana.
Let me set the stage for you. The first time I baked this cake, I was knee-deep in citrus peels and sticky fingers, but oh, the aroma! That mix of lemony brightness and the sweet promise of blueberries wafting through the kitchen—pure bliss. And when I sliced into the final creation, it was as if sunshine had been captured in each layer.
But here’s the thing: this recipe is not only bursting with flavor, it’s also beginner-friendly. No complicated steps, just a simple process that delivers a stunning result. Ready to dive in? Let’s start by setting up for success.
Preparing to Bake
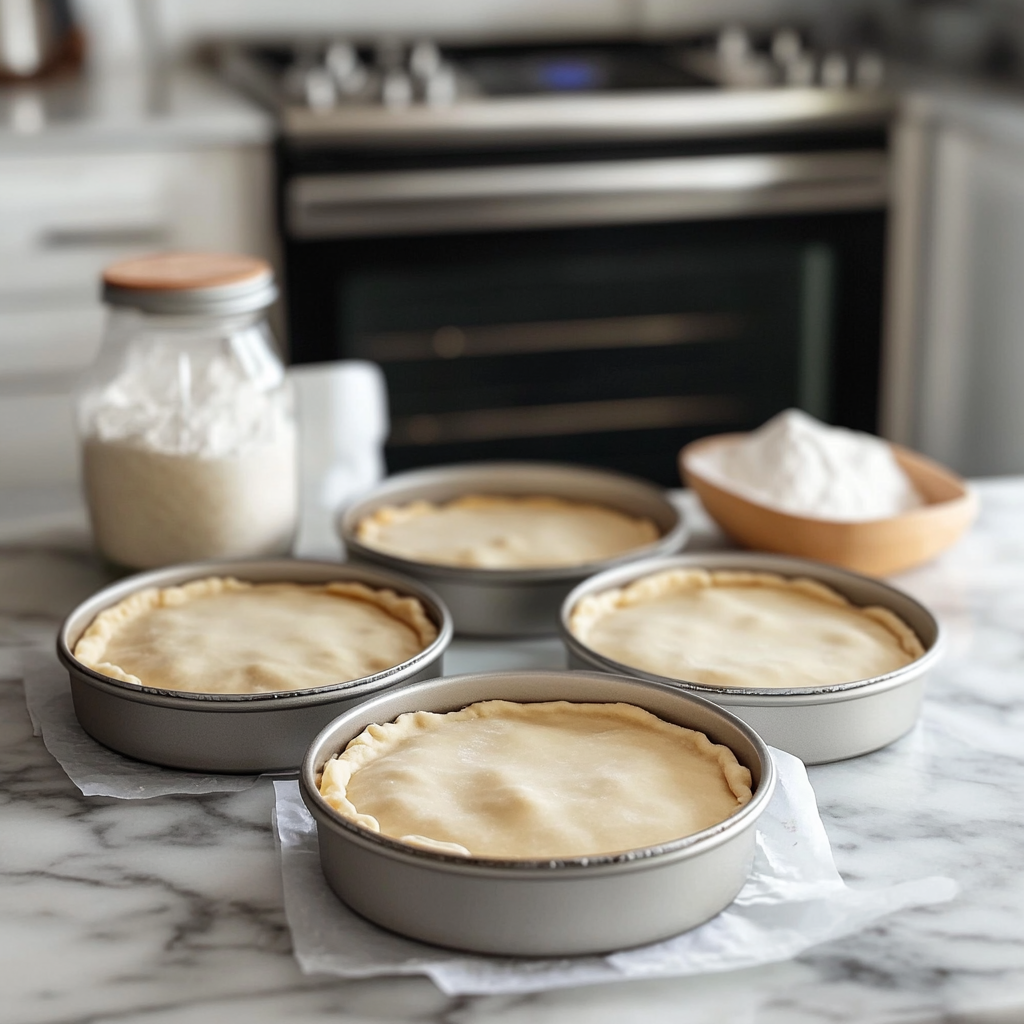
First things first: preheat your oven to 350°F (175°C). You’ll need three 8-inch round cake pans. Grease them generously and dust with flour to prevent sticking. To make things even easier, line the bottoms with parchment paper. Trust me, this small step can make a world of difference when it’s time to remove the cakes from their pans.
With your cake pans ready and the oven heating, let’s gather the ingredients and tackle the dry mix.
Step 1: Combine the Dry Ingredients
In a large mixing bowl, whisk together:
- 3 cups (375 g) all-purpose flour
- 1 ½ cups (300 g) granulated sugar
- 1 Tablespoon cornstarch
- 2 teaspoons baking powder
- ½ teaspoon baking soda
- ½ teaspoon table salt
This combination forms the backbone of your cake. The cornstarch helps create a tender crumb, while the leavening agents (baking powder and soda) ensure a light, fluffy texture. Don’t skip the salt—it subtly enhances the flavor, making the lemon and blueberries shine.
Step 2: Incorporate the Butter

Now for the magic touch: butter. You’ll need ½ cup (113 g) unsalted butter, softened and cut into 8 pieces. Using an electric mixer on low speed, add the butter to the dry ingredients one piece at a time. Let each piece incorporate fully before adding the next.
The result? A sandy mixture that’s evenly coated with fat. This step is crucial for a tender cake, so take your time. If you’re not sure you’ve reached the right texture, it should look like slightly damp sand.
Step 3: Add the Oil
Next, it’s time to boost the cake’s moisture. Slowly drizzle in ½ cup (120 ml) of oil while the mixer is still on low. Any neutral oil—canola, vegetable, or avocado—will work beautifully here. The oil ensures a soft, moist crumb without making the cake greasy.
Step 4: Mix the Wet Ingredients

In a separate bowl, whisk together the following:
- ¾ cup (180 ml) buttermilk
- 2 Tablespoons lemon zest
- ¼ cup (60 ml) fresh-squeezed lemon juice
- 4 large eggs
- ½ teaspoon vanilla extract
This is where the cake gets its vibrant flavor. The buttermilk adds tang and tenderness, while the lemon zest and juice pack a citrusy punch. If you’re zesting lemons, do it before juicing for maximum efficiency. Fresh ingredients make all the difference, so whenever possible, skip the bottled juice and go for the real deal.
Step 5: Combine the Wet and Dry Mixtures
With your mixer on low, gradually pour the buttermilk mixture into the bowl of dry ingredients. Blend until everything is just combined, then increase the speed to medium and mix until the batter is smooth.
Step 6: Fold in the Blueberries
Here comes the best part: the blueberries! You’ll need 2 ½ cups (340 g) of fresh or frozen blueberries. If you’re using frozen, don’t thaw them—they’ll hold their shape better in the batter.
Before folding the berries in, toss them with a tablespoon of flour to help prevent sinking during baking. Using a spatula, gently fold them into the batter. Take care not to crush the berries—you want them to stay whole for those delightful bursts of fruit in every bite.
Step 7: Divide and Bake
Evenly divide the batter among your prepared cake pans. Smooth the tops with a spatula and place the pans in the preheated oven. Bake for about 30 minutes, or until the tops spring back when lightly pressed and a toothpick inserted in the center comes out with a few moist crumbs.
As the cakes bake, your kitchen will fill with the tantalizing scent of lemon and blueberries. It’s the kind of aroma that has everyone asking, “What are you making?”
Assembling and Frosting Your Lemon Blueberry Cake
Congratulations, you’re halfway to creating a Lemon Blueberry Cake masterpiece! With the heavenly aroma of freshly baked cake filling your kitchen, it’s time to focus on cooling, frosting, and assembling your layers into a show-stopping dessert. But don’t worry—this part is just as simple as the baking process. Let’s dive in!
Step 8: Cool the Cakes
Once your cakes are done baking, remove them from the oven and let them cool in their pans for 10-15 minutes. This cooling period allows the cakes to firm up slightly, making it easier to release them from the pans.
Next, run a knife around the edges of each pan to loosen the cakes. Carefully invert them onto a wire rack and peel off the parchment paper from the bottom. Now, let them cool completely. This step is crucial—frosting a warm cake is a surefire way to end up with a melty, sliding mess.
Pro Tip: If you’re short on time, pop the cake layers into the fridge for about 20 minutes to speed up the cooling process. Just make sure they’re on a flat surface to prevent any warping.
Step 9: Prepare Your Frosting
Now for the fun part: the frosting! While the recipe suggests lemon frosting, you can use cream cheese frosting or any other type you love. A lemon cream cheese frosting is my personal favorite—it’s tangy, creamy, and pairs beautifully with the citrusy cake.
Here’s a quick recipe for lemon cream cheese frosting:
- 8 oz cream cheese, softened
- ½ cup unsalted butter, softened
- 3 ½ cups powdered sugar
- 2 tablespoons lemon juice
- 1 teaspoon lemon zest
- 1 teaspoon vanilla extract
Using an electric mixer, beat the cream cheese and butter together until smooth. Gradually add powdered sugar, 1 cup at a time, until the frosting is creamy and spreadable. Finally, mix in the lemon juice, zest, and vanilla for that extra zing.
Pro Tip: If your frosting is too thick, add a splash of milk or heavy cream. If it’s too thin, add a bit more powdered sugar until you reach the desired consistency.
Step 10: Assemble the Cake
With your frosting ready and cake layers completely cool, it’s time to stack and assemble. Here’s how:
- Start with the Base Layer: Place one cake layer on a serving plate or cake stand. Use a dollop of frosting underneath to keep it in place. Spread an even layer of frosting on top using an offset spatula.
- Add the Second Layer: Gently place the second cake layer on top of the frosted base. Repeat the process, spreading frosting evenly across the surface.
- Finish with the Top Layer: Add the final cake layer, bottom side up (for a flat surface). Apply a thin crumb coat of frosting to seal in any loose crumbs, then refrigerate the cake for about 15 minutes.
- Frost the Entire Cake: Once the crumb coat is set, spread a thicker layer of frosting over the top and sides of the cake. Smooth it out with a spatula or create swirls for a rustic look—it’s your cake, so make it your own!
Step 11: Add the Final Touches
Now that your cake is frosted, it’s time to make it picture-perfect. Here are a few ideas for decorating:
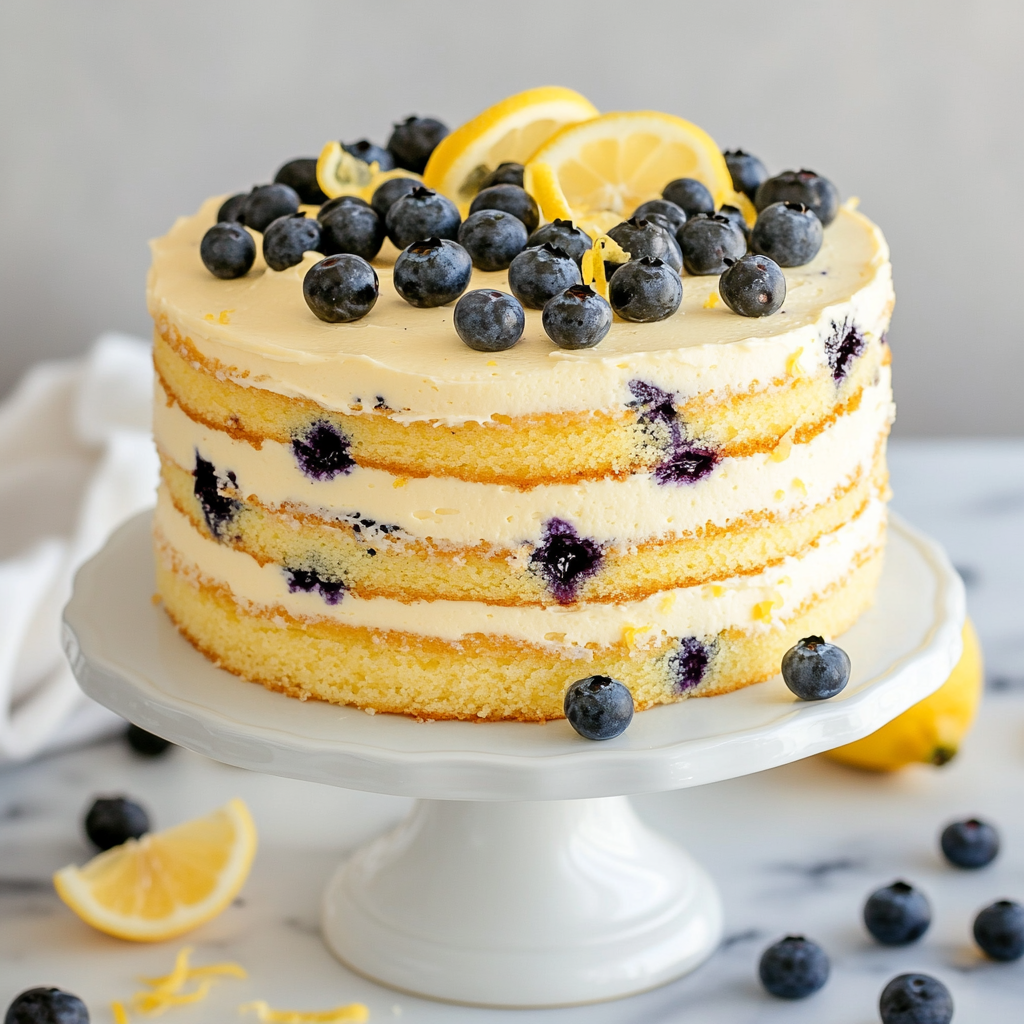
- Fresh Blueberries: Arrange them on top of the cake or around the base for a natural and vibrant touch.
- Lemon Slices or Twists: Thinly slice a lemon and use the pieces as a garnish to highlight the citrus theme.
- Edible Flowers: If you want to go all out, edible flowers like pansies or violets add a beautiful pop of color.
- Powdered Sugar Dusting: For a simple, elegant finish, lightly dust the cake with powdered sugar.
Step 12: Serve and Enjoy
Your Lemon Blueberry Cake is now ready to shine! Slice it up and serve immediately, or store it in an airtight container until you’re ready to dig in. This cake is best enjoyed within two to three days, though I doubt it’ll last that long once everyone gets a taste.
Pro Tip: For clean slices, use a sharp knife dipped in warm water, wiping it clean between cuts.
Tips and Variations
To make this cake your own, try some of these fun variations:
- Make it a Bundt Cake: If you prefer a single-layer presentation, pour the batter into a greased bundt pan and adjust the baking time to about 50-60 minutes.
- Add a Drizzle: For an extra lemony kick, mix powdered sugar and lemon juice into a glaze and drizzle it over the frosted cake.
- Swap the Blueberries: Substitute raspberries, blackberries, or a mix of berries for a unique twist.
FAQs and Final Thoughts
Your Lemon Blueberry Cake is frosted, garnished, and ready to impress. But before you serve it (and likely start fielding requests for the recipe), let’s address a few common questions about this delightful dessert.
FAQs About Lemon Blueberry Cake
1. Can I use frozen blueberries instead of fresh?
Absolutely! Frozen blueberries work just as well. To prevent them from bleeding into the batter, toss them in a tablespoon of flour before folding them in. Avoid thawing them before use to maintain their structure during baking.
2. What’s the best way to zest lemons?
A microplane is your best tool for zesting lemons. Make sure to only grate the yellow outer layer of the skin—avoiding the bitter white pith underneath. If you don’t have a microplane, the fine side of a box grater will also work.
3. Can I make this cake in advance?
Yes! You can bake the cake layers a day or two ahead of time. Wrap them tightly in plastic wrap and store at room temperature or in the fridge. Frost the cake on the day you plan to serve it for the freshest presentation.
4. How do I prevent my blueberries from sinking?
Tossing blueberries in a bit of flour before adding them to the batter helps distribute them evenly throughout the cake. This trick creates a light coating that suspends the berries during baking.
5. What can I use as a substitute for buttermilk?
If you don’t have buttermilk on hand, make your own by combining ¾ cup of milk with 1 tablespoon of lemon juice or white vinegar. Let it sit for 5 minutes, and it’s ready to use!
6. How should I store leftovers?
Store leftover cake in an airtight container. It will keep for up to 2 days at room temperature or up to a week in the refrigerator. For longer storage, you can freeze the frosted cake (or individual slices) for up to 3 months.
7. Can I make this cake gluten-free?
Yes, simply replace the all-purpose flour with a gluten-free baking flour blend that’s labeled as a 1:1 substitute. Be sure to check the other ingredients to ensure they’re gluten-free as well.
Conclusion
You’ve done it—crafted a Lemon Blueberry Cake that’s bursting with flavor, texture, and visual appeal. This cake isn’t just a dessert; it’s a statement piece, one that’s guaranteed to brighten any table and delight anyone lucky enough to snag a slice.
Whether you followed the recipe exactly or put your own spin on it, I hope you had fun creating this sweet treat. Baking isn’t just about the end result; it’s about the joy of the process—the whisking, folding, frosting, and even the little messes along the way.
If you tried this recipe, I’d love to hear how it turned out! Share your thoughts, tips, and variations in the comments below. Better yet, snap a photo of your masterpiece and tag it online. Seeing your creations is the best part of sharing recipes like this one.
So, what are you waiting for? Slice into that cake, savor the burst of lemon and blueberry goodness, and enjoy every bite. And remember, there’s no wrong occasion for a slice of something sweet. Happy baking! 🍋🫐
Print
Zesty Lemon Blueberry Cake Recipe: A Sweet-Tart Delight with Creamy Frosting
Description
This Lemon Blueberry Cake combines tangy lemon zest and juice with juicy blueberries for a delightful dessert that’s as beautiful as it is delicious. Moist and fluffy layers pair perfectly with a creamy lemon frosting, creating a cake that’s perfect for birthdays, brunches, or any time you want a show-stopping treat. Follow the simple steps and tips for a foolproof, flavorful bake every time!
Ingredients
Dry Ingredients:
- 3 cups (375 g) all-purpose flour
- 1 ½ cups (300 g) granulated sugar
- 1 tablespoon cornstarch
- 2 teaspoons baking powder
- ½ teaspoon baking soda
- ½ teaspoon table salt
Wet Ingredients:
- ½ cup (113 g) unsalted butter, softened and cut into 8 pieces
- ½ cup (120 ml) canola, vegetable, or avocado oil
- ¾ cup (180 ml) buttermilk
- 2 tablespoons lemon zest (zest lemons before squeezing)
- ¼ cup (60 ml) lemon juice (fresh-squeezed preferred)
- 4 large eggs (room temperature preferred)
- ½ teaspoon vanilla extract
Blueberries:
- 2 ½ cups (340 g) blueberries (fresh or frozen, about 12 oz)
For Frosting:
- 1 batch of lemon frosting (or lemon cream cheese frosting, as provided above)
Instructions
1️⃣ Prepare Cake Pans and Preheat Oven:
Preheat the oven to 350°F (175°C). Grease and flour three 8-inch round cake pans, and line the bottoms with parchment paper.
2️⃣ Combine Dry Ingredients:
In a large bowl, whisk together the flour, sugar, cornstarch, baking powder, baking soda, and salt.
3️⃣ Add Butter:
Using an electric mixer on low speed, add the softened butter one piece at a time, allowing each piece to fully incorporate. The mixture should resemble a sandy texture.
4️⃣ Add Oil:
With the mixer on low, slowly drizzle in the oil until just combined.
5️⃣ Mix Wet Ingredients Separately:
In a separate bowl, whisk together the buttermilk, lemon zest, lemon juice, eggs, and vanilla extract until smooth.
6️⃣ Combine Wet and Dry Mixtures:
Gradually add the wet mixture to the dry ingredients with the mixer on low. Mix until smooth and fully combined.
7️⃣ Fold in Blueberries:
Toss the blueberries in a tablespoon of flour to prevent sinking, then gently fold them into the batter with a spatula.
8️⃣ Divide and Bake:
Evenly divide the batter among the prepared pans. Bake for about 30 minutes, or until the tops spring back when touched and a toothpick comes out with a few moist crumbs.
9️⃣ Cool the Cakes:
Let the cakes cool in their pans for 10-15 minutes. Run a knife around the edges, invert onto a wire rack, and let cool completely.
🔟 Frost and Assemble:
Stack and frost the layers with your lemon frosting or cream cheese frosting. Decorate with blueberries, lemon slices, or powdered sugar if desired.
Notes
- Storage: Store the cake in an airtight container at room temperature for 2 days, or refrigerate for up to a week.
- Substitutions: Use raspberries or blackberries in place of blueberries for a twist. For a dairy-free version, substitute buttermilk with almond or oat milk soured with lemon juice.
- Make-Ahead: Bake the cake layers a day ahead, wrap them tightly in plastic, and frost on the day of serving.
- Gluten-Free Option: Substitute a 1:1 gluten-free flour blend for the all-purpose flour.


