

A Classic Cake with a Traybake Twist
If there’s one dessert that never fails to charm a crowd, it’s the good old-fashioned Victoria sponge. But let’s be honest – slicing, stacking, and perfectly aligning two cake rounds can feel like a bit of a balancing act. That’s why I’m totally in love with this Victoria Sandwich Traybake Cake. It’s everything you love about the classic – soft sponge, sweet jam, and a dreamy layer of whipped cream – only baked in one tray and sliced into easy-to-serve squares. Yes, please!
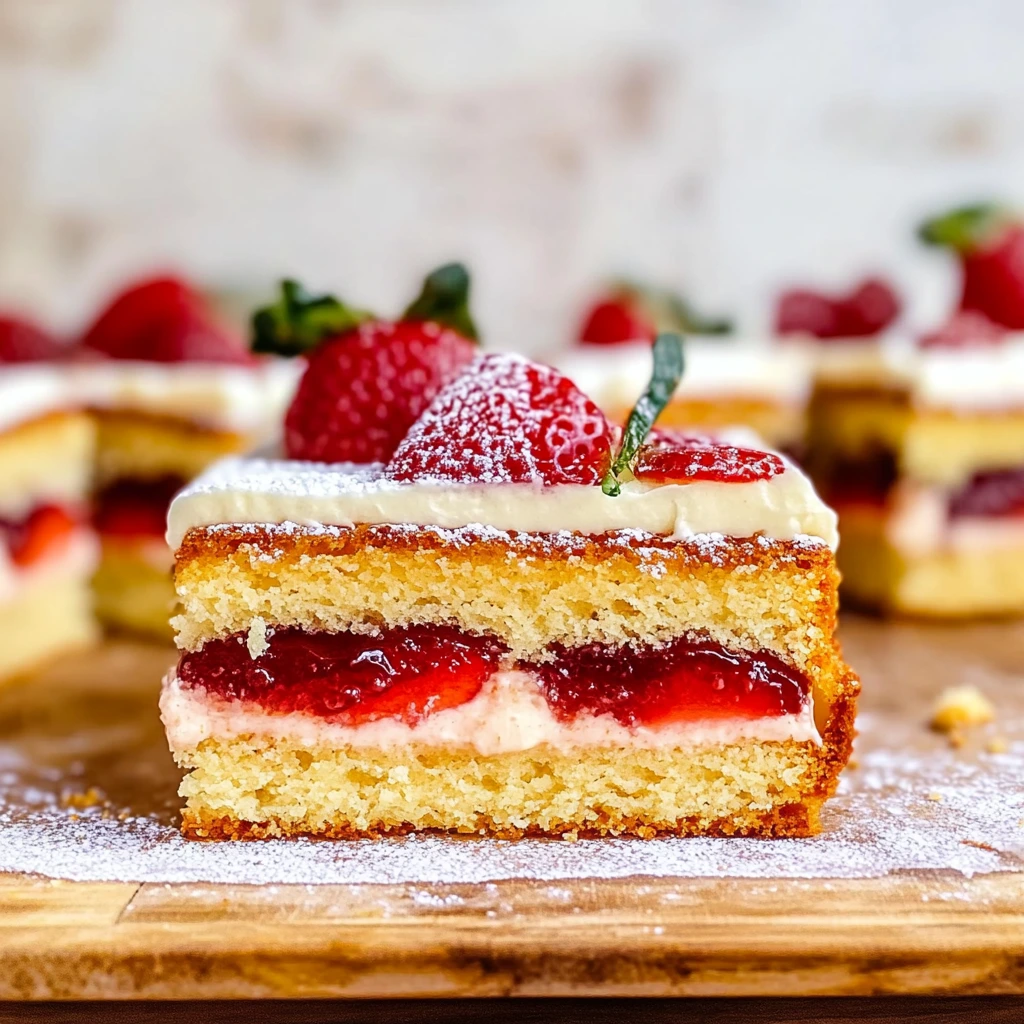
I made this last weekend for an afternoon tea with some friends, and let’s just say there were zero leftovers. Not only is it incredibly simple to whip up, but the presentation is just so cute with those little strawberry halves on top. It’s the kind of bake that looks like you put in way more effort than you actually did (and I’m always here for that kind of magic).
So, whether you’re baking for a summer picnic, a school fête, or just treating yourself to a slice with a cup of tea (highly recommended!), this traybake has you covered.
Let’s jump into how to make it!
Ingredients You’ll Need
Here’s everything you need to bring this traybake to life. Most of it you’ll probably already have on hand!
-
Unsalted butter: 250g, softened
-
Caster sugar: 250g
-
Eggs: 4 large
-
Self-raising flour: 250g
-
Whole milk: 2 tbsp
-
Strawberry jam: 150g
-
Double cream: 200ml, whipped
-
Fresh strawberries: A few, halved, for decoration
-
Icing sugar: For dusting
Step 1: Prep That Tin and Preheat Your Oven
First things first – get your oven heating to 180°C (or 160°C if you’re using a fan oven). Then, grease and line a rectangular traybake tin. You’re aiming for one around 30x20cm. This shape gives you those perfect square slices later on. I like to use parchment paper that overhangs slightly – it makes lifting the cake out super easy once it’s cool.
Step 2: Cream the Butter and Sugar
In a large bowl, cream together the softened butter and caster sugar until the mixture is pale and fluffy. This step is key – it’s what gives the cake that lovely light texture. Don’t rush it! I usually let my stand mixer do the heavy lifting for about 4-5 minutes here.
Step 3: Add the Eggs
Next, add in the eggs, one at a time, beating well after each addition. If the mixture looks like it’s starting to curdle – don’t panic! Just add a tablespoon of your flour to help bring it back together.
Step 4: Fold in the Flour and Milk
Sift in the self-raising flour and gently fold it in using a spatula or wooden spoon. Try not to overmix – just enough to combine everything. Then stir in the milk to loosen the batter a little.
Step 5: Bake the Sponge
Spoon the batter into your prepared traybake tin and smooth the top. Pop it into your preheated oven and bake for about 25 to 30 minutes, or until golden and springy to the touch. A skewer inserted into the center should come out clean. Let the cake cool completely in the tin before you even think about cutting it – patience is a virtue here!
Coming up in Part 2, we’ll be slicing, layering, and decorating this beauty. Plus, I’ll share a few of my favorite traybake tips to help yours come out picture-perfect every time.

Building the Perfect Victoria Traybake Cake – Layers, Tips & Little Extras
So now that your beautiful golden sponge has cooled completely (and hopefully, your kitchen smells amazing), it’s time for the fun part – slicing, layering, and making this cake really look the part. Honestly, this is where that simple sponge transforms into something truly special.
Step 6: Slice the Cake in Half
This part can feel a little scary at first, but I promise it’s easier than it looks. Using a long serrated knife, carefully slice the sponge horizontally through the middle. Go slowly, and don’t worry if it’s not absolutely perfect – that whipped cream filling will hide any little wonky spots.
💡 Tip: If you’re nervous about slicing, pop the cake in the fridge for 30 minutes. A chilled sponge is firmer and much easier to cut cleanly.
Step 7: Spread the Jam
Take your strawberry jam (or raspberry if you’re feeling bold!) and spread it generously over the bottom half of the sponge. You want a good even layer, but not so much that it spills out the sides once you sandwich the layers.
Step 8: Add the Whipped Cream
Next, spoon on your whipped double cream and gently spread it across the jam layer. You can use a piping bag if you want a neater finish, but I usually go rustic with a spoon – it adds that homemade charm.
💡 Hot day hack: If the weather’s warm, you might want to use buttercream instead of whipped cream. It holds up better at room temperature and still tastes delicious.
Step 9: Sandwich the Top Layer
Now, carefully place the top half of the sponge back on and press down very gently to help it settle. You don’t want to squish that lovely filling too much!
Step 10: Dust and Decorate
Finish it off with a light dusting of icing sugar, then slice the cake into 12 neat squares. Top each one with a halved fresh strawberry for that final bakery-style flourish. Honestly, they look so cute it’s almost a shame to eat them… almost.
Bonus Tips for the Best Traybake Every Time
-
Chill Before Slicing: A quick chill in the fridge helps the cream set and makes slicing way easier.
-
Go Seasonal: Try using different jams based on what’s in season – blackcurrant, cherry, even apricot.
-
Make Ahead: You can bake the sponge the day before. Just wrap it well and store at room temperature, then assemble before serving.
-
Storage: Because of the cream, store leftovers in the fridge and enjoy within 2 days.
In Part 3, we’ll dive into a quick FAQ to cover any last-minute questions, plus a sweet wrap-up to bring it all together. Stick around!
Part 3: FAQ + Final Thoughts on Your New Favorite Traybake
Whether you’re making this for a family gathering, an office treat, or just because cake sounds like a good idea (it always is), this Victoria Sandwich Traybake is bound to become a firm favorite in your recipe rotation. But before we finish, let’s tackle a few of those questions that tend to pop up.
FAQ: Your Traybake Questions Answered
1. Can I freeze this traybake cake?
You can freeze the sponge only (before adding cream or jam). Wrap it tightly and freeze for up to 2 months. Defrost and add fillings before serving.
2. Can I use whipped topping instead of real cream?
Yes! A stabilized whipped topping or buttercream can be used, especially if you’re serving this in warmer temperatures.
3. My sponge came out flat – what went wrong?
This could be due to overmixing or using expired baking powder (in the self-raising flour). Make sure your flour is fresh, and gently fold in dry ingredients.
4. Can I make this gluten-free?
Absolutely. Swap the self-raising flour for a gluten-free self-raising blend. Check that your jam and other ingredients are also certified gluten-free.
5. How do I stop the cream from squeezing out when slicing?
Chill the cake for 30 minutes before slicing. This helps the cream firm up and stay in place.
6. Can I use a round tin instead?
Technically yes, but you’ll lose the convenience of easy-to-slice squares. For the classic traybake feel, stick with the rectangle.
7. What other toppings can I try?
Chopped pistachios, a drizzle of white chocolate, or even edible flowers can all add a fun twist!
Final Thoughts: A Traybake That Steals the Show
There’s something so wonderfully nostalgic about a Victoria sponge, and this traybake version keeps all that old-school charm with none of the fuss. I love how easy it is to make, how pretty it looks on a plate, and most importantly – how it absolutely melts in your mouth with that combo of soft sponge, sweet jam, and fluffy cream.
If you make this cake, I’d love to hear how it turns out! Leave a comment with your twist (raspberry jam, chocolate drizzle – you name it!) or tag me if you share it online. Baking is meant to be shared, after all.
Until next time, happy baking and even happier eating!
Print
Victoria Sandwich Traybake Cake – A Classic British Treat Made Easy in a Tin
- Total Time: 50 minutes
Description
This Victoria Sandwich Traybake Cake is a modern twist on the beloved British classic. Made with fluffy sponge, strawberry jam, and fresh cream, it’s an easy-to-share dessert that’s perfect for picnics, parties, or your next afternoon tea spread.
Ingredients
-
250g unsalted butter, softened
-
250g caster sugar
-
4 large eggs
-
250g self-raising flour
-
2 tbsp whole milk
-
150g strawberry jam
-
200ml double cream, whipped
-
A few fresh strawberries, halved
-
Icing sugar, for dusting
Instructions
-
Preheat the oven to 180°C (160°C fan). Grease and line a 30x20cm traybake tin.
-
Cream the butter and sugar together until pale and fluffy.
-
Beat in the eggs one at a time, mixing well after each.
-
Sift in the flour and gently fold in, followed by the milk.
-
Pour the batter into the prepared tin and smooth the top.
-
Bake for 25–30 minutes until golden and springy to the touch. Let cool completely in the tin.
-
Once cool, slice the cake in half horizontally using a serrated knife.
-
Spread the jam over the bottom layer, then top with the whipped cream.
-
Place the top layer back on, dust with icing sugar, and cut into 12 squares.
-
Top each square with a halved strawberry before serving.
Notes
-
Chill before slicing for neater squares.
-
Swap strawberry jam for raspberry for a tangier flavor.
-
Use buttercream instead of whipped cream in warm weather.
-
Store in the fridge and consume within 2 days.
- Prep Time: 20 minutes
- Cook Time: 30 minutes


")