

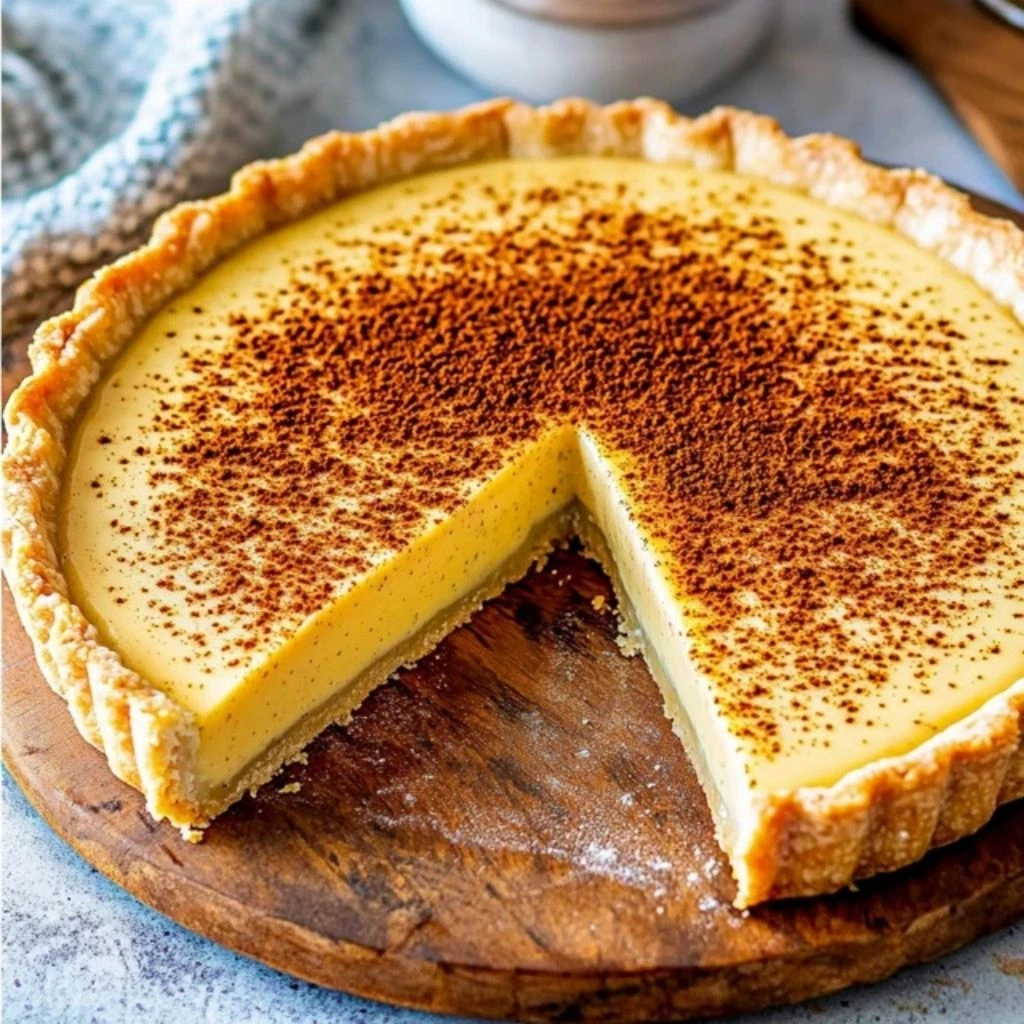
A Proper British Treat – Creamy Custard Tart That Feels Like Home
If you’ve ever found yourself cozied up on a rainy afternoon with a steaming cup of tea in one hand and something sweet in the other, chances are you already know just how special a traditional British custard tart can be. It’s one of those bakes that brings a comforting sense of nostalgia, even if you didn’t grow up with it. The silky-smooth custard, the whisper of nutmeg on top, and the buttery crunch of shortcrust pastry—it all comes together in the most satisfying way.
Now, I’ll admit, the first time I made this tart I was a little nervous. Custard can be a tricky beast if you’re not paying close attention. But this version? It’s surprisingly simple to pull off and incredibly forgiving. And the results? Absolutely worth it.
So, whether you’re planning a Sunday dinner dessert, want to impress guests, or just want to bring a bit of British charm into your kitchen, this is the recipe that’ll get you there.
Let’s get baking!
Ingredients You’ll Need
For the pastry:
-
175g plain flour
-
75g unsalted butter (cold and cubed)
-
25g icing sugar
-
1 medium egg yolk
-
2–3 tbsp cold water
For the custard filling:
-
300ml whole milk
-
150ml double cream
-
3 medium eggs
-
50g caster sugar
-
1 tsp vanilla extract
-
Ground nutmeg (for dusting)
Step 1: Make That Buttery Shortcrust
Shortcrust pastry might sound fancy, but once you get the hang of it, it becomes second nature. Start by rubbing the butter into the flour with your fingertips. You’re looking for a breadcrumb-like texture—don’t worry if it’s not perfect.
Next, stir in the icing sugar. Add the egg yolk and just enough cold water (start with 2 tablespoons) to bring the dough together. Use a fork at first, then switch to your hands to gently knead it into a smooth ball. Shape it into a disc, wrap it in cling film, and pop it in the fridge for at least 30 minutes to chill.
Chilling the dough gives the butter time to firm back up, which means flakier, more tender pastry later.
Step 2: Roll, Line, and Blind Bake
After your dough is nicely chilled, preheat your oven to 180°C (fan). Roll out the pastry on a lightly floured surface until it’s about the thickness of a £1 coin (or about 1/8 inch, for my American readers). Gently lift it into a 20cm loose-bottomed tart tin and press it into the corners. Trim off the excess and prick the base with a fork to keep it from puffing up.
Line the case with parchment paper and fill it with baking beans or dried rice. Blind bake it for 15 minutes. Then, remove the beans and parchment, and bake it for another 10 minutes until it’s just lightly golden. This step ensures the crust stays crisp and doesn’t get soggy when we add the custard later.
Let it cool for a few minutes while we make the dreamy filling.
Creamy Custard, Perfect Bake – Let’s Finish This Tart

Alright, we’ve got our buttery pastry baked and cooling, and now it’s time for the heart of this recipe—the silky, creamy, gently spiced custard filling. If you’ve made custard before, you know how rewarding it is to get that perfect, just-set texture with the tiniest wobble in the center. It feels like magic (but really, it’s just good technique and a little patience).
Let’s dive into the next steps and get that custard tart finished and ready for slicing!
Step 3: Warm and Whisk the Custard
Grab a medium saucepan and pour in the 300ml whole milk and 150ml double cream. You’re going to heat this gently over medium-low heat—just until you see steam rising, but not boiling. If it starts to bubble, reduce the heat right away. We want it warm, not scalding.
While that’s warming, crack 3 medium eggs into a large mixing bowl. Add 50g caster sugar and 1 teaspoon of vanilla extract, and give it all a good whisk until the mixture is smooth and slightly frothy.
Now here comes the only part that requires a little attention: tempering. Slowly pour the warm milk and cream into the egg mixture, whisking constantly as you go. This helps gently raise the temperature of the eggs without scrambling them. It might sound fancy, but you’ve got this—just pour slowly and keep whisking.
Once it’s fully combined, strain the custard mixture through a fine sieve into a jug. This extra step makes sure your filling is silky smooth and free from any little eggy bits that may have snuck in. Trust me, it’s worth the 30 seconds.
Step 4: Assemble and Bake
Pour your smooth custard mixture into the slightly cooled pastry shell. You’ll want to do this slowly and carefully to avoid splashes. Then take a little ground nutmeg and lightly dust the top. Nutmeg gives that traditional flavor note that really sets this tart apart—it’s warm, a little spicy, and just smells like comfort.
Bake the tart at 160°C (fan) for 30 to 35 minutes. The key here is not to overbake. You’re looking for the custard to be just set with a very gentle wobble in the center. It will continue to firm up as it cools, so don’t panic if it seems a little jiggly when it comes out of the oven.
Let the tart cool completely in the tin. This part is hard (especially with the amazing smell wafting through the kitchen), but it’s important. If you try to slice too soon, the custard might be too soft and won’t hold together.
Tips for Custard Tart Success
Here are a few little tricks I’ve picked up that’ll make your tart turn out bakery-worthy every time:
-
Use room-temperature eggs. They blend more smoothly with the warm milk and help create an even custard.
-
Keep your eye on the oven. Ovens vary, so check the tart at the 30-minute mark. If it looks set around the edges but wobbles gently in the middle, you’re golden.
-
Strain the custard. I know I mentioned it already, but it really is a game-changer. It makes the final texture unbelievably smooth.
-
Let it rest. This tart is best served cool, and chilling it for a few hours makes it easier to slice beautifully.
Serving Suggestions
There’s something so elegant about serving this tart just as it is—a slice on a plate with a cup of tea or coffee. But if you want to dress it up a bit, here are some ideas:
-
Add fresh berries on the side (raspberries and blueberries are my favorite pairing).
-
A drizzle of raspberry coulis brings a tart contrast to the creamy filling.
-
Serve with softly whipped cream for a truly decadent dessert moment.
This tart also travels well, so it’s perfect to bring along to a picnic, family gathering, or even a bake sale. It’s simple but makes a big impression—everyone will think you spent hours on it.
Frequently Asked Questions
Now that your custard tart is cooling on the counter (and probably filling your kitchen with the most amazing sweet, nutmeggy aroma), let’s wrap things up with a few final details. I know custard tarts can bring up some questions—especially if it’s your first time making one—so I’ve pulled together a quick FAQ to help you feel confident from start to finish.
Let’s get into it!
1. Why did my custard tart crack on top?
This usually means it was slightly overbaked. The custard should be gently set with a bit of wobble in the center. If it’s baked too long or at too high a temperature, it can firm up too much and crack as it cools. Try pulling it out right when the center still jiggles a bit.
2. Can I make the pastry ahead of time?
Yes, absolutely! You can make the pastry dough up to 2 days in advance and keep it wrapped in the fridge. You can even blind bake the shell the day before and fill it fresh the next day.
3. How do I know when the custard is “just set”?
Give the tart a gentle nudge—if the custard moves like set jelly with a slight wobble in the center, it’s done. It should not slosh or look liquidy, but it shouldn’t be totally firm either. It’ll continue to set as it cools.
4. What’s the best way to slice the tart cleanly?
Chill the tart completely in the fridge before slicing. Use a sharp knife and wipe it clean between slices. You’ll get beautiful, smooth cuts every time.
5. Can I freeze the custard tart?
Technically yes, but it’s not ideal. The texture of the custard can change slightly after freezing and thawing. It’s best enjoyed fresh or within 2-3 days from the fridge.
6. Is it okay to use store-bought pastry?
Definitely! If you’re short on time or just want to simplify the process, a good-quality store-bought shortcrust pastry will do the trick. Just make sure to blind bake it the same way before adding your custard filling.
7. Do I have to use nutmeg?
Nope! While traditional British custard tarts use nutmeg for that classic flavor, you can skip it or swap it for cinnamon or a touch of lemon zest if you prefer.
Final Thoughts: Simple, Elegant, and So Rewarding
There’s something so comforting about a dessert that doesn’t need frosting, layers, or fancy decorations to impress. A good custard tart speaks for itself—creamy, rich, perfectly spiced, and nestled in a golden, buttery crust. It’s elegant but not fussy, and every bite brings that nostalgic, homemade goodness we all love.
Whether you serve it at a dinner party, make it for a holiday spread, or just bake one on a quiet weekend to enjoy with your family (or yourself—no judgment here), this recipe is one to keep in your baking rotation.
If you give this Traditional British Custard Tart a try, I’d love to hear how it turned out! Did you stick with the classic nutmeg, or did you make it your own? Leave a comment, share your tweaks, or tag me in your baking photos—I’m always thrilled to see your creations.
And remember: as fancy as it may look, this tart is just good, honest baking. Simple ingredients, a little technique, and a whole lot of love.
Print
Traditional British Custard Tart Recipe: Silky Smooth, Buttery & Nostalgic
- Total Time: 1 hour 25 minutes (excluding cooling time)
- Yield: 8 slices 1x
Description
This Traditional British Custard Tart is a beloved classic for a reason. It features a crisp and buttery shortcrust pastry base filled with a smooth, gently sweetened egg custard. Infused with vanilla and topped with a hint of ground nutmeg, this tart is a timeless dessert that’s as elegant as it is comforting. Perfect for afternoon tea, dinner parties, or just a cozy weekend bake, it’s simple to make and absolutely delicious. Serve it chilled or at room temperature with a cup of tea for the ultimate nostalgic treat.
Ingredients
For the Pastry:
-
175g plain flour
-
75g unsalted butter, chilled and cubed
-
25g icing sugar
-
1 medium egg yolk
-
2–3 tbsp cold water
For the Custard Filling:
-
300ml whole milk
-
150ml double cream
-
3 medium eggs
-
50g caster sugar
-
1 tsp vanilla extract
-
Ground nutmeg, for sprinkling
Instructions
-
Make the pastry:
Rub the butter into the flour with your fingertips until the mixture resembles breadcrumbs. Stir in the icing sugar, then mix in the egg yolk and just enough cold water to bring the dough together. Shape into a disc, wrap in cling film, and chill for 30 minutes. -
Blind bake the crust:
Preheat the oven to 180°C (fan). Roll out the pastry on a lightly floured surface and line a 20cm loose-bottomed tart tin. Trim the edges and prick the base with a fork. Line with parchment and fill with baking beans. Blind bake for 15 minutes, remove the beans and paper, and bake for another 10 minutes until lightly golden. Set aside to cool slightly. -
Make the custard filling:
Heat the milk and cream gently in a saucepan until steaming (do not boil). In a separate bowl, whisk together the eggs, caster sugar, and vanilla extract. Gradually pour the warm milk mixture into the eggs, whisking constantly. Strain through a fine sieve into a jug. -
Assemble and bake the tart:
Pour the custard into the pastry case. Sprinkle lightly with ground nutmeg. Bake at 160°C (fan) for 30–35 minutes, or until the custard is just set with a slight wobble in the center. -
Cool and serve:
Allow the tart to cool completely in the tin. Slice and serve chilled or at room temperature.
Notes
-
Don’t overbake: The custard should still have a slight wobble in the center when done. It will continue to set as it cools.
-
Strain the custard: For an ultra-smooth finish, always strain the mixture before baking.
-
Use store-bought pastry: If you’re short on time, a pre-made shortcrust base works too—just blind bake it as directed.
-
Storage: Keeps in the fridge for up to 3 days. Best enjoyed fresh on the day it’s baked.
-
Serving tip: Pairs beautifully with fresh berries, a cup of tea, or a drizzle of fruit coulis.
- Prep Time: 30 minutes (plus 30 minutes chilling)
- Cook Time: 55 minutes


")