


Few dishes evoke the warmth and nostalgia of a perfectly roasted whole chicken. Whether it’s a Sunday family dinner, a cozy winter meal, or a holiday feast, roasted chicken is a dish that brings people together. Its rich aroma, golden crispy skin, and juicy, flavorful meat make it a timeless classic in kitchens around the world.
A Dish for Every Occasion
Whole roasted chicken is incredibly versatile—it can be a centerpiece for an elegant dinner or a simple, satisfying weeknight meal. Unlike other elaborate dishes, it requires minimal ingredients yet delivers maximum flavor. With just a handful of pantry staples like salt, pepper, garlic, and butter, you can transform an ordinary chicken into a mouthwatering meal.
Budget-Friendly and Nutritious
One of the biggest advantages of roasting a whole chicken is its cost-effectiveness. Compared to buying pre-cut chicken parts, a whole bird offers more value and can feed an entire family. Plus, it provides leftovers that can be repurposed into soups, sandwiches, or salads. Nutritionally, roasted chicken is an excellent source of lean protein, vitamins, and essential minerals like iron and zinc.
Aromatic and Nostalgic Comfort
The process of roasting a chicken fills the home with a warm, inviting aroma, triggering feelings of comfort and tradition. Whether it’s the memory of a home-cooked meal from childhood or the satisfaction of preparing a wholesome dish from scratch, a whole roasted chicken is the ultimate comfort food—simple, nourishing, and deeply satisfying.
Choosing the Best Chicken for Roasting
Selecting the right chicken is the first step to achieving a perfectly roasted bird. The quality, size, and type of chicken you choose significantly impact the flavor, texture, and overall outcome of your dish. Here’s what to consider when buying a whole chicken for roasting.
Fresh vs. Frozen: Which is Better?
- Fresh chicken tends to have better texture and flavor since it hasn’t been frozen, which can affect moisture retention.
- Frozen chicken is more convenient and budget-friendly, but it must be thawed properly in the refrigerator (not at room temperature) to ensure even cooking.
Understanding Chicken Labels: Organic, Free-Range, or Conventional?
- Organic Chicken – Raised without antibiotics or synthetic feed, offering a cleaner, more natural taste.
- Free-Range Chicken – Given access to the outdoors, which can result in firmer meat due to more movement.
- Pasture-Raised Chicken – Typically has a richer flavor because of a more varied diet.
- Conventional Chicken – The most affordable option, but may contain additives or be raised on grain-based feed.
For the best flavor and texture, organic or free-range chickens are recommended, but high-quality conventional chickens can still yield excellent results.
What’s the Ideal Chicken Size for Roasting?
- 3-4 lbs. (1.3-1.8 kg) – Ideal for small households, cooks faster, and remains juicy.
- 4-5 lbs. (1.8-2.3 kg) – The perfect balance between size and cook time for most families.
- 5-6+ lbs. (2.3+ kg) – Best for larger gatherings but requires longer roasting time.
A smaller bird (around 4 lbs.) roasts more evenly, while a larger one may need extra care to prevent dryness. Choosing a high-quality, properly sized chicken ensures the best texture and taste in your roast.
Essential Ingredients for the Best Roasted Chicken
A perfectly roasted chicken doesn’t require fancy ingredients—just the right combination of seasonings, fat, and aromatics to enhance its natural flavor. Here are the key ingredients that will take your roast chicken from good to exceptional.
1. The Chicken Itself
- The quality of the chicken matters most. Opt for organic, free-range, or pasture-raised for the best flavor and texture.
- A 4-5 lb. (1.8-2.3 kg) bird is ideal for even cooking and juicy meat.
2. Seasonings: The Foundation of Flavor
- Salt & Pepper – Essential for enhancing the natural taste of the chicken. Kosher salt is preferred for better absorption.
- Garlic Powder & Onion Powder – Add depth to the seasoning blend.
- Paprika (Smoked or Sweet) – Gives a subtle smokiness and enhances the golden-brown color.
- Dried Herbs (Thyme, Rosemary, Oregano) – Classic poultry flavors that infuse into the meat.
3. Fat: For Crispy, Golden Skin
- Butter – Adds richness and helps create an ultra-crispy, flavorful skin.
- Olive Oil – A great alternative for a lighter taste and high-heat cooking.
- Combination of Both – Butter for flavor and olive oil for better heat resistance.
4. Aromatics: Infusing Extra Flavor
Stuffing the cavity with fragrant ingredients boosts the chicken’s taste from the inside out:
- Lemon Wedges – Add a bright, citrusy contrast.
- Garlic Cloves – Deepens the savory aroma.
- Onions & Carrots – Enhance sweetness and moisture.
- Fresh Herbs (Thyme, Rosemary, Parsley) – Elevate the overall flavor.

Step-by-Step Guide to Prepping Your Chicken
Proper preparation is key to achieving a juicy, flavorful, and crispy-skinned roasted chicken. Follow these steps to ensure your bird is perfectly seasoned and ready for the oven.
1. Thawing the Chicken (If Frozen)
If using a frozen chicken, plan ahead:
- Refrigerator Method (Recommended): Place the chicken in a dish and thaw in the fridge for 24 hours per 4-5 lbs.
- Cold Water Method: Submerge the chicken (sealed in a leak-proof bag) in cold water, changing the water every 30 minutes. It takes about 2-3 hours per 4 lbs.
- Avoid Room Temperature Thawing to prevent bacterial growth.
2. Cleaning & Drying the Chicken
- Remove the giblets and neck from the cavity (save for gravy or broth).
- Do NOT wash the chicken—this spreads bacteria; cooking will kill any harmful germs.
- Pat the chicken completely dry with paper towels. This step is crucial for crispy skin.
3. Trussing vs. Not Trussing
- Trussing (Tying the Legs) helps the chicken cook evenly and retains moisture.
- Leaving the Legs Untied allows better airflow, leading to crispier skin.
- Optional: Secure the wings under the body to prevent burning.
4. Seasoning the Chicken
- Generously season the outside, inside the cavity, and under the skin.
- Dry Brining Option: Coat with salt and let it sit uncovered in the fridge for 12-24 hours for extra crispiness.
- For maximum flavor, rub butter or oil under the skin before roasting.
5. Adding Aromatics for Extra Flavor
Stuff the cavity with aromatics to enhance taste:
- Lemon or Orange Wedges (for brightness)
- Whole Garlic Cloves (for depth)
- Fresh Herbs (Thyme, Rosemary, or Sage) (for fragrance)
- Onion or Carrots (for natural sweetness)
The Secret to Crispy Skin and Juicy Meat
Achieving crispy, golden skin while keeping the meat juicy and tender is the ultimate goal of a perfect roast chicken. Here are the key techniques to ensure success.
1. Dry the Skin Completely
- Moisture is the enemy of crispy skin! Pat the chicken thoroughly dry with paper towels before seasoning.
- For the best results, let the chicken air-dry uncovered in the refrigerator for 12-24 hours. This helps remove excess moisture, allowing the skin to crisp up beautifully when roasted.
2. Use Salt for Dry Brining
- Instead of a wet brine, use dry brining (rubbing salt directly on the skin and inside the cavity).
- Dry brining draws out moisture and then reabsorbs it, making the skin crispier and the meat more flavorful.
3. Butter or Oil? Why Not Both!
- Butter under the skin adds richness and flavor.
- Olive oil on the skin promotes an even golden-brown color at high heat.
- A combination of both ensures flavorful, crispy skin with deep golden color.
4. Roast at the Right Temperature
- Start roasting at 425°F (220°C) for 20 minutes, then lower to 375°F (190°C) to finish cooking.
- This method renders fat effectively, crisping the skin while keeping the meat juicy.
5. Don’t Cover the Chicken While Roasting
- Covering traps steam, making the skin soggy.
- If the skin browns too quickly, lightly tent with foil near the end.
The Best Roasting Techniques for Perfect Results
Roasting a whole chicken may seem simple, but using the right technique can make the difference between a dry, bland bird and one that’s crispy, juicy, and full of flavor. Here are the best roasting methods to achieve perfect results every time.
1. High-Heat vs. Low-and-Slow Roasting
- High-Heat Roasting (400-450°F / 200-230°C) – Produces crispy skin and deep golden color, but requires careful timing to avoid dryness. Best for smaller chickens (under 4 lbs.).
- Low-and-Slow Roasting (300-350°F / 150-175°C) – Cooks more gently, allowing flavors to develop and keeping meat juicy. Ideal for larger birds (5+ lbs.).
- Best Approach: Start at 425°F (220°C) for 20 minutes, then lower to 375°F (190°C) to finish cooking. This creates crispy skin while keeping the meat moist.
2. Roasting Rack vs. Direct Pan Roasting
- Using a Roasting Rack – Elevates the chicken, allowing hot air to circulate evenly, leading to a crispier bottom.
- Roasting Directly in the Pan – The chicken sits in its juices, which enhances moisture but may soften the skin.
- Best Option: Use a rack for crispier skin, or place the chicken on a bed of vegetables for added flavor.
3. To Baste or Not to Baste?
- Basting (spooning pan juices over the chicken) adds flavor but can make the skin less crispy by introducing extra moisture.
- Instead, rub butter under the skin before roasting for better flavor without sacrificing crispiness.
4. Should You Flip the Chicken?
- Some chefs recommend starting breast-side down for the first 30 minutes to keep the white meat juicy, then flipping it upright for crispier skin.
- However, this can be tricky. If roasting at high heat with dry skin, flipping isn’t necessary.
Cooking Time and Temperature Guide
Cooking your chicken at the right temperature and for the correct duration ensures a juicy interior and crispy skin. Here’s a foolproof guide:
1. Ideal Roasting Temperatures
- High-Heat Start: 425°F (220°C) for 20 minutes (for crispy skin).
- Lower to Finish: Reduce to 375°F (190°C) until fully cooked.
- Alternative: Roast at 350°F (175°C) the entire time for a slower, more even cook.
2. General Cooking Time Based on Weight
- 3-4 lbs. (1.3-1.8 kg): 60-75 minutes
- 4-5 lbs. (1.8-2.3 kg): 75-90 minutes
- 5-6 lbs. (2.3-2.7 kg): 90-105 minutes
3. Checking for Doneness
- Use a meat thermometer inserted into the thickest part of the thigh (without touching bone). It should read 165°F (75°C).
- No thermometer? Pierce the thigh—juices should run clear, not pink.
- The wiggle test: If the leg moves easily in the socket, it’s done.
4. Avoid Overcooking
- Chickens continue to cook after removing from the oven, so take it out at 160°F (71°C) and let it rest—it will reach 165°F (75°C) during resting.
Resting and Carving Your Roast Chicken
1. Why Resting is Crucial
- Letting the chicken rest for 15-20 minutes before carving allows the juices to redistribute, keeping the meat moist.
- If sliced too early, juices spill out, leading to dryness.
2. How to Rest Your Chicken
- Place the chicken on a cutting board or platter.
- Loosely tent it with foil to retain warmth without trapping steam (which softens the skin).
3. Carving Step-by-Step
-
Remove the Legs & Thighs
- Slice between the thigh and breast until you hit the joint.
- Pop the joint and cut through to separate.
-
Detach the Wings
- Pull them away from the breast and slice through the joint.
-
Carve the Breast
- Slice along one side of the breastbone, following the curve.
- Cut into thin slices for serving.
-
Separate Thighs and Drumsticks (Optional)
- Find the joint and slice through to separate the thigh from the drumstick.
4. Pro Tip: Use the Carcass for Broth!
- Save the leftover bones and scraps for a homemade chicken broth or soup.
Best Side Dishes to Serve with Roasted Chicken
A beautifully roasted chicken pairs perfectly with classic, comforting sides or fresh, vibrant accompaniments. Here are some must-try side dishes:
1. Classic Comfort Foods
- Garlic Mashed Potatoes – Creamy and buttery, a perfect match.
- Roasted Vegetables – Carrots, Brussels sprouts, and potatoes caramelized to perfection.
- Homemade Gravy – Made from pan drippings for extra flavor.
2. Light & Fresh Options
- Simple Green Salad – Arugula, spinach, or romaine with a zesty vinaigrette.
- Steamed Asparagus or Green Beans – Adds color and a crisp texture.
3. Unique & Flavorful Pairings
- Herbed Rice Pilaf – Infused with garlic and fresh herbs.
- Cranberry-Walnut Couscous – A slightly sweet, nutty contrast.
- Cornbread or Biscuits – For a Southern-inspired touch.
4. Sauces & Dips
- Garlic Aioli – A creamy dip for extra richness.
- Chimichurri – Bright and herby, perfect for a zesty kick.
No matter the occasion, these sides will complement your perfectly roasted chicken!
Storing and Using Leftovers
1. Storing Leftovers Properly
- Refrigerator: Store leftover chicken in an airtight container for up to 4 days.
- Freezer: Shred or slice chicken, store in a freezer-safe bag, and freeze for up to 3 months.
2. Reheating Without Drying Out
- Oven (Best for Crispiness): Place in a baking dish, cover with foil, and heat at 325°F (165°C) for 15-20 minutes.
- Stovetop (For Quick Reheat): Warm in a pan with a bit of broth or butter over medium heat.
- Microwave (Fast but Risky): Use low power and cover with a damp paper towel to prevent drying.
3. Creative Ways to Use Leftover Chicken
- Chicken Salad – Mix with mayo, celery, and herbs for a quick lunch.
- Soups & Stews – Add to chicken noodle soup or a hearty stew.
- Tacos & Wraps – Toss with salsa or seasonings for a quick meal.
- Chicken Fried Rice – A delicious way to repurpose leftovers.
- Homemade Chicken Broth – Use the carcass to make rich, flavorful stock.
Leftover roasted chicken is incredibly versatile and delicious, making it easy to create new meals with minimal effort!
FAQs – People Also Ask
1. Should I cover my chicken while roasting?
No, roasting uncovered allows the skin to crisp up. If it browns too quickly, loosely tent with foil in the last 20 minutes.
2. How do I make my roast chicken more flavorful?
- Season inside and out – Don’t forget the cavity!
- Use butter under the skin for extra moisture.
- Stuff with aromatics like lemon, garlic, and fresh herbs.
3. What’s the best way to get crispy skin?
- Pat the chicken completely dry before roasting.
- Let it air-dry in the fridge for 12-24 hours.
- Use high heat (425°F/220°C) for the first 20 minutes.
4. Can I roast a chicken without a rack?
Yes! Place the chicken on a bed of chopped onions, carrots, and celery. This prevents it from sitting in its juices while adding flavor.
5. What’s the difference between roasting and baking a chicken?
- Roasting (375-450°F / 190-230°C) – Uses dry, high heat for crispy skin.
- Baking (300-350°F / 150-175°C) – A gentler process, often used for casseroles or breaded chicken.
6. How can I keep the breast from drying out?
- Roast breast-side down for the first 30 minutes, then flip.
- Baste with butter or pan juices midway through cooking.
- Let it rest before slicing to retain moisture.
The Best Whole Roasted Chicken
Description
This comprehensive guide walks you through everything you need to know about making the best whole roasted chicken. From selecting the right bird and essential ingredients to expert roasting techniques and storage tips, this article ensures that your roast chicken turns out crispy on the outside, juicy on the inside, and packed with flavor.
You’ll also find step-by-step instructions, cooking time and temperature guides, side dish recommendations, and answers to frequently asked questions to help you master the art of roasting a whole chicken.
Ingredients
- 1 large carrot, halved lengthwise and cut into thirds
- 1 stalk celery, cut into large thirds
- 1 – 2-4 pound whole chicken, giblets removed and patted dry
- 1/4 cup unsalted butter, melted
- 3 cloves garlic, finely minced
- 1/2 teaspoon fresh thyme
- 1/2 teaspoon grated lemon zest
- 3 tablespoons olive oil
- salt
- freshly cracked black pepper
For the Cavity
- 1 head garlic, top sliced off
- 1/2 yellow onion, cut into 2 large pieces
- 1 lemon, cut in half
- 4–6 sprigs fresh thyme
Instructions
- Preheat oven to 400 degrees.
- To a small mixing bowl add the melted butter, garlic, lemon zest, 1/2 teaspoon fresh thyme, and a generous pinch of salt and freshly cracked pepper.
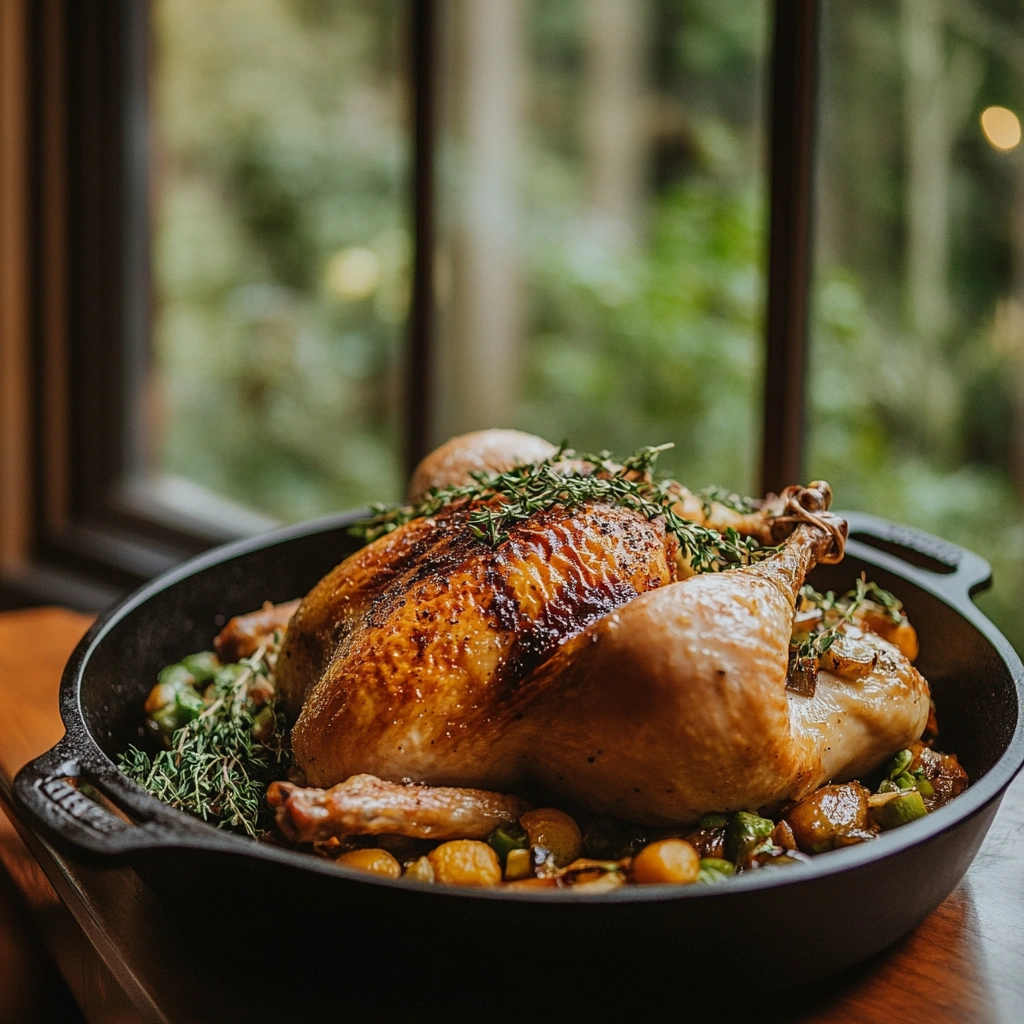
- Place the celery and carrots in a cast iron and skillet. Use a paper towel to pat the chicken dry and then place the chicken on top of the veggies, breast side up.
- Rub the melted butter mixture under the skin of the chicken as well as inside the cavity of the chicken, being sure to use all of the butter.
- Stuff the chicken cavity with the head of garlic, pieces of yellow onion, lemon, and fresh thyme. If you like, use a bit of kitchen twine to tie the drumsticks.
- Drizzle the olive oil over the skin of the chicken and then use a basting brush to ensure that the skin is well coated with oil. Liberally season the chicken with salt and fresh cracked black pepper.
- Place the chicken in the oven, on the middle rack, and roast for 1 hour and 15-30 minutes, basting every 30 minutes, or until the internal temperature, at the thickest part, reaches 165 degrees.
- Remove the chicken from the oven and let rest for 10-15 minutes in the skillet.
- Carve the chicken and serve with the pan drippings or reserve the pan drippings to make homemade chicken gravy.
Notes
-
Perfect for Beginners & Experts:
- This guide is suitable for home cooks of all levels, offering both basic techniques and pro chef tips for the best results.
-
Focus on Crispy Skin & Juicy Meat:
- The article emphasizes dry brining, proper seasoning, and the right roasting temperature to ensure a crispy, flavorful crust while keeping the meat tender.
-
Detailed Step-by-Step Instructions:
- From choosing the best chicken to trussing, seasoning, and carving, every step is broken down for easy-to-follow execution.
-
Customizable Flavors & Variations:
- The guide includes different seasoning blends, roasting techniques, and stuffing ideas to match different taste preferences.
-
Leftover-Friendly & Meal Prep Tips:
- Learn how to store, reheat, and repurpose leftover roast chicken into soups, salads, tacos, and more.
-
FAQ Section Covers Common Roasting Mistakes:
- The FAQs answer common concerns like preventing dryness, getting crispy skin, and checking for doneness without a thermometer.
-
Internal Links & External References Included:
- Provides additional resources, including Wikipedia articles and Pinterest inspiration boards for recipes, side dishes, and carving techniques.


")