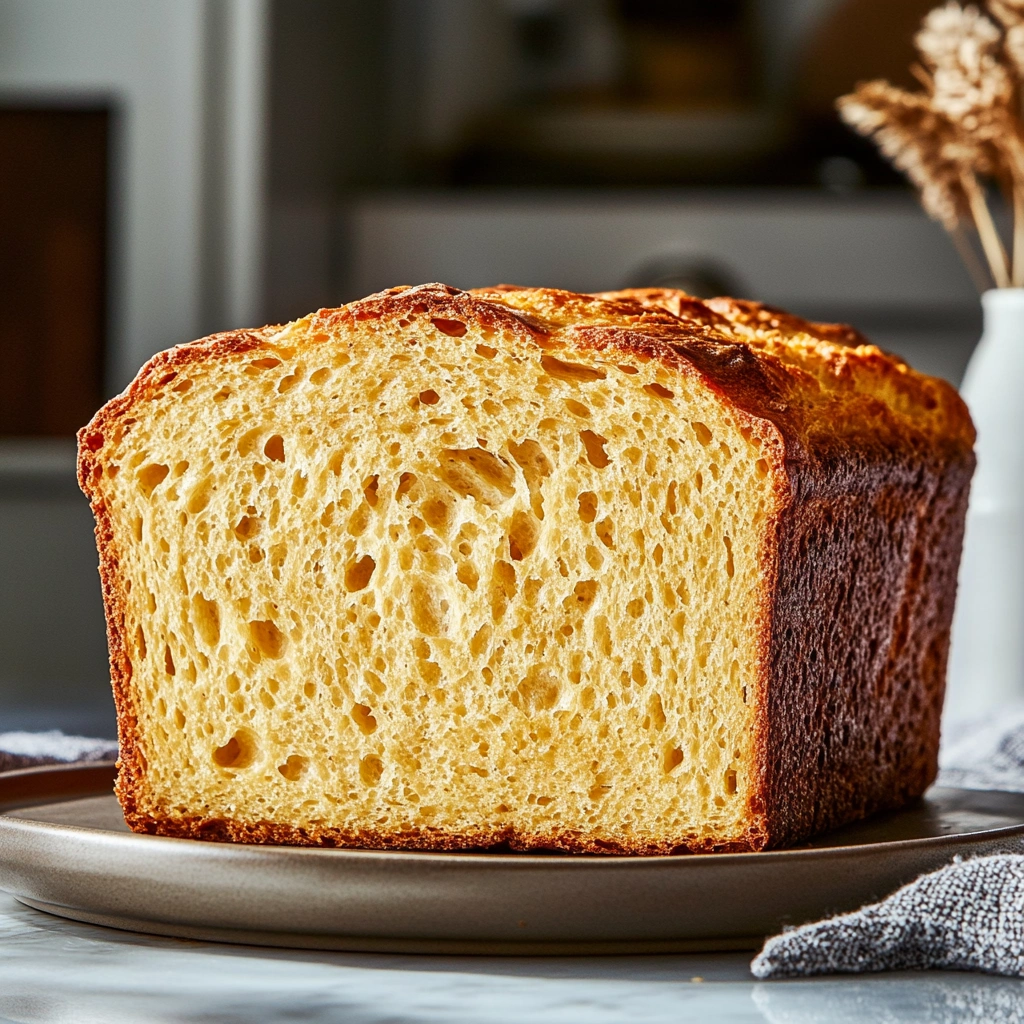
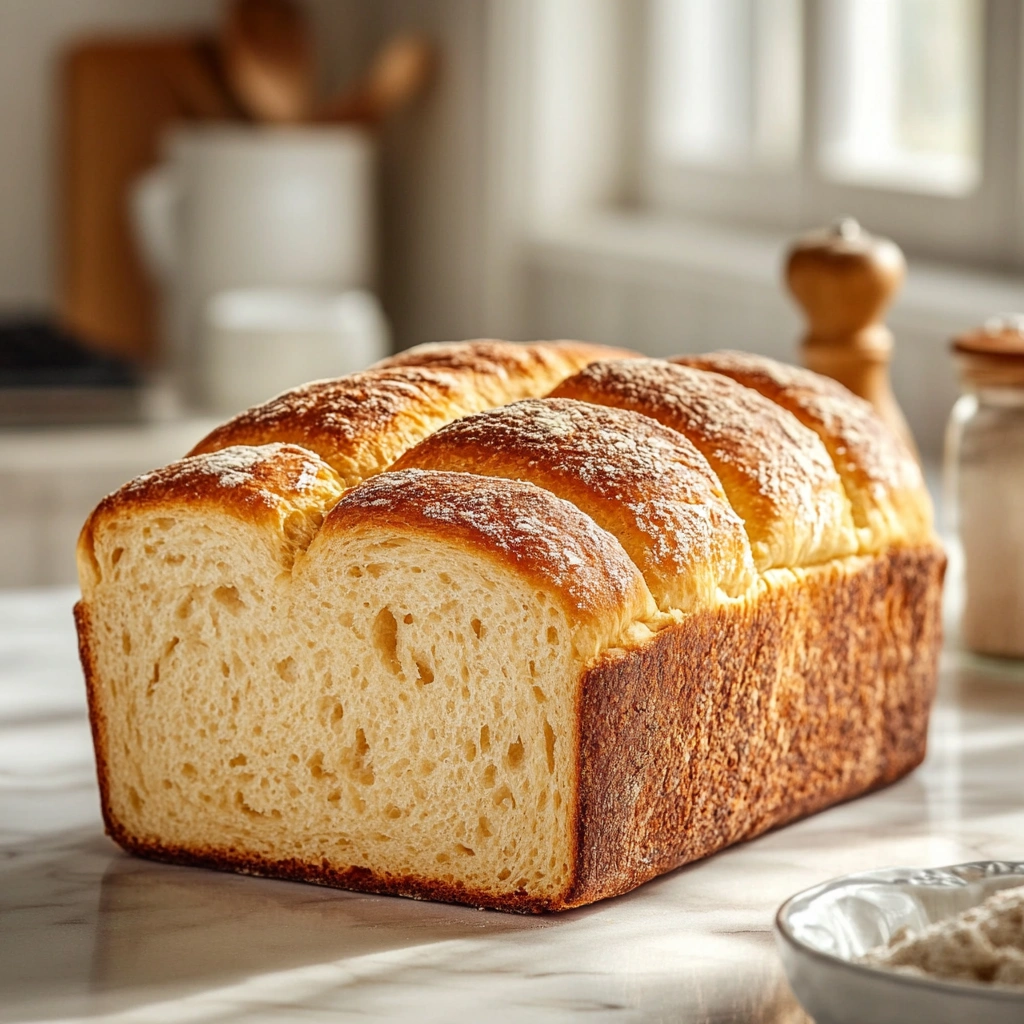
Sourdough bread is one of the oldest and most beloved types of bread in the world, known for its tangy flavor, chewy texture, and beautiful, rustic crust. Unlike breads made with commercial yeast, sourdough relies on a natural fermentation process involving wild yeast and lactic acid bacteria cultivated in what’s called a sourdough starter. This age-old technique dates back thousands of years and continues to captivate home bakers and professionals alike.
At its core, sourdough is made with just three simple ingredients: flour, water, and salt. But it’s the starter—an active, living culture of flour and water—that brings the dough to life, both literally and figuratively. This wild fermentation process not only helps the bread rise but also develops its signature tang and deep, complex flavor.
One of the biggest appeals of sourdough is that it’s entirely natural, with no commercial yeast or preservatives. The slow fermentation not only enhances taste but also makes the bread easier to digest for many people. Some even report that sourdough is gentler on the stomach compared to other types of bread.
Whether you’re a seasoned baker or just getting started, learning to bake sourdough at home is a rewarding skill. It encourages patience, creativity, and a deeper connection to the food you eat. In this guide, we’ll walk you through everything—from making your own sourdough starter to baking your first loaf—with clear steps and helpful tips, even if you’re a complete beginner.
What Is a Sourdough Starter?
A sourdough starter is a natural culture made by combining flour and water and allowing it to ferment over time. This process encourages the growth of wild yeast and beneficial bacteria, specifically lactic acid bacteria, which are naturally present in the environment and in flour. The result is a bubbly, active mixture that can be used to leaven bread—without any commercial yeast.
What makes sourdough so unique is this wild fermentation. Unlike instant or active dry yeast, which is a single strain cultivated for speed, sourdough starters develop a diverse community of microorganisms. This diversity creates not only lift and structure in the dough but also sourdough’s signature tangy flavor and improved shelf life.
Maintaining a starter is simple but requires consistency. Bakers “feed” the starter regularly by discarding a portion and refreshing it with new flour and water. An active, mature starter will double in size after feeding, smell pleasantly sour or fruity, and have a spongy, aerated texture.
There are two main types of sourdough starters:
-
Stiff Starter (lower hydration): thicker in consistency, often used in cooler climates.
-
Liquid Starter (higher hydration): more common and easier for beginners to manage.
A healthy starter is the key to successful sourdough baking. It determines the rise, texture, and flavor of your bread. Once it’s well-established, your starter can live indefinitely with proper care—passed down like a family heirloom.
Whether you’re cultivating your own or using one passed from a friend, the sourdough starter is truly the heart of sourdough baking.
Ingredients Needed for Sourdough Bread
Sourdough bread requires just a few basic ingredients, but the quality and ratios make all the difference. Here’s what you’ll need:
Basic Ingredients:
-
Flour: Bread flour is ideal for its high protein content, but all-purpose or whole wheat can also be used (or mixed).
-
Water: Filtered or dechlorinated water is best to avoid killing your wild yeast.
-
Salt: Enhances flavor and controls fermentation.
-
Active Sourdough Starter: Your natural leavening agent—should be bubbly and recently fed.
Optional Add-ins:
-
Olive Oil or Butter: Adds softness to the crumb (not traditional, but good for certain loaves).
-
Seeds, Herbs, Grains: For flavor and texture variety.
Tools You’ll Need:
-
Mixing bowls
-
Digital kitchen scale
-
Bench scraper
-
Dutch oven or baking stone
-
Banneton (proofing basket) or a towel-lined bowl
With these tools and ingredients, you’re ready to bake artisan-quality bread right at home.
How to Make a Sourdough Starter (If You Don’t Have One)
Creating your own sourdough starter from scratch is simple and only takes about 5 to 7 days. Here’s a step-by-step guide:
Day 1:
-
Mix 50g flour (whole wheat or rye works best for starters) with 50g water in a clean jar.
-
Stir well, cover loosely, and leave at room temperature.
Day 2:
-
You may see a few bubbles. Discard half the mixture, then feed with 50g flour + 50g water.
-
Stir, cover, and rest.
Days 3-5:
-
Repeat the discard-and-feed routine every 24 hours.
-
Around Day 4, you should see more bubbles, a rise in volume, and a sour, fruity aroma.
Day 6-7:
-
The starter should double in size within 4–6 hours of feeding.
-
It’s now ready to bake! You can test its readiness by doing the “float test”: drop a small spoonful in water—if it floats, it’s ready.
Tips:
-
Always use a clean spoon.
-
Store at room temp if baking daily, or refrigerate and feed weekly for maintenance.
-
Use a glass jar so you can observe growth and bubbles.
Once mature, your starter becomes a living part of your kitchen—a reliable, reusable base for every sourdough loaf.
Step-by-Step Sourdough Bread Recipe
This beginner-friendly sourdough bread recipe is designed for flavor, texture, and success—even on your first try.
Ingredients:
-
500g bread flour
-
350g water (70% hydration)
-
100g active sourdough starter
-
10g salt
1. Autolyse (Mix & Rest)
-
Combine the flour and water in a bowl. Mix until no dry flour remains.
-
Cover and let rest for 30–45 minutes. This allows enzymes to activate and gluten to start forming.
2. Add Starter and Salt
-
Add the sourdough starter and mix thoroughly.
-
Add salt and knead gently or mix by hand until fully incorporated.
3. Bulk Fermentation (4–5 hours)
-
Let the dough rest in a covered bowl at room temperature.
-
Every 30 minutes for the first 2 hours, perform stretch and folds: pull one side of the dough and fold it over itself.
-
After 4–5 hours, the dough should feel airy, smooth, and slightly domed.
4. Pre-shape and Bench Rest
-
Turn dough onto a lightly floured surface. Pre-shape into a round, let rest 20 minutes.
5. Final Shaping
-
Shape the dough into a tight boule or batard. Transfer to a floured banneton or lined bowl.
6. Cold Proof (8–12 hours in fridge)
-
Cover and refrigerate overnight. This slows fermentation and enhances flavor.
7. Preheat & Bake
-
Preheat oven to 475°F (245°C) with Dutch oven inside.
-
Score the dough with a razor or lame.
-
Bake covered for 20 minutes, then uncover and bake 20–25 minutes until golden brown.
8. Cool
-
Let the bread cool on a wire rack for at least 1 hour before slicing—this allows the crumb to set.
Baking Techniques for the Best Crust and Crumb
Great sourdough isn’t just about the recipe—it’s also about how you bake it. Here are key techniques for achieving that classic artisan finish:
1. Steam Baking:
Using a Dutch oven traps steam, which keeps the crust soft during initial baking. This allows the bread to expand fully before setting, giving you that beautiful oven spring.
2. Scoring the Dough:
Proper scoring controls how the bread expands in the oven. Use a sharp razor or lame to make confident, intentional cuts—this also adds visual flair.
3. High Heat & Preheating:
A hot Dutch oven and preheated oven (475°F/245°C) give the bread a strong rise and rich caramelized crust.
4. Open Crumb Tips:
For airy holes inside:
-
Use high hydration (70%+ water).
-
Handle the dough gently during shaping.
-
Avoid over-proofing.
Perfecting crust and crumb takes practice, but even early loaves can be delicious and beautiful with the right techniques.
Sourdough Bread Troubleshooting Guide
Even experienced bakers face issues with sourdough now and then. Here are some of the most common problems—and how to fix them:
1. My Bread Didn’t Rise Well
-
Possible Causes: Weak starter, under-proofing, or cold dough.
-
Solution: Ensure your starter is bubbly and active (passes the float test). Allow enough bulk fermentation time—use the “poke test” to check readiness.
2. The Crumb Is Dense and Gummy
-
Possible Causes: Under-proofing, low hydration, or overmixing.
-
Solution: Let dough ferment longer and increase hydration slightly. Handle gently when shaping to preserve air pockets.
3. My Bread Is Too Sour
-
Possible Causes: Over-fermentation or feeding your starter too infrequently.
-
Solution: Try using your starter earlier after feeding or shorten the cold proof time.
4. The Crust Is Too Hard or Too Thick
-
Solution: Cover with a towel as it cools to soften the crust. Ensure you’re not overbaking or baking at too high a temp for too long.
5. My Dough Is Too Sticky to Handle
-
Solution: Use wet hands during mixing and shaping. If needed, lower hydration slightly until you’re more comfortable.
6. My Loaf Spreads Flat in the Oven
-
Solution: Improve dough strength with more stretch and folds. Try proofing in a banneton or tightly shaped bowl.
Troubleshooting is part of the learning process—track your bakes, adjust, and trust your instincts!
Storing and Keeping Your Sourdough Fresh
Sourdough bread stays fresh longer than most homemade breads thanks to its natural acidity, but it still benefits from proper storage:
Short-Term (1–3 days):
-
Store at room temperature in a linen bread bag, paper bag, or bread box.
-
Avoid plastic bags unless you want a softer crust.
Medium-Term (4–5 days):
-
Wrap in a clean kitchen towel and place in a sealed container.
Freezing for Long-Term:
-
Slice the loaf first, then freeze slices between layers of parchment.
-
Reheat in a toaster or oven—perfect for a quick, crunchy slice!
Avoid storing sourdough in the fridge—this accelerates staling due to the cool, dry air.
Pro Tip: If your bread has gone a bit stale, toast it or make sourdough croutons or breadcrumbs—waste nothing!

Flavor Variations and Add-Ins
Once you master the basic loaf, sourdough is the perfect canvas for flavor creativity. Here are some delicious ideas:
Savory Add-Ins:
-
Herbs & Spices: Rosemary, thyme, garlic powder
-
Cheese: Cheddar, parmesan, feta
-
Olives, Sun-dried Tomatoes, Caramelized Onions
Sweet Add-Ins:
-
Dried Fruits: Cranberries, raisins, chopped figs
-
Nuts & Seeds: Walnuts, pecans, pumpkin seeds
-
Cinnamon & Brown Sugar Swirls
Grain Boosters:
-
Soaked oats, quinoa, or flaxseeds for a hearty texture
How to Add Them:
-
Mix into dough during the second or third stretch and fold to ensure even distribution.
Stick to a moderate amount of add-ins (10–20% of flour weight) to maintain dough structure. Get creative and let your sourdough reflect your flavor personality!
Health Benefits of Sourdough Bread
Sourdough isn’t just tasty—it comes with real nutritional advantages, too.
1. Easier Digestion:
The fermentation process breaks down gluten and phytic acid, which may make it easier on sensitive stomachs and better for nutrient absorption.
2. Lower Glycemic Index:
Sourdough bread may cause a slower rise in blood sugar compared to conventional bread, helping with blood sugar control.
3. Gut-Friendly Bacteria:
Lactic acid bacteria produced during fermentation support gut health and may act as natural probiotics (though most are killed during baking).
4. Fewer Preservatives Needed:
The acidity of sourdough naturally inhibits mold growth, giving it a longer shelf life without additives.
5. Enhanced Nutrients:
Sourdough baking can increase the bioavailability of minerals like magnesium, zinc, and iron.
It’s a flavorful way to incorporate whole grains and fermented foods into your diet—and it’s satisfying to make from scratch.
FAQs – People Also Ask
1. How long does it take to make sourdough bread with a starter?
From mixing to baking, a typical sourdough loaf takes 12 to 24 hours, depending on proofing time. Most of that is hands-off.
2. Can I use sourdough starter straight from the fridge?
Yes, but it’s best to feed your starter and let it become active at room temperature (usually 4–6 hours) before using it in dough.
3. How much starter should I use in sourdough bread?
A common ratio is 20% starter to total flour weight. For example, in a 500g flour recipe, use around 100g starter.
4. What flour is best for sourdough bread?
Bread flour gives the best structure, but whole wheat, rye, or all-purpose flour can be used or mixed for different flavors and textures.
5. Do I need to discard my starter every time I feed it?
Yes, unless you’re baking often. Discarding keeps your starter manageable and prevents the growth of off flavors.
6. Why is my sourdough bread not rising?
Common causes include inactive starter, under-proofing, or overproofing. Make sure your starter is bubbly and passes the float test.
Conclusion
Baking sourdough bread with a starter is a rewarding journey of patience, flavor, and creativity. With just flour, water, salt, and time, you can create something both rustic and nourishing. Whether you’re a first-time baker or a seasoned pro, every loaf is a delicious new adventure.
Print
Sourdough Bread Recipe with Starter
Description
This classic sourdough bread recipe is perfect for beginners and seasoned bakers alike. Made with just flour, water, salt, and a bubbly sourdough starter, it yields a tangy, crusty artisan loaf with a chewy interior and beautiful open crumb. Whether you’re using your own homemade starter or one shared by a friend, this step-by-step recipe guides you through the entire sourdough process—from mixing and fermentation to shaping, cold proofing, and baking. No commercial yeast required!
Great for toast, sandwiches, or just slathered with butter straight out of the oven.
Ingredients
-
500g (3 ¾ cups) bread flour (or all-purpose flour)
-
100g (½ cup) active sourdough starter
-
10g (2 teaspoons) salt
-
350g (1 ½ cups) water (room temperature)
Instructions
Step 1: Feed Your Sourdough Starter (If Needed)
If your starter has been in the fridge, feed it 4-6 hours before baking. Make sure it’s active, bubbly, and has doubled in size before using it in your dough.
Step 2: Mix the Dough (Autolyse Stage)
- In a large bowl, mix flour and water until fully combined.
- Let it rest for 30-45 minutes to allow the flour to absorb the water.
Step 3: Add the Sourdough Starter and Salt
- Mix in the sourdough starter and salt.
- Use your hands or a dough whisk to fully incorporate the ingredients.
Step 4: Stretch and Fold the Dough
- Instead of kneading, use the stretch and fold method:
- Stretch one side of the dough and fold it over.
- Turn the bowl and repeat 4-6 times.
- Repeat this process every 30 minutes for 2 hours to develop gluten structure.
Step 5: Bulk Fermentation (First Rise)
- Cover the dough with a damp towel and let it rest at room temperature for 6-8 hours (or overnight in the fridge).
- The dough should double in size.
Step 6: Shape the Dough
- Gently remove the dough from the bowl.
- Shape it into a round or oval loaf by folding the edges toward the center.
- Place the dough into a floured proofing basket or bowl.
Step 7: Second Rise (Proofing)
- Cover and let it rise for 1-2 more hours at room temperature.
- If you prefer, refrigerate the dough overnight for a deeper flavor.
Step 8: Preheat the Oven
- Preheat your oven to 475°F (245°C).
- Place a Dutch oven or baking stone inside to heat up.
Step 9: Score the Dough
- Turn the dough onto parchment paper.
- Use a sharp knife or bread lame to make a deep slash across the surface.
Step 10: Bake the Sourdough Bread
- Place the dough into the preheated Dutch oven.
- Cover and bake for 20 minutes.
- Remove the lid and bake for another 20-25 minutes until golden brown.
Step 11: Cool and Enjoy
- Let the bread cool on a wire rack for at least 1 hour before slicing.
Notes
-
Sourdough Starter: Make sure your starter is active and bubbly before using. It should have been fed 4–6 hours prior and passed the float test.
-
Flour Options: Bread flour provides the best structure, but you can experiment with whole wheat or rye for added flavor and texture.
-
Proofing Times: Always adjust fermentation times based on your room temperature—warmer kitchens ferment faster.
-
Cold Proofing: Overnight cold fermentation (8–12 hours) enhances flavor and makes the dough easier to handle.
-
Shaping Tip: Handle the dough gently to preserve gas bubbles and achieve an airy crumb.
-
Storage: Store at room temperature wrapped in a linen bag or towel. Freeze sliced for quick access.
-
Variations: Try adding olives, herbs, cheese, or seeds during bulk fermentation for extra flavor.


