INTRODUCTION & RECIPE BEGINNINGS
You know those weeknights when the fridge is half-empty, everyone’s starving, and you need dinner on the table yesterday? Yep, I’ve been there. That’s exactly why this Ground Beef Mongolian Noodles recipe has become a total lifesaver in my house. It’s fast, it’s flavour-packed, and it only takes about 25 minutes from start to finish — perfect for those busy evenings when time (and patience) is running low!
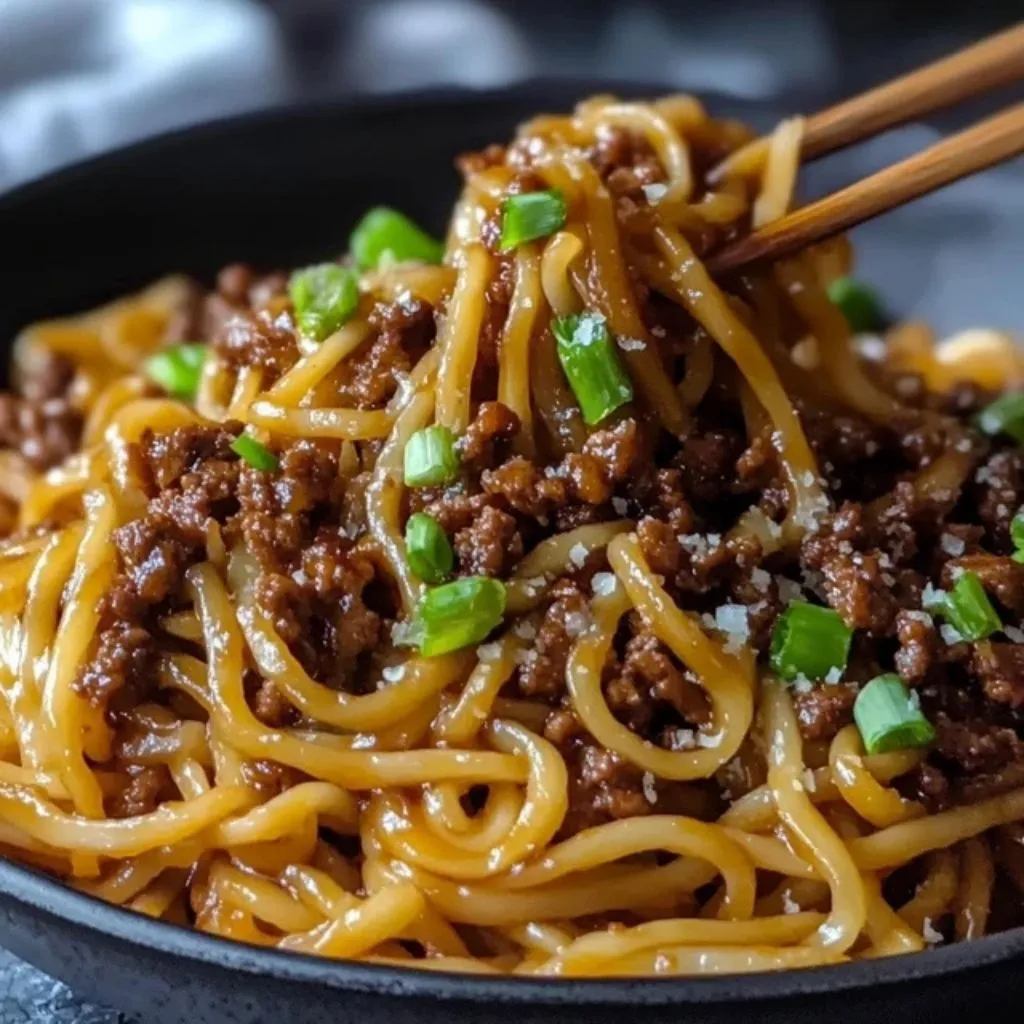
This recipe brings together tender noodles, savoury beef, and a glossy, sweet-and-salty Mongolian-inspired sauce that tastes like takeout — but better. And the best part? You probably already have most of the ingredients in your kitchen!
I first whipped this up on a whim when we were craving noodles but didn’t want to order out again. I tossed together some pantry staples — soy sauce, hoisin, brown sugar — and crossed my fingers. One bite in and we were hooked. Now it’s a go-to meal that my whole family loves, and I’m excited to share it with you!
Let’s dive in and get started on this cozy, satisfying dish. You’ll want to bookmark this one — trust me.
Ingredients You’ll Need:
-
225g linguine or udon noodles (fresh udon if you can get them = chef’s kiss)
-
450g ground beef mince
-
1 tbsp vegetable oil
-
4 cloves garlic, minced
-
1 tsp fresh grated ginger
-
120ml soy sauce
-
60g brown sugar
-
60ml beef stock (or just water)
-
1 tbsp hoisin sauce
-
Cornflour slurry: 1 tbsp cornflour + 2 tbsp water
-
½ tsp red pepper flakes (optional for a little heat)
-
3 spring onions, sliced (for garnish)
-
1 tbsp sesame seeds (for garnish)
Step 1: Boil the Noodles
Start by bringing a large pan of salted water to a boil. Toss in your noodles and cook according to the packet instructions. You’re aiming for al dente here — not mushy. Once done, drain them well and set them aside. If you’re using fresh udon, they only need a few quick minutes to cook and soak up flavor like a dream.
💡 Tip: Toss the drained noodles with a drizzle of sesame or vegetable oil if you’re prepping them ahead. This keeps them from sticking together while you work on the sauce.
Step 2: Cook the Beef
Next, heat up 1 tablespoon of vegetable oil in a large frying pan or wok over medium-high heat. Add your ground beef and break it up with a wooden spoon as it cooks. You’ll want it browned and cooked through — this usually takes about 5–6 minutes.
If there’s any excess fat in the pan, go ahead and drain that off. We want all the flavor, not the grease!
Step 3: Add Garlic and Ginger
Now it’s time to build some serious flavor. Stir in your minced garlic and grated ginger and cook for 1–2 minutes, just until your kitchen starts to smell amazing. That rich, aromatic base sets the tone for the entire dish — don’t skip it!
SAUCE, COMBINING & TIPS
Step 4: Make That Mongolian Sauce
Alright, now for the magic sauce. Into the pan with your beef, garlic, and ginger, add:
-
120ml soy sauce
-
60g brown sugar
-
60ml beef stock or water
-
1 tbsp hoisin sauce
Give everything a good stir, scraping the bottom of the pan to get all those delicious browned bits mixed in. Bring the sauce to a gentle simmer — this helps the sugar dissolve and the flavors meld together beautifully.
🎯 Note: Hoisin adds that unmistakable deep umami flavor, but if you’re out, don’t panic! You can sub in a bit of oyster sauce or even skip it in a pinch.
Step 5: Thicken It Up
Next, mix 1 tablespoon of cornflour with 2 tablespoons of cold water in a small bowl to create a slurry. Pour this into your simmering sauce and stir well. Let it cook for 2–3 minutes more. The sauce should thicken into a glossy, luscious coating — exactly what we’re after!
If you like a little kick, now’s your chance to stir in ½ teaspoon of red pepper flakes. Totally optional, but it gives the dish a lovely warmth without being too spicy.
Step 6: Bring It All Together
Time for the grand finale! Toss your cooked noodles into the pan with the sauce and beef. Use tongs or two forks to really mix everything well, making sure the noodles are completely coated in that gorgeous sticky sauce.
Let everything cook together for a minute or two, just until the noodles are heated through and glossy.
Step 7: Garnish and Serve
Once everything’s combined and piping hot, take the pan off the heat. Sprinkle over your sliced spring onions and a good pinch of sesame seeds.
Serve immediately — and don’t be surprised if your family is already hovering nearby with forks in hand.
Handy Tips & Variations
-
Use fresh udon noodles if you can find them — they’re soft, chewy, and soak up sauce like little flavor sponges.
-
Leftovers? Pop them in an airtight container and refrigerate for up to 2 days. Reheat in a pan with a splash of water to loosen the sauce.
-
Make it vegetarian: Swap the beef for Quorn mince or crumbled tofu. It’s just as tasty and super satisfying.
-
Gluten-free? Use tamari instead of soy sauce and grab gluten-free noodles.
Honestly, this dish is the total package: quick, hearty, comforting, and totally flexible. You can switch up the protein, add in some veggies (broccoli, snow peas, or bell peppers are awesome), or dial the heat up or down depending on your crew’s taste.
🧠 FAQ: Ground Beef Mongolian Noodles
1. Can I use spaghetti instead of udon or linguine?
Absolutely! Spaghetti or even ramen noodles work just fine. Just aim for something that can hold the sauce well.
2. Can I make this recipe ahead of time?
Yes, it keeps well in the fridge for about 2 days. Just reheat it gently in a pan with a splash of water or broth to revive the sauce.
3. Is there a way to make it healthier?
Sure! Use lean ground beef or swap in ground turkey or chicken. You can also cut the sugar slightly if you prefer a less sweet sauce.
4. What vegetables can I add to this recipe?
Great additions include sliced bell peppers, broccoli florets, snow peas, or shredded carrots. Just toss them in when the beef is almost cooked through.
5. Can I freeze this?
Not really recommended — the noodles can get mushy after thawing. It’s best enjoyed fresh or as leftovers within a couple of days.
6. What can I use instead of hoisin sauce?
If you don’t have hoisin, try a mix of soy sauce and a touch of honey or molasses. It won’t be exactly the same, but it’s a great stand-in.
7. Is this recipe spicy?
Only if you add the red pepper flakes! You can leave them out or adjust the amount to suit your heat preference.
Wrapping Things Up
And there you have it — Ground Beef Mongolian Noodles that are quick, comforting, and full of crave-worthy flavor. Whether you’re feeding picky eaters, cooking for two, or just want something cozy after a long day, this recipe is guaranteed to hit the spot.
If you give this recipe a try, I’d love to hear what you think! Did you tweak it with extra veggies or switch up the protein? Let me know in the comments — and don’t forget to share your photos. We’re all about those saucy noodle moments around here.
Until next time, happy cooking and enjoy those slurpy bites of goodness! 🍜
Print
Quick and Easy Ground Beef Mongolian Noodles – A 25-Minute Weeknight Dinner Hero!
- Total Time: 25 minutes
Description
These Ground Beef Mongolian Noodles are your new go-to for fast and satisfying weeknight dinners! Made with tender noodles, savory ground beef, and a glossy, sweet-and-salty Mongolian-style sauce, this dish comes together in just 25 minutes. With rich umami flavor from soy sauce, hoisin, and fresh aromatics, it’s a simple yet bold meal that’s sure to be a hit with the whole family. Use udon, linguine, or even spaghetti — whatever you have on hand. Bonus: it reheats beautifully, so leftovers are just as tasty!
Ingredients
-
225g linguine or udon noodles
-
450g ground beef mince
-
1 tbsp vegetable oil
-
4 cloves garlic, minced
-
1 tsp fresh ginger, grated
-
120ml soy sauce
-
60g brown sugar
-
60ml beef stock (or water)
-
1 tbsp hoisin sauce
-
1 tbsp cornflour mixed with 2 tbsp cold water (for thickening)
-
½ tsp red pepper flakes (optional)
-
3 spring onions, sliced (for garnish)
-
1 tbsp sesame seeds (for garnish)
Instructions
-
Cook the noodles:
Bring a large pot of salted water to a boil. Cook the noodles according to the package directions until al dente. Drain and set aside. -
Cook the beef:
Heat the vegetable oil in a large skillet or wok over medium-high heat. Add the ground beef and cook for 5–6 minutes, breaking it up with a spoon, until browned. Drain excess fat if necessary. -
Add aromatics:
Stir in the minced garlic and grated ginger. Cook for 1–2 minutes until fragrant. -
Make the sauce:
Add the soy sauce, brown sugar, beef stock (or water), and hoisin sauce. Stir to combine and bring to a gentle simmer. -
Thicken the sauce:
Stir in the cornflour slurry and simmer for 2–3 minutes, or until the sauce thickens. Add red pepper flakes if using. -
Combine noodles and beef:
Toss the cooked noodles into the sauce and beef mixture. Stir until everything is well coated and heated through. -
Garnish and serve:
Top with sliced spring onions and sesame seeds. Serve hot and enjoy!
Notes
-
Noodle options: Fresh udon noodles work best for soaking up the sauce, but linguine or even spaghetti also work great.
-
Vegetarian version: Swap ground beef for Quorn mince or firm tofu.
-
Storage: Store leftovers in the fridge for up to 2 days. Reheat gently in a pan with a splash of water.
-
Spice it up: Add more red pepper flakes or a drizzle of chili oil for a spicier version.
-
Add veggies: Stir-fry broccoli, snow peas, or bell peppers with the beef for an extra veggie boost.
- Prep Time: 10 minutes
- Cook Time: 15 minutes


