

Introduction & The First Steps of Baking
There’s something undeniably charming about a Victoria sponge cake. Maybe it’s the simple elegance of its layers — golden sponge, sweet jam, and a billow of softly whipped cream. Or maybe it’s the nostalgic comfort it brings, like a warm afternoon spent in a sunny kitchen with the scent of baking butter wafting through the air. Whatever it is, this classic British bake has stood the test of time — and today, we’re giving it a delightful little twist.
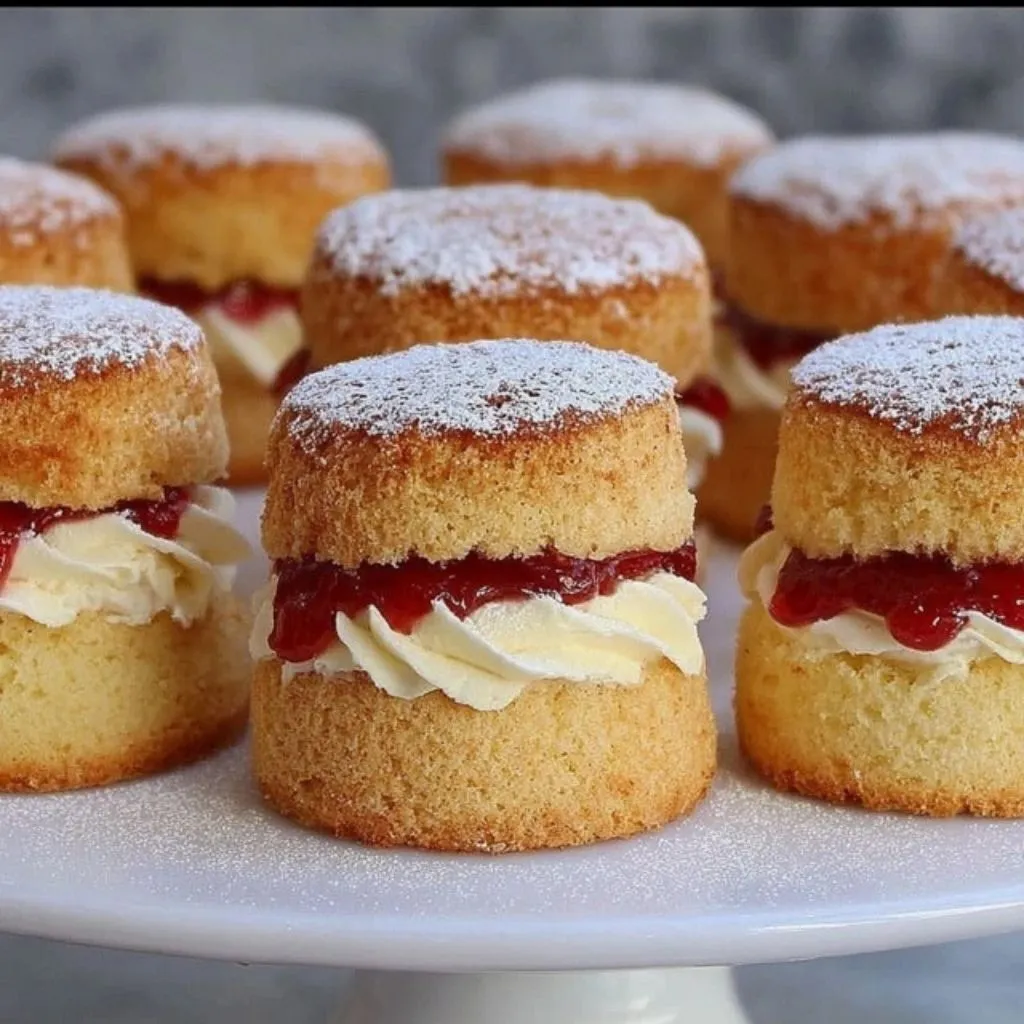
Say hello to Mini Victoria Sponge Cakes — the same classic you know and love, but in bite-sized form. These dainty sponges are perfect for garden parties, bridal showers, bake sales, or simply as an excuse to make your afternoon cuppa a little more special. Because honestly, who can resist a mini cake?
This recipe captures everything you adore about a traditional Victoria sponge but makes it wonderfully easy to share (or not share — no judgment here!). Each little sponge is perfectly soft, lightly golden, and filled with sweet strawberry jam and whipped cream. The best part? You don’t need any fancy equipment or professional skills — just a good whisk, a muffin tin, and a bit of love.
Let’s get baking, shall we?
Ingredients You’ll Need
Here’s everything to gather before you start:
-
Unsalted butter: 1 cup (200g), softened, plus extra for greasing
-
Caster sugar: 1 cup (200g)
-
Medium eggs: 4
-
Self-raising flour: 1½ cups (200g)
-
Baking powder: 1 tsp
-
Whole milk: 2 tbsp
-
Strawberry jam: 4 tbsp
-
Double cream: ⅔ cup (150ml), whipped to soft peaks
-
Icing sugar: For dusting
Tip: Bring your ingredients to room temperature before starting — it helps create that light, even texture we love in a sponge.
Step 1: Prepare Your Tin and Preheat
Start by preheating your oven to 350°F (fan 325°F). Grease a 12-hole mini sandwich tin or deep muffin tray and line the bases with small circles of baking paper. This ensures your cakes release easily once baked (because there’s nothing worse than a stuck sponge!).
Step 2: Whip Up the Butter and Sugar
In a large mixing bowl, beat the butter and caster sugar together until the mixture is very pale, light, and fluffy. This step is key — it’s what gives your cakes that dreamy, airy texture. You’ll know it’s ready when it looks almost whipped, not grainy.
If you’re using an electric mixer, go for about 3–4 minutes on medium-high speed. If you’re doing it by hand, consider it your arm workout for the day!
Step 3: Add the Eggs
Next, add the eggs one at a time, beating well after each addition. If the mixture starts to curdle (which can happen if the eggs are a little cold), just toss in a spoonful of your measured flour and keep mixing. It’ll come together beautifully.
Step 4: Combine the Dry Ingredients
Now, sift the flour and baking powder together. Gently fold them into the batter using a spatula or large metal spoon — the key word here is gently. Overmixing can knock out the air you worked so hard to whip in earlier, leaving you with dense cakes. And nobody wants that!
Finally, stir in the milk, just enough to loosen the batter to a soft, dropping consistency.
Step 5: Fill the Tins
Divide the mixture evenly among the holes in your prepared tray. A small cookie scoop or tablespoon makes this job neat and easy. Smooth the tops, then make a tiny dip in the center of each one — it helps them bake evenly and prevents domed tops (a small trick that makes assembling later much easier).
Now it’s time for the oven magic!
Baking, Filling & Helpful Tips
Step 6: Bake Until Golden
Pop your tray into the preheated oven and bake for 15–18 minutes. You’ll know they’re done when the tops are golden, springy to the touch, and a skewer inserted into the center comes out clean.
Once baked, let them cool in the tin for about 5 minutes, then carefully turn them out onto a wire rack. Peel off the baking paper circles and leave the cakes to cool completely. Patience here pays off — warm sponges and cream are not friends!
Step 7: Slice and Fill
When your mini sponges are completely cool, use a serrated knife to slice each cake horizontally into two layers.
Spread the bottom halves with a layer of strawberry jam — not too thick, but enough for that sweet burst of flavor. Then, pipe or spoon on the whipped cream, keeping it light and fluffy. You can be rustic or neat — both look beautiful in their own way.
Cap each with the top half of the sponge and dust lightly with icing sugar. And there you have it — the most charming little cakes you ever did see.
A Few Helpful Tips
-
Jam Variations: Swap strawberry for raspberry or even lemon curd for a zesty twist.
-
Add Fruit: A slice of fresh strawberry or raspberry in the filling adds color and freshness.
-
Make Ahead: You can bake the sponges a day in advance — just fill them right before serving.
-
Freezing Tip: Freeze unfilled sponge halves for up to 2 months. Thaw, then fill and dust before serving.
-
Serving Idea: These look stunning on a tiered cake stand for tea parties or baby showers.
These little cakes are everything a Victoria sponge should be — buttery, light, and just sweet enough. But what makes them truly irresistible is how effortlessly they impress. They look fancy but come together in under 40 minutes. That’s what I call baking magic.
FAQs & Final Thoughts
Frequently Asked Questions
1. Can I make these as full-sized cakes instead of mini ones?
Absolutely! This same recipe works perfectly for an 8-inch sandwich cake. Just divide the batter between two tins and bake for about 20–22 minutes.
2. Can I use plain flour instead of self-raising flour?
Yes — just add 2 teaspoons of baking powder per 200g (1½ cups) of plain flour.
3. What’s the best way to whip the cream?
Use chilled double cream and a cold bowl. Whip until it forms soft peaks — over-whipping can make it grainy.
4. How do I keep them fresh?
Store filled cakes in the fridge for up to 2 days. Bring them to room temperature about 10 minutes before serving.
5. Can I make them dairy-free?
You can! Swap butter for a dairy-free spread and use coconut cream for the filling. They’ll still be deliciously light.
6. Why did my cakes sink in the middle?
This usually happens if the oven door was opened too early or the batter was overmixed. Make sure your oven is fully preheated before baking.
7. Can I add flavor to the sponge itself?
Definitely — a splash of vanilla extract or lemon zest in the batter adds a lovely touch.
Final Thoughts
There’s something wonderfully nostalgic about sitting down with a cup of tea and one of these mini Victoria sponges. They’re elegant without being fussy, and simple enough to whip up on a whim. Each bite has that perfect balance — soft sponge, fruity jam, and creamy filling — the very essence of British baking tradition.
Whether you’re hosting a garden party, treating yourself on a cozy weekend afternoon, or baking with little helpers, these mini Victoria sponge cakes are bound to bring smiles all around. So go ahead — preheat that oven, pull out your prettiest tea cups, and enjoy a taste of classic comfort in its most delightful form.
SEO Keywords Used Naturally:
mini victoria sponge cakes, classic british bake, easy victoria sponge recipe, afternoon tea cakes, mini sponge cake recipe, british dessert, mini cakes with jam and cream, bite-sized victoria sponge


")