The Banana Bread That Never Fails
Let me paint you a picture: It’s a lazy Sunday afternoon, your bananas have gone a little too ripe, and you’re not exactly in the mood for an elaborate bake. But you do want something cozy, simple, and reliably delicious. That’s when I always reach for Mary Berry’s banana bread recipe. It’s been a go-to in my kitchen for years, and it never lets me down.
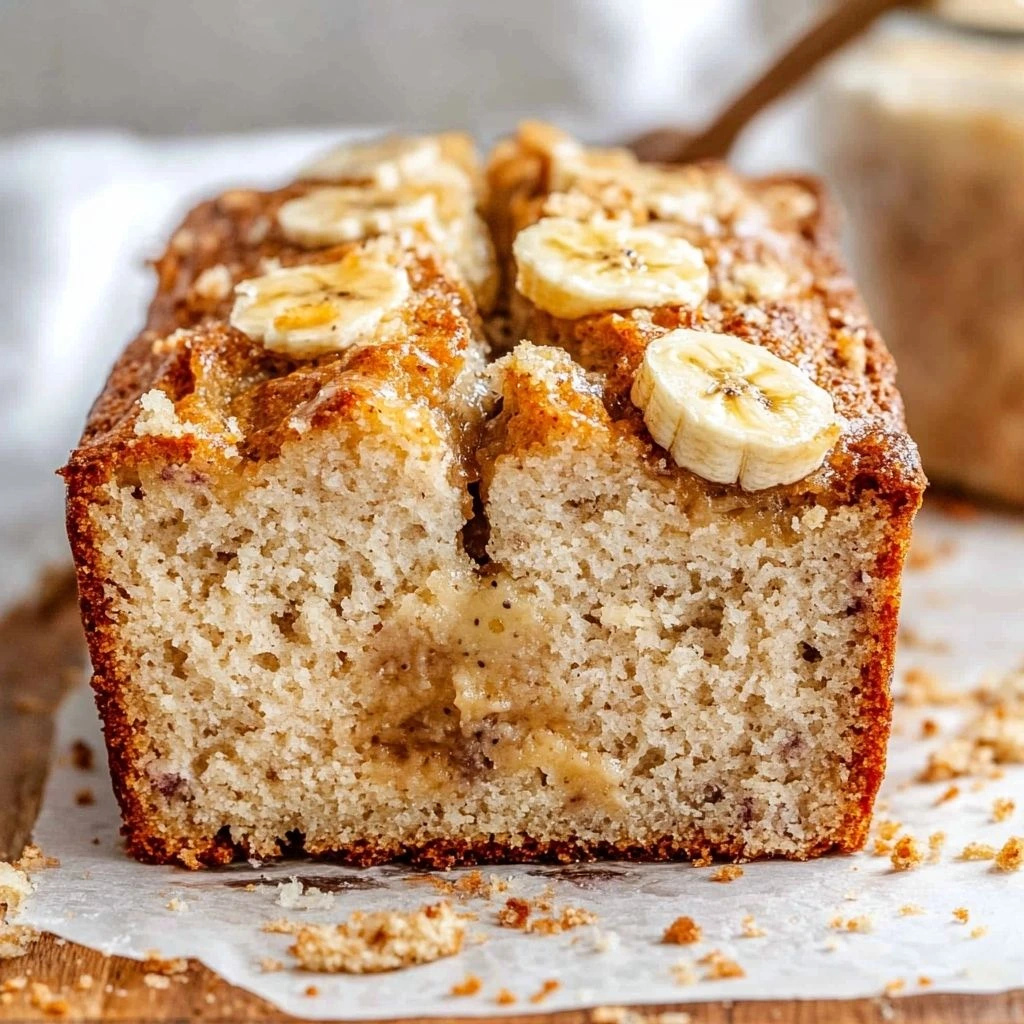
This banana loaf is everything you want it to be—moist, lightly sweet, and spiced just enough to keep it interesting. Plus, it’s the perfect use for those speckled bananas we all have sitting around (you know the ones). What I love most is that it’s quick to make, doesn’t require fancy ingredients, and gives you that wholesome, just-like-Grandma-made-it feeling. Oh, and did I mention it pairs perfectly with a hot cup of tea?
Now let’s get into the recipe. You don’t need to be a star baker to pull this one off—just a bowl, a wooden spoon, and those overripe bananas.
📝 Ingredients (Serves 8–10)
Here’s what you’ll need to make this cozy loaf:
-
3 large ripe bananas (about 300g when mashed)
-
100g butter, softened to room temperature
-
100g caster sugar
-
2 large eggs, beaten
-
200g self-raising flour
-
1 tsp baking powder
-
1 tsp vanilla extract
-
50g chopped walnuts (optional, but highly recommended for a little crunch!)
Quick Tip: No self-raising flour on hand? You can substitute it with plain flour + 2 tsp of baking powder. Easy fix!
Step 1: Getting Everything Prepped
Before you start mixing, take a few minutes to get your setup ready. Trust me, having everything in place makes baking feel way less chaotic. Go ahead and preheat your oven to 180°C fan (or 160°C if you’re using a conventional oven). Then grease and line a 900g loaf tin—parchment paper works best for an easy lift once the loaf is baked.
Now let’s deal with those bananas. Peel and mash them in a bowl until smooth. You can leave a few little chunks if you like a bit of banana texture in your loaf, but I usually mash them pretty thoroughly.
Step 2: Mixing the Batter

In a large mixing bowl, beat together your softened butter and caster sugar until it turns light and fluffy. This step is important—it helps the loaf rise nicely and gives it that lovely, airy crumb. If your butter is still cold, give it a quick zap in the microwave (about 10–15 seconds should do it).
Once the butter and sugar are creamed, gradually pour in the beaten eggs while continuing to mix. Don’t worry if the mixture looks a bit curdled at this stage—once the dry ingredients go in, everything comes together.
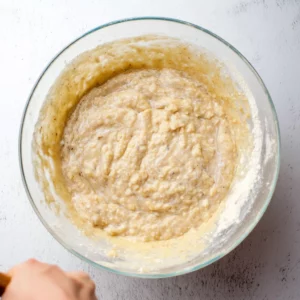
Fold in your self-raising flour, baking powder, and vanilla extract. Stir until it’s just combined (over-mixing can make banana bread a little tough). Now it’s time to bring in the star of the show: your mashed bananas. Gently fold them into the batter until everything is well blended.
If you’re using walnuts, now’s the time to stir them in. They add such a lovely texture, and that nutty crunch really complements the soft banana flavor. But if you’re more of a chocolate chip person, I won’t stop you from swapping them in. (We’ll talk about that more in Part 2!)
Step 3: Ready for the Oven
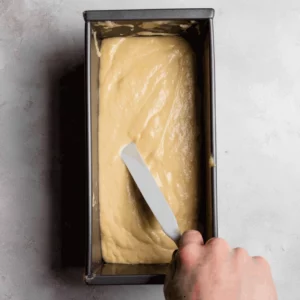
Once your batter is ready, pour it into the prepared tin and smooth the top out with a spatula or the back of a spoon. That’s it! You’re ready to bake.
Pop it into the oven for 50–60 minutes. Every oven is a little different, so I like to check mine around the 50-minute mark. You’ll know it’s done when the top is golden brown and a skewer inserted in the center comes out clean. If the top is browning too quickly, you can loosely cover it with foil for the last 10 minutes or so.
When it’s finished baking, remove the loaf from the oven and let it cool in the tin for about 10 minutes. Then gently transfer it to a wire rack to cool completely (this is the hardest part—waiting while the smell fills your kitchen!).

Coming up in Part 2: We’ll talk about baking tips, fun twists (like adding chocolate chips or yogurt), and how to keep your banana bread moist and flavorful for days. Stay tuned—you won’t want to miss these simple upgrades that take Mary’s classic loaf to the next level!
Tips, Twists & Keeping It Moist
So, your banana bread is in the oven, and your kitchen smells like pure comfort. That golden loaf is baking away, and you’re wondering: How can I make this even better next time? Well, that’s what Part 2 is all about.
Mary Berry’s classic banana bread is already perfection, but with a few little tweaks and tips, you can personalize it, troubleshoot common baking snags, and keep it tasting fresh for days. Let’s dive into the rest of the recipe journey and those little baker’s secrets that make all the difference.
Add a Moisture Boost
One of the most common questions I get about banana bread is how to keep it moist—not just straight out of the oven, but for the next couple of days too.
Honestly, this recipe is already super moist thanks to the mashed bananas, but if you want an extra soft, almost melt-in-your-mouth texture, try this:
Add 1 tablespoon of honey or plain yogurt to the batter before baking. It sounds simple, but it works. Honey gives a light sweetness and helps the crumb stay tender, while yogurt adds moisture without making the loaf dense.
Pro Tip: If using yogurt, make sure it’s not too cold straight from the fridge—room temp mixes better and prevents curdling.
Chocolate Chip Twist 🍫
I love walnuts, but let’s be real—sometimes you’re just craving a little chocolate. Swap out the walnuts and stir in 50g of dark chocolate chips for a richer, dessert-like banana loaf. Semi-sweet or even milk chocolate chips work too, but I find that dark chocolate balances the sweetness beautifully.
You can also go half-and-half with nuts and chocolate, or swirl in a spoonful of Nutella if you’re feeling fancy (and let’s be honest—who isn’t?).
No Self-Raising Flour? No Problem
If your pantry’s missing self-raising flour (it happens to the best of us), don’t run to the shop just yet. You can make your own substitute using ingredients you probably already have.
Here’s how:
-
Use 200g plain flour
-
Add 2 teaspoons baking powder
Mix them together well before adding to your batter to make sure the baking powder is evenly distributed. This DIY version works like a charm and still gives you that lovely rise and fluffy texture.
Bake It Just Right
By now, your banana bread is likely nearly done or cooling on the rack. But let’s talk baking time for a minute.
The sweet spot is usually 50–60 minutes at 180°C (fan). However, ovens can be temperamental (we’ve all been there), so here are a few quick checks:
-
The top should be a warm golden brown, not too pale.
-
A skewer or toothpick inserted in the center should come out clean or with just a few moist crumbs.
-
The loaf should spring back lightly when pressed in the center.
If the top starts browning too early but the inside isn’t done yet, cover it loosely with foil around the 40-minute mark to stop it from over-browning. Easy fix!
Storing & Freezing Tips
Once cooled, this banana bread stays moist and tender for up to 3 days when stored in an airtight container at room temperature. I usually wrap it in parchment or foil and keep it in a cake tin—it feels a bit old-school, but it works.
Want to make a batch for later? This loaf freezes beautifully. Just slice it up, wrap individual slices in plastic wrap or parchment, and pop them in a freezer bag. They’ll keep for up to 2 months. When you’re ready for a slice, just let it defrost at room temp—or pop it in the microwave for 20 seconds if you’re impatient like me.
Optional Glaze or Toppings
Now, this is totally extra, but if you’re making this for a brunch or want to dress it up a bit, you can:
-
Dust with icing sugar just before serving.
-
Drizzle with a quick glaze made from icing sugar and lemon juice for a zesty touch.
-
Spread a little butter or cream cheese on each slice. (Yes, really.)
I’ve even added a few slices of banana on top before baking for that rustic, bakery-style look—but heads up: it can make the top a bit more moist, so bake for a couple extra minutes if you try this!
So whether you’re sticking with the original or playing around with add-ins, Mary Berry’s banana bread is endlessly flexible. It’s forgiving, quick, and turns out like a dream every time. I’ve made it more times than I can count, and it’s still the one I reach for when I want something simple and satisfying.
Up next: In Part 3, I’ll answer the most common banana bread questions (like what to do if your loaf sinks in the middle), plus share a few final thoughts to help you make the most of this timeless bake.
Keep reading—it’s about to get even more helpful! 👇
FAQs & Final Thoughts on Mary Berry’s Banana Bread
By now, your banana bread has cooled, been sliced, maybe even shared (if you’re feeling generous). Hopefully, your kitchen smells amazing and you’re enjoying that first bite—soft, golden, banana-rich, and just the right amount of sweet. It’s the kind of bake that feels cozy and comforting without trying too hard. And really, that’s the magic of Mary Berry’s recipes. They just work.
Before we wrap things up, let’s go over a few frequently asked questions I often hear when it comes to banana bread. Whether you’re a beginner baker or just looking to perfect your loaf, these tips should help you feel confident every time.
🍌 FAQ: Your Banana Bread Questions, Answered
1. Why did my banana bread sink in the middle?
This usually means it was underbaked. Ovens vary, so always check doneness with a skewer or toothpick. If it comes out with wet batter, give it another 5–10 minutes and tent with foil if needed.
2. Can I use frozen bananas?
Absolutely! Just thaw them completely and drain off any excess liquid before mashing. They’ll be softer and sweeter, which actually works great in this recipe.
3. How do I keep banana bread moist?
Store it in an airtight container, wrapped in parchment or foil, at room temperature. For an extra moist loaf, add a tablespoon of honey or yogurt to the batter before baking.
4. Can I make this recipe gluten-free?
Yes! Swap the self-raising flour for a good-quality gluten-free self-raising blend. Add an extra ¼ tsp of baking powder if needed to ensure a good rise.
5. What’s the best way to freeze banana bread?
Let the loaf cool completely, then slice it. Wrap individual slices in parchment paper and freeze in a sealed freezer bag. Just pull out a slice when needed—let it thaw or microwave it for 20 seconds.
6. Can I double the recipe?
You can! Just divide the batter between two loaf tins and bake as usual, checking for doneness around the 55-minute mark.
7. What else can I add to this recipe?
Go wild! Try cinnamon, nutmeg, a swirl of peanut butter, or even a handful of blueberries. The base recipe is super forgiving and takes well to creative mix-ins.
🧁 Final Thoughts: A Recipe You’ll Return to Again and Again
There’s a reason this Mary Berry banana bread recipe has stood the test of time—it’s classic, dependable, and effortlessly delicious. Whether you’re new to baking or just looking for that go-to loaf recipe you can always count on, this one’s a keeper.
What I love most is how flexible it is. You can switch things up based on what’s in your pantry (chocolate chips? Sure. Yogurt? Why not?). And no matter how you tweak it, the result is always comforting, tender, and just sweet enough.
So go ahead—make it your own, bake it often, and maybe even pass it on. Recipes like this are meant to be shared.
And if you give this a try, I’d love to hear how it turned out for you! Did you go classic or add your own spin? Let me know in the comments or tag your bake—because honestly, there’s nothing better than seeing these warm, golden loaves pop up in other kitchens.
Happy baking, friends. And don’t forget the cup of tea to go with it. ☕
Coming Soon: Want more cozy bakes like this one? Stay tuned for Mary-inspired classics like her lemon drizzle cake or her all-in-one Victoria sponge—perfect for your next tea break.
Print
Mary Berry’s Classic Banana Bread Recipe – Moist, Easy & Foolproof
- Total Time: 1 hour 5 minutes
Description
This classic Mary Berry Banana Bread is everything a banana loaf should be—soft, moist, and packed with rich banana flavor. Made with simple pantry ingredients and no complicated steps, it’s the perfect bake for beginners or anyone looking for a reliable, comforting treat. Customize it with chopped walnuts, chocolate chips, or even a spoonful of honey or yogurt for an extra moist texture. Whether served with tea, packed in lunchboxes, or frozen for later, this banana bread is a cozy staple you’ll want to make again and again.
Ingredients
-
3 large ripe bananas (about 300g when mashed)
-
100g butter, softened
-
100g caster sugar
-
2 large eggs, beaten
-
200g self-raising flour
-
1 tsp baking powder
-
1 tsp vanilla extract
-
50g chopped walnuts (optional)
Instructions
1. Preheat & Prepare:
-
Preheat your oven to 180°C (fan) or 160°C (conventional).
-
Grease and line a 900g loaf tin (roughly 2lb).
2. Mix Wet Ingredients:
-
Mash the bananas until smooth and set aside.
-
In a large bowl, beat the butter and sugar until pale and fluffy.
-
Gradually add the beaten eggs, mixing continuously.
3. Add Dry Ingredients:
-
Gently fold in the self-raising flour, baking powder, and vanilla extract.
-
Stir in the mashed bananas until fully combined.
-
Fold in chopped walnuts, if using.
4. Bake:
-
Pour the batter into the prepared loaf tin and level the top.
-
Bake for 50–60 minutes or until golden brown and a skewer inserted in the center comes out clean.
-
If the top browns too quickly, cover loosely with foil halfway through.
5. Cool & Serve:
-
Let the loaf cool in the tin for 10 minutes.
-
Transfer to a wire rack to cool completely before slicing.
Notes
-
Extra Moisture: Add 1 tbsp honey or plain yogurt to the batter for a softer texture.
-
Chocolate Twist: Replace walnuts with 50g dark chocolate chips.
-
DIY Self-Raising Flour: Use 200g plain flour + 2 tsp baking powder if you don’t have self-raising.
-
Storage: Keeps for 3 days in an airtight container. Can be frozen for up to 2 months.
-
Serving Tip: Tastes great with a little butter or cream cheese spread on top.
- Prep Time: 15
- Cook Time: 50


