

A Sweet Slice of Nostalgia + Getting Started
There are some recipes that never lose their charm, and this Iced Cherry Bakewell Traybake Cake is one of them. For me, it brings back memories of Sundays at my nan’s house — the kettle on, the good china out, and the unmistakable smell of almond sponge wafting through the kitchen. Forget church bells, the true ritual was tea time. And while everyone else might have gone straight for the middle slices, I was always a corner-piece girl. More icing, more sponge, more happiness.
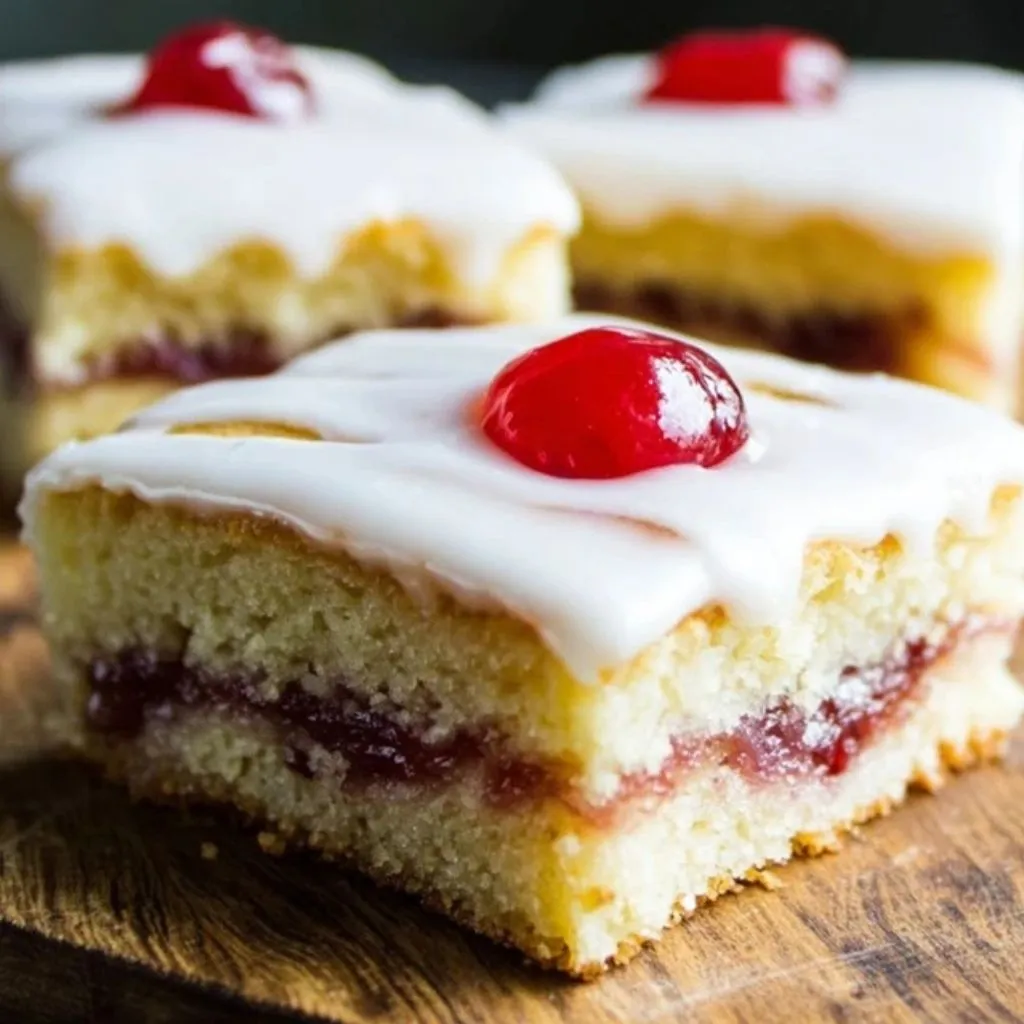
That’s the thing about traybakes: they’re made for sharing, but they still manage to feel indulgent. This Cherry Bakewell traybake is no exception. It’s got everything you want from the classic British tart but in cake form — a soft almond sponge, a layer of tangy raspberry jam, sweet icing on top, and those iconic ruby-red glacé cherries proudly crowning each slice.
And the best part? It’s one of those recipes that looks way more impressive than the effort it takes. If you’ve got a bowl, a whisk, and a rectangular tin, you’re halfway there.
So, let’s get started.
Ingredients You’ll Need

-
200g unsalted butter, softened
-
200g caster sugar
-
4 medium eggs
-
100g ground almonds
-
100g self-raising flour
-
1 tsp almond extract
-
150g raspberry jam
-
250g icing sugar
-
3–4 tbsp warm water
-
8–12 glacé cherries, halved
This list alone gives me excitement. Butter, sugar, and eggs already mean cake. Add in almonds, jam, and cherries? Now we’re talking Bakewell magic.
Step 1: Prep That Pan
Preheat your oven to 160°C fan (or 180°C conventional). Grab a 20x30cm rectangular tin, line it with baking paper, and you’re good to go. This little step makes all the difference when it comes to lifting the cake out neatly later.
Step 2: Creamy, Dreamy Batter
In a mixing bowl, beat together the butter and sugar until pale, fluffy, and creamy. This is where you set the stage for a light sponge, so don’t rush it. Add the eggs one by one, mixing well after each.
Once the eggs are in, fold through the ground almonds, flour, and almond extract. Be gentle here — just enough to combine everything without knocking out too much air.
Step 3: Jam Sandwich Layers
Spoon half of the sponge mixture into your prepared tin, spreading it out evenly. Then comes the sweet surprise: spread the raspberry jam across the sponge. Go gently so you don’t drag crumbs into the jam. Finally, smooth the remaining sponge mixture over the top.
Step 4: Bake Time
Slide the tray into the oven and bake for 35–40 minutes, until golden and risen. The kitchen will smell like almond heaven. When a skewer poked into the center comes out clean, you know it’s ready. Let the cake cool completely in the tin — as tempting as it is to ice it warm, patience is your friend here.
Icing, Decorating, and Tasty Tips
Now that your sponge is baked and cooled, it’s time to turn it into the true showstopper it’s meant to be. The iconic white icing with cherries on top is what makes this traybake instantly recognizable.
Step 5: Glossy White Icing
In a bowl, mix the icing sugar with 3–4 tablespoons of warm water. Start with less, then add more as needed. You’re aiming for a thick but pourable consistency. Too thin and it will run off the cake; too thick and it won’t spread nicely.
Pour the icing over the cooled sponge and use a palette knife or back of a spoon to gently spread it out to the edges. Don’t worry about perfection — a little unevenness just makes it look more homemade and charming.
Step 6: The Cherry on Top
Literally. Slice your glacé cherries in half and place them on top of the icing before it sets. Traditionally, you’d pop one cherry half per square, so space them out evenly in a grid pattern. Not only does this look neat, but it also helps when cutting later.
Step 7: Let It Set
The hardest part: waiting. Let the icing firm up completely before slicing into squares. If you try too early, you’ll end up with smudged icing. Trust me, the wait is worth it.
Tips & Tricks for the Best Bakewell Traybake
-
Jam swap: Raspberry is traditional, but cherry, strawberry, or even apricot jam all work beautifully.
-
Extra almond punch: Stir a drop of almond extract into your icing for a stronger Bakewell flavor.
-
Storage secrets: Keep it in an airtight tin for up to 4 days. The flavors actually get better by day two!
-
Freezer-friendly: You can freeze the sponge (without icing) for up to 3 months. Just defrost, then ice when you’re ready to serve.
-
Serving idea: Pair with a proper cup of English tea or, if you’re feeling indulgent, a scoop of vanilla ice cream.
This traybake is everything you want in a tea-time treat: simple, nostalgic, and utterly delicious.
FAQs + Wrapping It All Up
Before we finish, let’s answer a few common questions about making this Iced Cherry Bakewell Traybake Cake.
FAQ
1. Can I make this traybake gluten-free?
Yes! Just swap the self-raising flour for a good gluten-free self-raising blend. The ground almonds already help keep the sponge moist.
2. My icing is too runny — how do I fix it?
Add a little more icing sugar until it thickens up. Always add water slowly to avoid this in the first place.
3. Can I use fresh cherries instead of glacé?
You can, but glacé cherries give that traditional look and sweetness. Fresh cherries will work but might release extra juice.
4. How do I get clean slices without smudging the icing?
Use a sharp knife dipped in hot water, then wipe clean between cuts. This keeps your squares neat and pretty.
5. Do I have to use almond extract?
If you’re not a fan of almond, you can skip it, but it won’t have that classic Bakewell flavor. A touch of vanilla can be used instead.
6. Can I make it ahead for a party?
Absolutely. In fact, it tastes even better the next day once the flavors have settled.
7. Why did my cake sink in the middle?
That usually happens if the oven door is opened too soon or if the batter was overmixed. Don’t worry, the icing will cover a multitude of sins!
Final Thoughts
There you have it — the perfect Iced Cherry Bakewell Traybake Cake. It’s everything a good teatime bake should be: nostalgic, simple, and big enough to share (though no judgment if you don’t). Whether you’re a corner-piece lover or someone who dives straight for the middle, every bite delivers that almond-and-jam goodness topped with sweet icing and cherries.
So, the next time you’re looking for a bake that’s as comforting as it is impressive, give this recipe a try. Make it for Sunday tea, take it to a family gathering, or bake a batch just because. And don’t forget to let me know — are you a corner cutter or a center slicer?
Print
Iced Cherry Bakewell Traybake Cake – A Classic Tea Time Treat
- Total Time: 1 hour 45 minutes
- Yield: 16 squares
Description
This Iced Cherry Bakewell Traybake Cake is a teatime classic made simple. A soft almond sponge is layered with raspberry jam, topped with sweet icing, and finished with iconic glacé cherries. Perfect for family gatherings, afternoon tea, or when you just need a nostalgic slice of something sweet.
Ingredients
-
200g unsalted butter, softened
-
200g caster sugar
-
4 medium eggs
-
100g ground almonds
-
100g self-raising flour
-
1 tsp almond extract
-
150g raspberry jam
-
250g icing sugar
-
3–4 tbsp warm water
-
8–12 glacé cherries, halved
Instructions
-
Preheat oven to 160°C (fan) / 180°C (conventional). Line a 20x30cm rectangular tin with baking paper.
-
Cream butter and sugar together until light and fluffy.
-
Add eggs, one at a time, mixing well after each.
-
Fold in ground almonds, flour, and almond extract until just combined.
-
Spread half the mixture into the prepared tin.
-
Gently spread raspberry jam on top, being careful not to mix it with the sponge.
-
Top with remaining sponge mixture and smooth evenly.
-
Bake for 35–40 minutes until golden and a skewer comes out clean. Cool completely in the tin.
-
Mix icing sugar with warm water to make a thick but pourable icing.
-
Spread icing over cooled cake and top with halved glacé cherries.
-
Let set before slicing into 16 squares.
Notes
-
Jam Variations: Swap raspberry for cherry, strawberry, or apricot.
-
Extra Almond Flavor: Add a drop of almond extract to the icing.
-
Storage: Keep in an airtight container for up to 4 days — it tastes even better the next day.
-
Freezing: Freeze un-iced sponge for up to 3 months. Defrost and ice before serving.
-
Serving Tip: Pairs perfectly with a hot cup of tea or coffee.
- Prep Time: 20 minutes
- Cooling & Icing Time: 45 minutes
- Cook Time: 40 minutes
Nutrition
- Calories: 320 per square


")