In this article
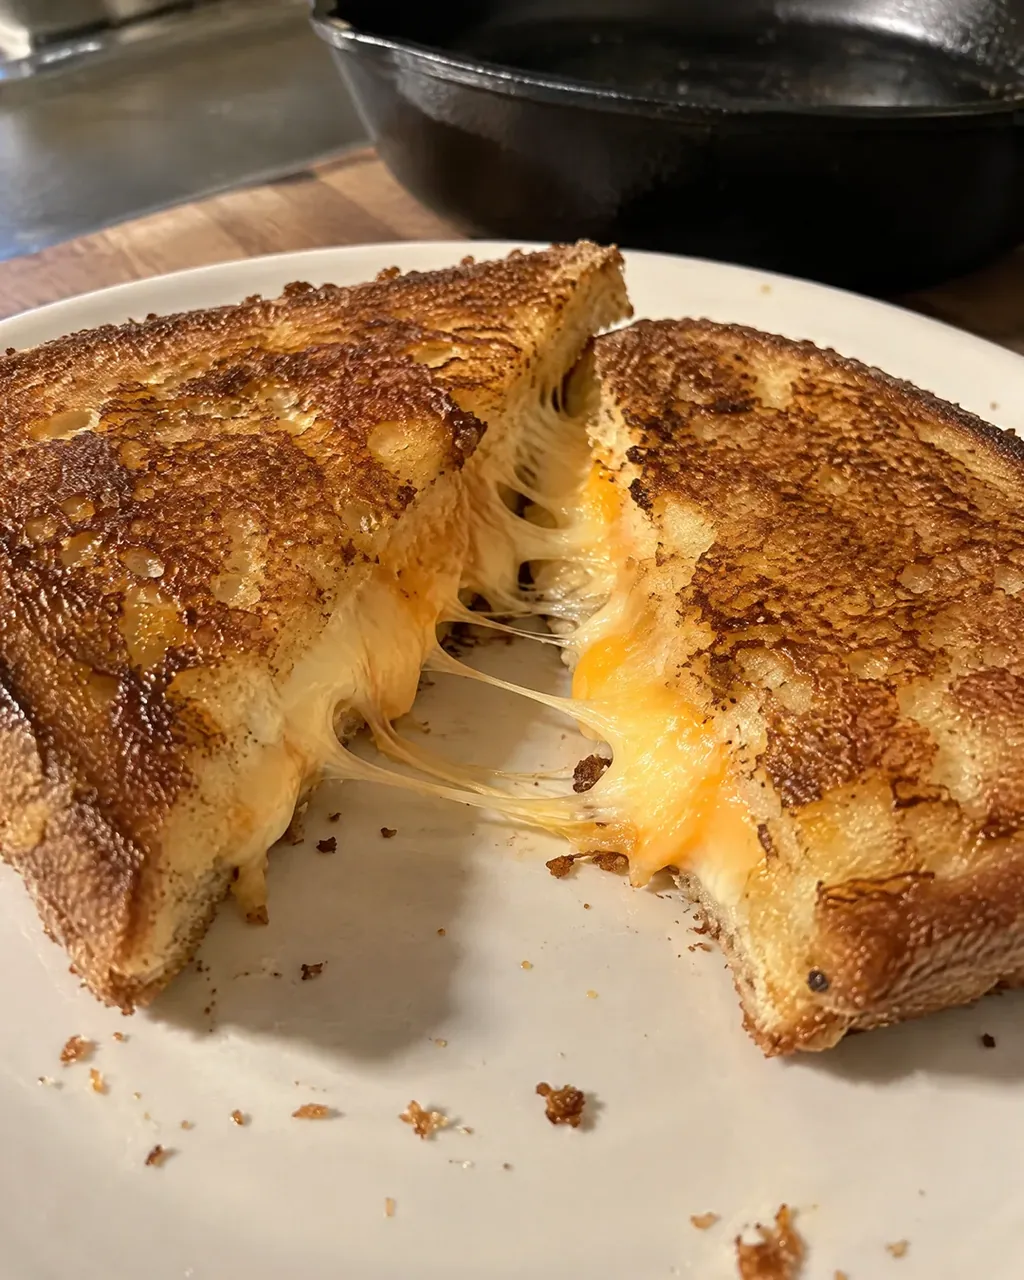
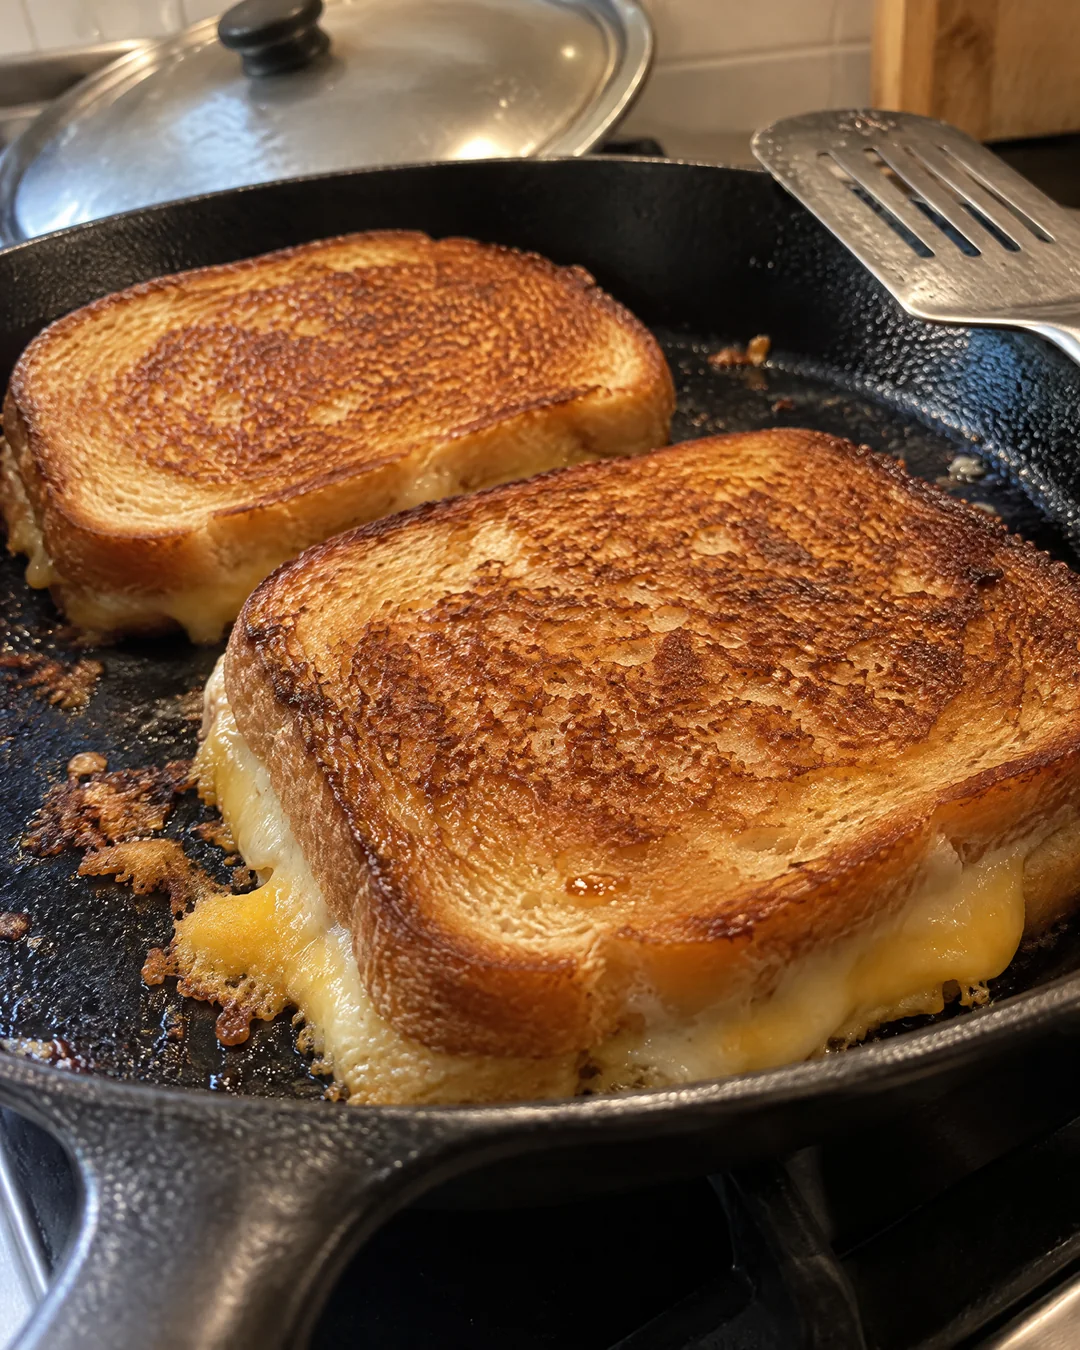
My mother never put butter on the outside of a grilled cheese. Not once. She kept a jar of mayonnaise by the stove, spread a thin layer on the outside of each slice of bread, and laid the sandwiches into a cold skillet. The first time a friend of mine saw it she made a face, and then she ate two. The crust comes out an even deep gold all the way to the corners, crisp like a cracker, and it does not taste of mayonnaise at all. It tastes like the best grilled cheese you ever had, which it is.
There are good reasons it works. Cold butter tears soft bread, and melted butter soaks in and leaves greasy patches. Mayonnaise is soft straight from the jar, so it spreads thin and even to the edges. It is made of oil and egg, and the oil has a higher smoke point than butter, so the bread browns slowly and evenly instead of scorching, and the little bit of egg helps it turn a deep, even gold. The other half of the trick is patience. A grilled cheese made on high heat burns on the outside while the cheese is still cold in the middle. Medium low heat and a lid for the first side melt the cheese all the way through by the time the bread is ready to turn.
Why this grilled cheese works
- Mayonnaise, not butter. It spreads without tearing the bread, browns evenly to the edges and does not burn as fast as butter.
- A cold skillet. The sandwiches go into a cold pan and heat up with it, so the bread toasts gradually instead of searing.
- Medium low heat. Slow heat lets the cheese melt completely before the outside gets too dark.
- A lid on the first side. It traps the heat around the sandwich and melts the cheese like a little oven.
- Two cheeses. Sharp cheddar for flavor, one slice of American cheese for the smooth melt that holds the sandwich together.
Ingredients
Makes 2 sandwiches. The measurements are in US cups and spoons with grams in brackets.
For two sandwiches
- 4 slices white sandwich bread
- 2 tablespoons mayonnaise (28g), about 1 teaspoon for the outside of each slice
- 1 cup shredded sharp cheddar (115g), 1/2 cup per sandwich
- 2 slices American cheese, 1 per sandwich
Plain soft white sandwich bread is the classic. Thick-sliced bread works too; add a minute with the lid on. Shred the cheddar yourself from a block if you can; it melts more smoothly than pre-shredded cheese.
How to make grilled cheese
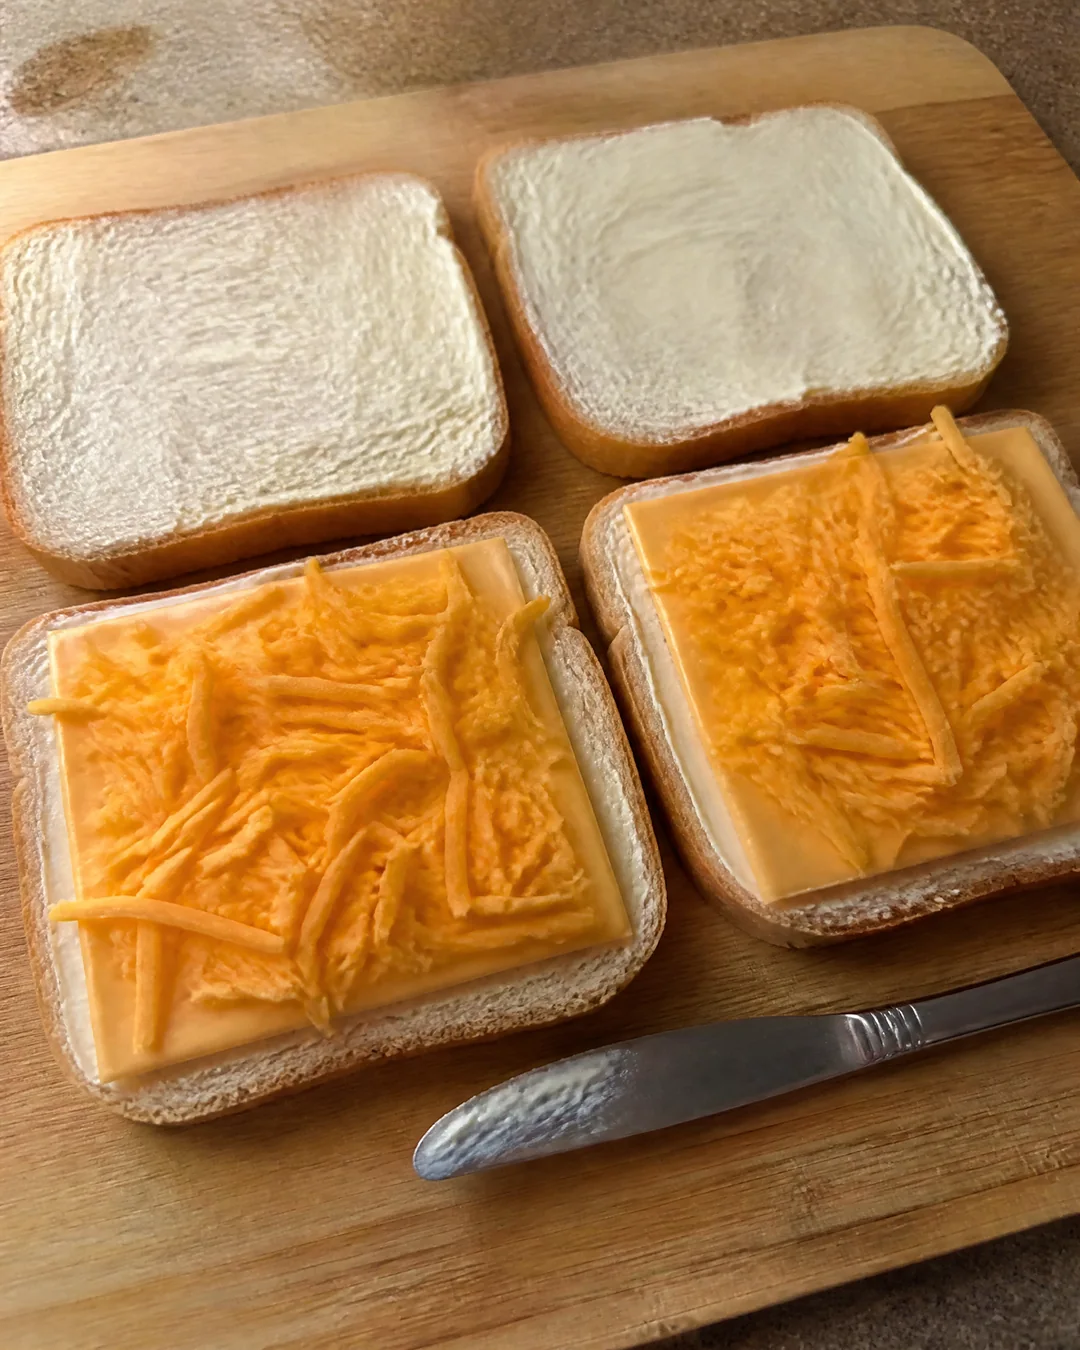
- Lay out the 4 slices of bread. Spread about 1 teaspoon of mayonnaise thinly on one side of each slice, all the way to the edges and corners. These are the outsides.
- Turn 2 slices mayonnaise side down. On each, lay 1 slice of American cheese and pile 1/2 cup of the shredded cheddar on top, keeping it a little in from the edges. Top with the other slices, mayonnaise side up.
- Set the sandwiches in a cold, dry skillet, large enough to hold both. Do not add butter or oil to the pan.
- Turn the heat to medium low. Cover the skillet with a lid and cook for 3 to 4 minutes, until the bottoms are a deep, even gold. Lift a corner with a spatula to check.
- Flip the sandwiches, leave the lid off, and cook 2 to 3 minutes more, until the second side is golden and the cheese is fully melted.
- Move them to a cutting board and let them rest for 1 minute, so the cheese sets just enough not to run out. Cut corner to corner and serve hot.
Tips that make the difference
- Spread the mayonnaise thin. A thick layer makes the outside soft instead of crisp.
- Keep the cheese a quarter inch from the edges so it melts inward and does not burn in the pan.
- If the bread browns before the cheese melts, turn the heat down. That is the whole lesson of grilled cheese.
- A cast iron skillet gives the most even color, but any heavy skillet works.
Variations
- With tomato. Lay a thin slice of ripe tomato on the cheese before closing the sandwich. Pat it dry first.
- Parmesan crust. Sprinkle a little finely grated Parmesan onto the mayonnaise before the sandwiches go in the pan, for a crisp, lacy crust.
- Three cheese. Swap half of the cheddar for Monterey Jack or Swiss.
- With tomato soup. The supper of every snow day of my childhood: serve it with a bowl of hot tomato soup for dunking.
Storage and make-ahead
Grilled cheese is best eaten within minutes of leaving the skillet. If you must hold it, keep it on a rack in a 200 degree oven for up to 10 minutes so the bottom does not steam.
Leftover sandwiches can be wrapped and refrigerated for a day. Reheat them in a dry skillet over low heat with the lid on, never in the microwave, which turns the bread soft and chewy.
You can assemble the sandwiches, mayonnaise and all, a few hours ahead and keep them covered in the refrigerator. Add a minute to the covered cooking time.
Frequently asked questions
Does a grilled cheese made with mayonnaise taste like mayonnaise?
No. The mayonnaise browns into the crust and tastes simply like toasted bread, a little richer than butter.
Why put the sandwiches in a cold pan?
So the bread warms up slowly with the skillet. A preheated pan sears the outside before the cheese has started to melt.
What is the best cheese for grilled cheese?
Sharp cheddar for flavor with a slice of American cheese for the smooth melt is my mother’s mix. Any good melting cheese works: Colby, Monterey Jack, mild cheddar.
Why cut it corner to corner?
My mother said it tasted better that way, and the triangles are easier to dunk in tomato soup. I have never been able to prove her wrong.
Mayonnaise on the outside, low heat, a lid, and one minute of patience before the knife. That is the whole grilled cheese, and it took me thirty years to admit my mother had it right.
Grilled Cheese Sandwich with Mayonnaise on the Outside (Low Heat, Lid On)
The grilled cheese my mother made: mayonnaise spread thin on the outside instead of butter, sharp cheddar plus a slice of American cheese inside, a cold skillet, medium low heat and a lid for 3 to 4 minutes, then 2 to 3 minutes on the second side.
Ingredients
- 4 slices white sandwich bread
- 2 tablespoons mayonnaise (28g), about 1 teaspoon for the outside of each slice
- 1 cup shredded sharp cheddar (115g), 1/2 cup per sandwich
- 2 slices American cheese, 1 per sandwich
Instructions
- Lay out the 4 slices of bread. Spread about 1 teaspoon of mayonnaise thinly on one side of each slice, all the way to the edges and corners. These are the outsides.
- Turn 2 slices mayonnaise side down. On each, lay 1 slice of American cheese and pile 1/2 cup of the shredded cheddar on top, keeping it a little in from the edges. Top with the other slices, mayonnaise side up.
- Set the sandwiches in a cold, dry skillet, large enough to hold both. Do not add butter or oil to the pan.
- Turn the heat to medium low. Cover the skillet with a lid and cook for 3 to 4 minutes, until the bottoms are a deep, even gold. Lift a corner with a spatula to check.
- Flip the sandwiches, leave the lid off, and cook 2 to 3 minutes more, until the second side is golden and the cheese is fully melted.
- Move them to a cutting board and let them rest for 1 minute, so the cheese sets just enough not to run out. Cut corner to corner and serve hot.