The Perfect Jaffa Cake-Inspired Traybake
In the cosy, approachable voice of The Best Blog Recipes
If you’ve ever found yourself halfway through a pack of Jaffa Cakes wondering why they’re so addictive… you’re not alone. There’s just something magical about that trio of zesty orange, soft sponge, and smooth chocolate. So, I thought – why not turn that iconic combo into a traybake that’s easy to make, simple to slice, and perfect for sharing?
Enter: the Decadent Jaffa Cake Traybake.
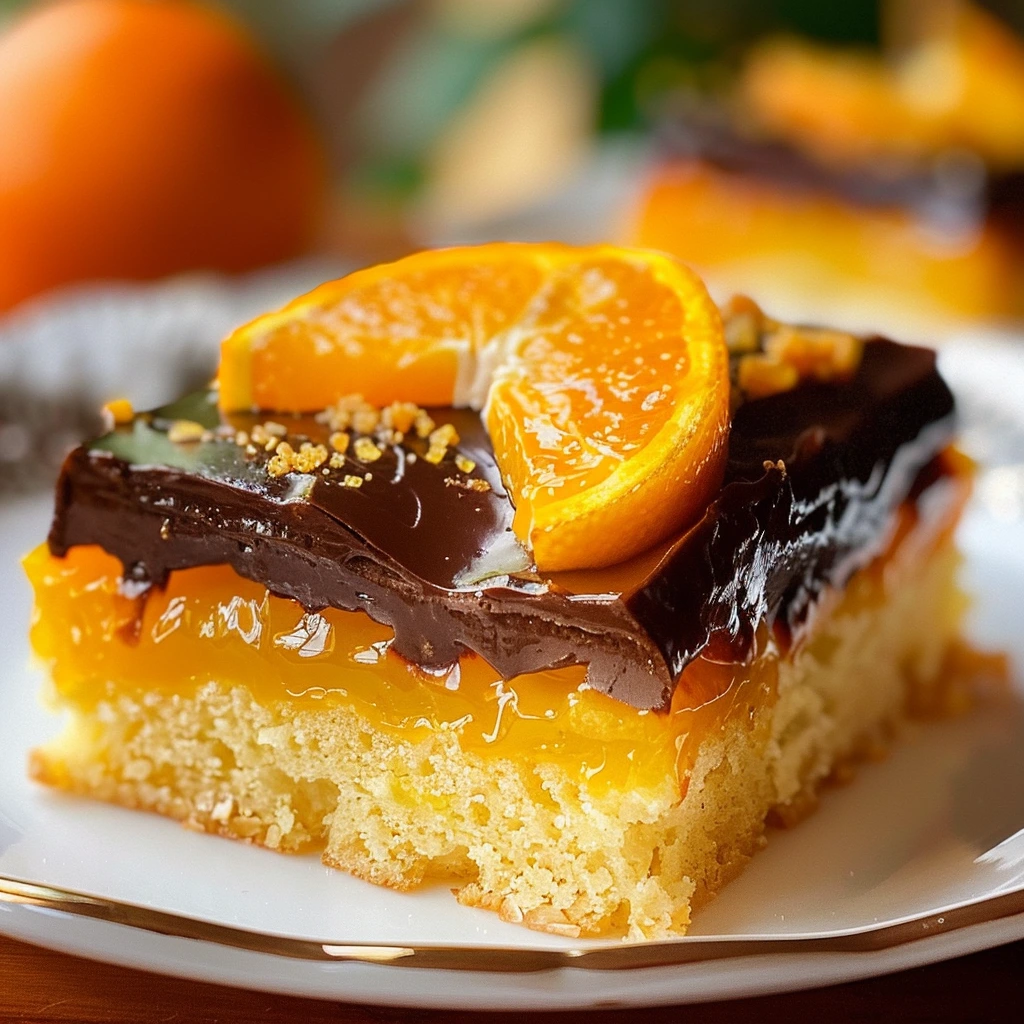
This recipe gives you all the nostalgic Jaffa Cake flavour you love, but in the form of a buttery, citrusy sponge layered with tangy orange jelly and topped off with a glossy dark chocolate finish. It’s fun, it’s easy, and let me tell you – it disappears fast. I made it last weekend “just to test,” and we were down to crumbs before the evening movie even started.
Whether you’re baking for a birthday, bringing something to a picnic, or just want a weekday treat that feels a bit special, this Jaffa Cake traybake has you covered.
🧁 Ingredients Breakdown
Let’s break this beauty down layer by layer – because each one plays its part in making the magic happen.
For the sponge:
-
200g unsalted butter, softened
-
200g caster sugar
-
4 large eggs
-
Zest of 2 oranges
-
200g self-raising flour
-
1 tsp baking powder
-
2 tbsp orange juice
For the jelly layer:
-
135g orange jelly (1 packet)
-
150ml boiling water
-
150ml fresh orange juice
For the chocolate topping:
-
200g dark chocolate, chopped
-
1 tbsp vegetable oil
Step 1: Make the Orange Sponge
Start by preheating your oven to 180°C (160°C fan) and grease and line a 20x30cm traybake tin. You’ll want a nice even surface for the jelly later.
In a mixing bowl, cream together the softened butter and caster sugar until light and fluffy – this is your base, so take a couple of minutes to get it really airy. Then beat in your eggs one at a time, along with the orange zest (which smells amazing, by the way). If your mixture starts to split, just add a tablespoon of the flour to help bring it back together.
Now fold in the self-raising flour and baking powder, then gently stir in the orange juice. The batter should be smooth, citrusy, and ready to bake!
Pour the sponge mix into your prepared tin, smoothing the top with a spatula. Bake for 20–25 minutes or until the sponge is risen, golden, and springs back when lightly touched. Let it cool completely in the tin – you don’t want any warmth when we pour over the jelly.
Coming up in Part 2: We’ll get that tangy jelly layer just right and finish it off with a shiny chocolate topping that won’t crack when you slice it (yes, there’s a trick to it!).
Jelly Magic & the Ultimate Chocolate Finish
Continuing in the friendly, step-by-step style of The Best Blog Recipes
Now that your golden sponge is baked and cooling (and your kitchen smells like citrus heaven), it’s time to move on to the fun part – building those iconic Jaffa layers. The jelly and chocolate are what turn this from a simple orange cake into something truly irresistible. And trust me, the process is easier than you might think.
I’ve learned a few tricks while testing this traybake (multiple times, for “quality control” of course), and I’m going to walk you through each one so you can get that flawless, layered finish every single time.
Step 2: Make the Jelly Layer
Let’s talk jelly – the bright, wobbly star of this dessert. It adds a refreshing, slightly tangy burst that cuts through the sweetness of the sponge and pairs beautifully with dark chocolate.
🧃 Here’s how to do it:
-
Dissolve the jelly:
Break the 135g packet of orange jelly into cubes and place them in a heatproof jug or bowl. Pour over 150ml of boiling water and stir until completely dissolved. (You want to make sure there are no sneaky jelly lumps hiding at the bottom!) -
Add orange juice:
Once the jelly is dissolved, stir in 150ml of fresh orange juice. This gives the jelly a natural tang that tastes so much fresher than water alone. -
Let it cool slightly:
Here’s the trick – don’t pour the jelly straight onto the sponge! Let it sit for about 30 minutes at room temperature, until it turns syrupy. It should still be pourable but not hot. If it’s too hot, it could soak into the sponge instead of sitting nicely on top. -
Pour over the cooled sponge:
Once the jelly mixture is syrupy and your sponge is completely cooled, gently pour the jelly over the top. Tilt the tray if needed to get an even layer. -
Chill to set:
Place the traybake in the fridge and chill for about 2 hours, or until the jelly is fully set and firm to the touch.
Step 3: Chocolate Topping – Smooth and Shiny!
Now for the chocolate – arguably the most satisfying part of this bake. You want a nice, glossy layer that cracks just slightly when you bite in, but doesn’t break into shards when you slice it. The secret? A bit of oil.
🍫 How to make the perfect topping:
-
Melt the chocolate:
In a heatproof bowl, combine 200g chopped dark chocolate with 1 tablespoon of vegetable oil. Gently melt it over a pan of simmering water, stirring frequently. (Alternatively, microwave in 20-second bursts, stirring in between, until smooth.) -
Cool slightly:
Let the melted chocolate sit for 5–10 minutes so it thickens slightly. This helps it spread smoothly without disturbing the jelly layer underneath. -
Spread over jelly:
Pour the chocolate over the set jelly and use a spatula or the back of a spoon to spread it evenly all the way to the edges. -
Let it set at room temperature:
Resist the urge to pop it in the fridge! Chilling chocolate can cause it to bloom (those white streaks that appear on the surface). Instead, let it set at room temp for an hour or so until firm.
Bonus Tips for Traybake Success
-
Clean slices every time: Use a sharp knife dipped in hot water (then wiped dry) to slice through the chocolate without cracking it or pulling at the jelly. It really makes a difference!
-
Want more orange flavour? Add ½ teaspoon of orange extract to the sponge batter or a few drops to the jelly for an extra citrus punch.
-
Storage tip: Keep your Jaffa Cake traybake in an airtight container at room temperature for up to 3 days. No need to refrigerate – it actually tastes better at room temp.
In Part 3, I’ll answer the most common questions I get about this traybake (including how to make it ahead and swap ingredients), and we’ll wrap up with a sweet little conclusion.
Print
Easy Jaffa Cake Traybake Recipe – Zesty Orange, Tangy Jelly & Rich Chocolate Topping
- Total Time: 55 minutes + 2 hours chilling
Description
Bring the beloved flavour of classic Jaffa Cakes into a fun, shareable dessert with this Jaffa Cake Traybake! Featuring layers of fluffy orange-scented sponge, a homemade orange jelly layer, and a glossy dark chocolate topping, it’s the ultimate nostalgic treat made simple. Perfect for parties, lunchbox treats, or teatime indulgence, this bake is easy to prepare and delivers maximum flavour with every bite. Slice into squares for a stunning homemade dessert that’s sure to impress.
Ingredients
For the sponge:
-
200g unsalted butter, softened
-
200g caster sugar
-
4 large eggs
-
Zest of 2 oranges
-
200g self-raising flour
-
1 tsp baking powder
-
2 tbsp orange juice
For the jelly layer:
-
135g orange jelly (1 standard packet)
-
150ml boiling water
-
150ml fresh orange juice
For the chocolate topping:
-
200g dark chocolate, chopped
-
1 tbsp vegetable oil
Instructions
-
Prepare the sponge:
Preheat oven to 180°C (160°C fan). Grease and line a 20x30cm traybake tin.
In a bowl, cream butter and sugar until light and fluffy. Beat in eggs one at a time, adding orange zest.
Fold in flour and baking powder, then stir in orange juice.
Spread batter evenly into the tin and bake for 20–25 minutes, or until golden and springy. Cool completely. -
Make the jelly layer:
Dissolve orange jelly in 150ml boiling water, stirring until fully melted. Add 150ml orange juice and mix well.
Let jelly mixture cool for 30 minutes, until slightly thickened.
Pour gently over the cooled sponge and refrigerate for 2 hours, or until fully set. -
Add chocolate topping:
Melt chocolate with 1 tbsp vegetable oil in a heatproof bowl over simmering water (or microwave in short bursts).
Let cool slightly, then pour over the jelly layer and spread evenly.
Allow chocolate to set at room temperature (not the fridge!) for about 1 hour. -
Slice and serve:
Use a sharp knife dipped in hot water and wiped dry to slice cleanly into squares.
Notes
-
Boost the orange flavour: Add ½ tsp orange extract to the sponge or jelly for an extra citrus kick.
-
Perfect slices every time: Use a hot knife and wipe between cuts for clean edges through chocolate and jelly.
-
Storage: Keep in an airtight container at room temperature for up to 3 days. Avoid refrigeration to prevent chocolate bloom.
-
Make ahead: Can be made a day in advance — ideal for parties or gatherings.
- Prep Time: 30 minutes
- Cook Time: 25 minutes


