


Introduction and the Stovetop/Microwave Method
There’s nothing like wrapping your hands around a warm mug of mocha, especially when it’s homemade. That velvety blend of chocolate and coffee, perfectly balanced and made just the way you like it—it’s pure bliss. The best part? You don’t need a fancy espresso machine or barista skills to create this dreamy drink. With a few simple ingredients and methods that are practically foolproof, you can whip up your own mocha masterpiece right in the comfort of your kitchen.
I still remember the first time I attempted a homemade mocha. I was tired of spending way too much at coffee shops and thought, “How hard can it be?” Spoiler alert: It wasn’t hard at all! Now, it’s my go-to treat when I want something indulgent but quick. Whether I’m cozying up with a book or need a mid-afternoon pick-me-up, this recipe always hits the spot.
Today, I’ll share the easiest stovetop and microwave method for making mocha at home. It’s simple, quick, and customizable to suit your taste.
Ingredients You’ll Need:
Let’s gather the essentials first. These are all ingredients you probably already have in your kitchen:
- 1 to 2 tablespoons granulated sugar: Adjust this based on how sweet you like your mocha.
- 1 tablespoon unsweetened cocoa powder: This gives your mocha its rich, chocolatey flavor.
- 1 tablespoon water: Only needed if you’re using the stovetop or microwave method.
- 1 cup hot coffee: Brewed fresh and as strong as you like it.
- ¼ cup milk: Whole, skim, or even a plant-based option like almond or oat milk.
- 1 tablespoon heavy cream (optional): This adds a creamy, luxurious texture.
- Whipped cream for topping (optional): Because everything’s better with whipped cream.
Stovetop or Microwave Method
Ready to bring your mocha dreams to life? Here’s how you can do it step-by-step:
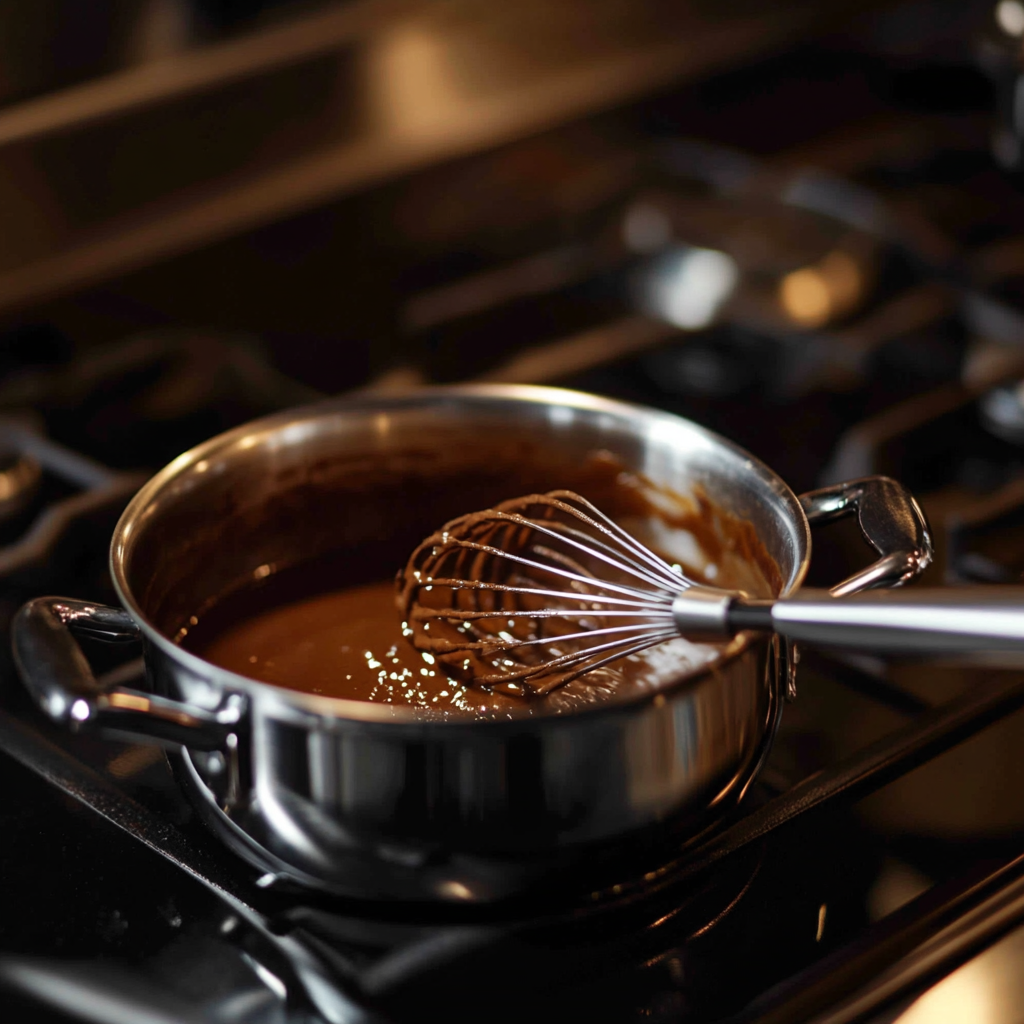
- Mix the Cocoa Base: Start by combining sugar, cocoa powder, and water in a small pot or a microwave-safe cup. This is your base, the heart of your mocha’s chocolatey goodness.
- If you’re using the stovetop, heat the mixture over low heat while stirring constantly until the sugar and cocoa dissolve.
- For the microwave, pop the mixture in for about 15 seconds, then give it a good stir.
- Add Coffee and Milk: Once the cocoa base is smooth, stir in the hot coffee and milk. For the stovetop, keep the heat on and continue to stir until the mixture is steaming. If you’re using the microwave, heat the mixture again for about 30 seconds.
- Make it Frothy (Optional): If you’re feeling fancy, whisk the mixture vigorously while it’s still on the stove. This adds a light, frothy touch that mimics a coffeehouse mocha.
- Serve and Top: Pour your mocha into a favorite mug, add a swirl of whipped cream on top, and maybe sprinkle a little cocoa powder or chocolate shavings as a finishing touch.
Pro Tip: If you want an extra kick of chocolate, toss in a piece of dark chocolate while the mixture is heating. It melts beautifully and takes the richness to the next level.
In just a few minutes, you’ll have a steamy, chocolate-infused cup of joy that rivals anything you’d buy at a café. And trust me, the satisfaction of knowing you made it yourself is just the cherry (or whipped cream) on top!
The Mason Jar Method and Creative Tips
If you loved how easy the stovetop or microwave method was, wait until you try the mason jar method. It’s the ultimate hack for a quick, creamy, and foam-topped mocha without dirtying extra dishes or pulling out a whisk. This approach is perfect for those on the go or anyone who loves a little kitchen magic.
But before we dive into the mason jar technique, let’s talk about why this method is so fantastic: it does the mixing and frothing for you. The best part? No fancy equipment is required. Just shake, heat, and sip.
Mason Jar Method
Here’s how to whip up your mocha in a jar:
- Add the Ingredients: Combine the sugar, cocoa powder, coffee, milk, and heavy cream (if using) directly into a mason jar. If you’re skipping the whipped cream topping, this is truly a one-container recipe.

- Seal and Shake: Screw the lid on tightly (you don’t want any leaks!) and give the jar a few strong shakes. Think of it as your morning workout. Shake for about 15–20 seconds until everything is well-mixed and slightly frothy.
- Heat It Up: Remove the lid and microwave the jar for about 30 seconds, or until the mixture is hot and steaming. Be careful when removing it from the microwave—it might be hot!
- Serve and Garnish: Pour the mocha into your favorite mug, top with whipped cream if you like, and enjoy.
Pro Tip: If you’re serving guests, mix everything in one large jar, shake it up, and divide the mocha among individual mugs. It’s a simple way to impress without breaking a sweat.
Creative Ways to Customize Your Mocha
Now that you’ve mastered the basics, it’s time to get creative. One of the best things about homemade mocha is how easily you can tweak it to match your mood or cravings. Here are a few fun ideas to try:
1. Sweetener Swaps
- Replace granulated sugar with honey, maple syrup, or brown sugar for a deeper flavor.
- Want to cut back on sugar? Use stevia or monk fruit sweetener instead.
2. Chocolate Upgrades
- Stir in a spoonful of Nutella or peanut butter for a decadent twist.
- Add a splash of chocolate syrup or a few chocolate chips while heating for extra richness.
3. Spiced Mocha Magic
- Sprinkle in a pinch of cinnamon, nutmeg, or cardamom for a warming, spiced mocha.
- Feeling adventurous? A dash of chili powder adds a subtle heat that pairs beautifully with chocolate.
4. Flavored Syrups
- Add a splash of vanilla extract, hazelnut syrup, or caramel syrup for a café-style mocha.
- Peppermint extract is a great choice during the holidays—hello, homemade peppermint mocha!
5. Dairy-Free Options
- Swap regular milk with almond, oat, or coconut milk for a vegan version. Each type of milk brings its own unique flavor to the drink.
- Coconut cream is a fantastic replacement for heavy cream if you’re looking for a non-dairy way to boost creaminess.
6. Frozen Mocha
- Want something refreshing? Use cold coffee, blend all the ingredients with ice, and skip the heating step. This turns your mocha into a frosty treat.
Quick Tips for the Perfect Homemade Mocha
- Choose Your Coffee Wisely: A medium to dark roast works best for balancing the cocoa’s richness.
- Whisk for Froth: If you don’t have a mason jar or frother, whisking your mocha vigorously in a bowl before heating can create a lovely foam.
- Layer It Up: For an Instagram-worthy presentation, layer your coffee and milk over the cocoa mixture before stirring. It’s a small detail, but it looks amazing.
With these ideas, your homemade mocha can transform into something new and exciting every time. Whether you’re craving something sweet, spiced, or extra indulgent, the possibilities are endless.
FAQ Section and Conclusion
Now that you’ve got two simple methods for making an irresistible homemade mocha and a toolkit of creative ideas to personalize it, you’re almost ready to enjoy the ultimate coffeehouse experience at home. But before we wrap up, let’s tackle a few frequently asked questions that might pop up during your mocha-making journey.
FAQ: Your Mocha Questions Answered
1. Can I use instant coffee instead of brewed coffee?
Yes! Instant coffee is a great substitute if you’re in a hurry. Dissolve 1–2 teaspoons of instant coffee in a cup of hot water, and you’re good to go.
2. How do I make a dairy-free mocha?
It’s easy to make a vegan or dairy-free mocha. Swap out regular milk with almond, oat, soy, or coconut milk. For a creamier texture, use coconut cream instead of heavy cream.
3. Can I make a mocha ahead of time?
While mocha is best enjoyed fresh, you can prepare the base (cocoa, sugar, coffee, and milk) ahead of time and refrigerate it for up to 24 hours. When you’re ready, heat it up and add any toppings.
4. How can I avoid a grainy texture in my mocha?
Graininess usually comes from undissolved cocoa powder or sugar. Be sure to mix the cocoa and sugar thoroughly with a little water before adding other ingredients. Heating the base also helps dissolve everything completely.
5. Can I make my mocha sweeter or less sweet?
Absolutely! Adjust the sugar to your liking. Start with 1 tablespoon and add more if needed. If you accidentally make it too sweet, a splash of extra coffee will balance the flavors.
6. What’s the best way to froth milk without fancy equipment?
The mason jar method is your best friend! Shaking milk in a sealed jar creates a lovely foam. Alternatively, use a whisk or even a hand blender for a frothy touch.
7. Can I turn this into an iced mocha?
Yes! Let your brewed coffee cool to room temperature, then follow the recipe using cold milk. Shake everything in a mason jar with ice, skip the heating step, and pour over fresh ice for a refreshing treat.
Conclusion: Sip, Savor, and Share
And there you have it—the ultimate guide to making a delicious homemade mocha! Whether you’re using the stovetop, microwave, or mason jar method, this recipe is as versatile as it is delightful. From classic hot mochas to spiced or iced versions, the possibilities are endless.
The beauty of this recipe is in its simplicity and adaptability. You can make it as indulgent or as light as you like, depending on your preferences or mood. Plus, the joy of creating your favorite coffeehouse drink at home is a little victory worth savoring.
So, grab your favorite mug, whip up this cozy mocha, and take a moment to enjoy the rich flavors of chocolate and coffee coming together in perfect harmony. Whether you’re treating yourself or making a batch for friends, this recipe is sure to impress.
If you tried this recipe or have your own creative twist, I’d love to hear about it! Drop a comment below and share your mocha-making adventures. Don’t forget to bookmark this recipe—it’s one you’ll come back to again and again. Cheers to sipping happiness in every cup! ☕🍫
PrintEasy Homemade Mocha: Your Go-To Recipe for a Cozy, Coffeehouse Drink at Home
Description
Skip the coffeehouse lines and create your own café-style mocha at home! This easy homemade mocha recipe blends the bold flavor of coffee with the creamy sweetness of milk and chocolate. Whether you prefer the stovetop, microwave, or mason jar method, this customizable drink is quick to prepare and perfect for any occasion. Add your favorite toppings or flavors to make it uniquely yours!
Ingredients
- 1 to 2 tablespoons (12g to 25g) granulated sugar (adjust to taste)
- 1 tablespoon (5g) unsweetened cocoa powder
- 1 tablespoon water (omit if using the mason jar method)
- 1 cup hot coffee (any roast)
- ¼ cup milk (any percentage or non-dairy alternative)
- 1 tablespoon heavy cream (optional, for extra creaminess)
- Whipped cream (optional, for topping)
Instructions
Stovetop or Microwave Method:
- In a small pot or microwave-safe cup, mix sugar, cocoa powder, and water. Heat gently on the stove or microwave for 15 seconds until smooth.
- Stir in coffee and milk, and continue to heat until steaming (30 seconds in the microwave). Whisk vigorously on the stove for a frothy texture.
- Pour into a mug, top with whipped cream if desired, and enjoy!
Mason Jar Method:
- Combine sugar, cocoa powder, coffee, milk, and heavy cream (if using) in a mason jar.
- Secure the lid tightly and shake vigorously for 15–20 seconds until frothy.
- Remove the lid and microwave for 30 seconds or until steaming. Pour into a mug, garnish with whipped cream, and enjoy!
Notes
- Customize Sweetness: Adjust sugar to your taste, or use alternatives like honey or stevia.
- Dairy-Free Options: Almond, oat, or coconut milk work wonderfully in this recipe.
- Add Chocolate Flair: Stir in chocolate chips, Nutella, or a splash of chocolate syrup for extra indulgence.
- Spice it Up: A pinch of cinnamon or nutmeg adds warmth, while chili powder offers a bold twist.


")