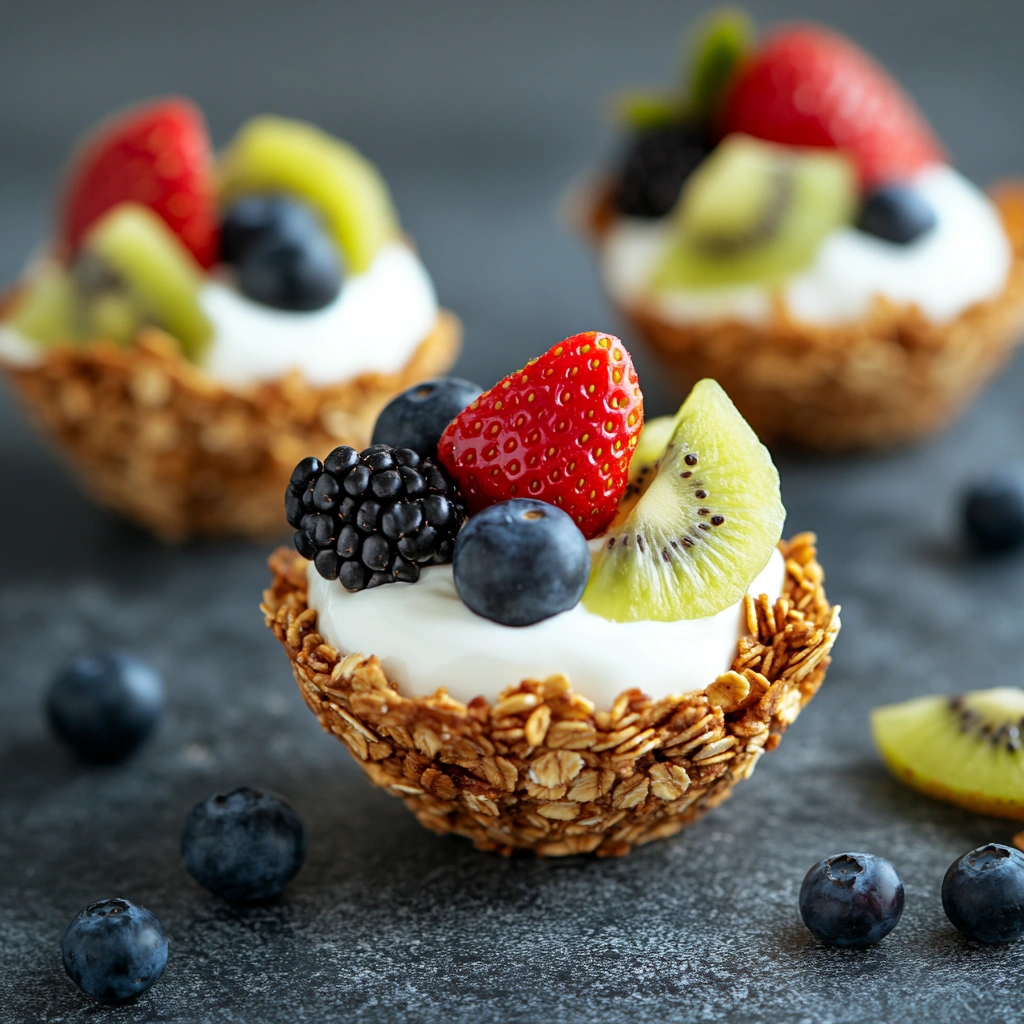
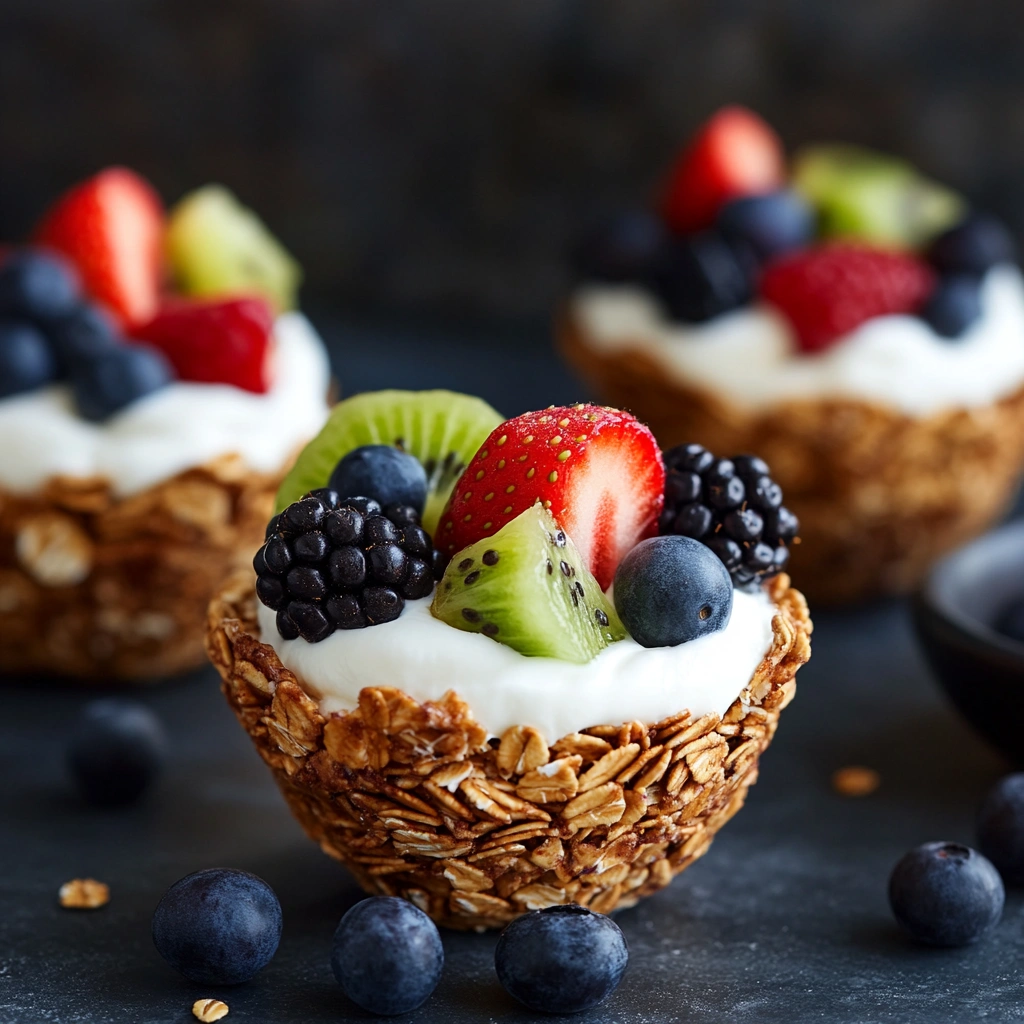
Granola yogurt cups are a simple, delicious, and wholesome snack or breakfast option that combines crunchy granola, creamy yogurt, and fresh fruit in a convenient, portion-controlled form. These no-bake cups are perfect for busy mornings, post-workout fuel, or healthy desserts, offering both nutrition and flavor in every bite.
They are typically made using a muffin tin or silicone molds, where a granola mixture is pressed into a cup shape and topped with yogurt and your choice of toppings such as berries, nuts, or honey. Whether you’re looking to eat healthier or just want a quick and satisfying treat, granola yogurt cups are an ideal make-ahead solution.
In this article, you’ll learn how to make easy granola yogurt cups at home, discover creative variations, explore their nutritional benefits, and get practical tips for storage and meal prep. Let’s dive into how to make this versatile recipe a part of your routine.
Ingredients Overview
Making granola yogurt cups at home starts with just a few simple ingredients. Here’s a breakdown of what you’ll need and why each component matters:
1. Granola
Granola forms the base of the cups. You can use store-bought granola or make your own with rolled oats, honey or maple syrup, coconut oil, and optional add-ins like nuts or dried fruit. Choose granola that is firm and not overly crumbly, as it needs to hold its shape.
2. Yogurt
Greek yogurt is the most popular choice because of its thick texture and high protein content, but regular yogurt also works if strained slightly. For a dairy-free version, opt for plant-based yogurts made from almond, coconut, or soy milk.
3. Sweeteners (optional)
Depending on your preference and the yogurt’s sweetness, you might want to add a drizzle of honey, agave, or maple syrup.
4. Toppings
Fresh or frozen berries, banana slices, shredded coconut, chia seeds, or a sprinkle of cinnamon are great for both flavor and visual appeal.
5. Binders (for granola base)
If your granola is too dry to stick together, mix it with a bit of nut butter or coconut oil to help it hold its shape when pressed into cups.
Step-by-Step Recipe: How to Make Easy Granola Yogurt Cups
Here’s a simple, foolproof method to create delicious granola yogurt cups at home. These steps will guide you through the process from start to finish.
Prep Time and Tools Needed
-
Prep Time: 15 minutes
-
Chill/Freeze Time: 1–2 hours
-
Total Time: Approx. 1.5 to 2.5 hours
-
Tools Required:
-
Muffin tin or silicone muffin molds
-
Cupcake liners (optional but recommended)
-
Spoon or small measuring cup
-
Mixing bowl
-
Instructions
Step 1: Prepare the Granola Base
In a mixing bowl, combine 2 cups of granola with 2–3 tablespoons of nut butter (like almond or peanut butter) and 1 tablespoon of honey or maple syrup. Stir well until the mixture becomes slightly sticky and holds together when pressed.
Step 2: Form the Cups
Line each section of your muffin tin with paper or silicone liners. Spoon about 2–3 tablespoons of the granola mixture into each cup and use the back of the spoon or your fingers to press it firmly into the bottom and slightly up the sides, creating a cup shape.
Step 3: Chill or Bake the Base (Optional)
To firm up the cups, place the tin in the freezer for 15–30 minutes. For extra crunch and stability, you can also bake the granola base at 325°F (165°C) for 10–12 minutes, then allow to cool completely.
Step 4: Add Yogurt and Toppings
Once the granola base is firm, add a generous spoonful of yogurt to each cup, filling them to the top. Then, decorate with your preferred toppings—fresh fruit, seeds, a drizzle of honey, or chopped nuts.
Step 5: Set and Serve
Place the finished cups in the refrigerator for at least 1 hour to allow the flavors to meld. If prepping ahead, you can also freeze them and thaw individual cups as needed.
Pro Tips for Best Results
-
Use thick yogurt to prevent the cups from becoming soggy.
-
Press the granola base firmly to help it stay intact.
-
If freezing, let cups sit at room temperature for 5–10 minutes before eating.
Variations of Granola Yogurt Cups
Granola yogurt cups are highly adaptable to suit your taste, dietary needs, or the season. Here are some fun and delicious ways to mix things up.
Flavor Combinations
Berry Blast
Top your yogurt with a mix of strawberries, blueberries, and raspberries. Add a drizzle of honey and a sprinkle of chia seeds for texture.
Tropical Twist
Use coconut yogurt, add mango chunks and pineapple slices, and finish with shredded coconut for a refreshing tropical flair.
Apple Cinnamon Delight
Mix cinnamon into the granola base. Top with apple slices, a dusting of cinnamon, and a few walnut pieces for a cozy autumn-inspired treat.
Dietary Modifications
Vegan
Choose a plant-based yogurt (like almond, oat, or coconut) and sweeten with maple syrup instead of honey. Use vegan granola or make your own using coconut oil as the binder.
Gluten-Free
Ensure your granola is certified gluten-free. Most oats are naturally gluten-free but can be processed in facilities that handle wheat unless specified.
Low-Sugar/Keto-Friendly
Use a low-carb granola or make your own with nuts and seeds. Choose unsweetened yogurt and sweeten naturally with a small amount of stevia or monk fruit.
Kid-Friendly Variations
Frozen Yogurt Pops
Make the yogurt cups in mini muffin tins and freeze them into snack-sized bites. Great for hot days or school lunches.
Fun Shapes and Toppings
Use silicone molds in fun shapes (hearts, stars) and top with colorful fruits, mini chocolate chips, or sprinkles to appeal to kids.
These variations ensure you never get bored with the same recipe and allow for creativity and personalization in every batch.
Nutrition Benefits of Granola Yogurt Cups
Granola yogurt cups aren’t just tasty—they’re packed with nutrients that make them a smart choice for anyone looking to eat better.
1. High Protein Content
Greek yogurt, in particular, is an excellent source of protein, which helps support muscle growth, satiety, and energy throughout the day. A single cup of Greek yogurt can offer up to 15 grams of protein.
2. Good Source of Fiber
Granola, especially when made with oats, nuts, and seeds, provides dietary fiber that supports digestion, heart health, and keeps you full longer.
3. Rich in Vitamins and Antioxidants
The fruits added on top of the yogurt cups are typically high in vitamin C, vitamin A, and antioxidants that support immune health and skin health.
4. Portion-Controlled and Customizable
Because these cups are made individually, they encourage mindful eating and portion control. You can also adjust ingredients to meet your dietary needs, whether it’s reducing sugar or boosting protein.
5. Healthy Fats
Ingredients like nut butter, seeds, or coconut oil add healthy fats that help in nutrient absorption and support long-term satiety.
Storage and Meal Prep Tips
Granola yogurt cups are excellent for meal prep, making it easy to grab a nutritious snack or breakfast on busy days. Here’s how to store them properly and maximize their shelf life.
Refrigeration
If you plan to eat the granola yogurt cups within a few days, refrigerate them in an airtight container. They will stay fresh for up to 3–5 days. It’s best to store them in individual portions using cupcake liners or silicone molds for easy handling. Keep them covered to prevent the yogurt from absorbing other flavors in the fridge.
Freezing
To prepare a larger batch, granola yogurt cups can be frozen for up to one month. Place the assembled cups in the freezer on a tray until solid (about 2 hours), then transfer them to a freezer-safe container or zip-lock bag. When you’re ready to eat, remove a cup and let it sit at room temperature for 10–15 minutes, or defrost in the fridge overnight.
Tips for Meal Prep
-
Avoid using fresh fruit with high water content (like watermelon) for freezer storage, as it may become mushy when thawed.
-
Use thicker yogurt to prevent water separation after thawing.
-
Silicone molds are reusable, easy to clean, and help maintain shape during freezing.
Meal prepping granola yogurt cups ensures you always have a healthy option ready to go, whether for breakfast, snack time, or dessert.

When to Serve Granola Yogurt Cups
Granola yogurt cups are incredibly versatile and can be served at various times throughout the day. Their convenience and balanced nutrition make them suitable for multiple occasions:
1. Quick Breakfast:
Perfect for rushed mornings, especially when made in advance. They provide protein, fiber, and natural sugars to start the day.
2. Post-Workout Snack:
Thanks to the combination of carbohydrates from granola and protein from yogurt, they support muscle recovery and energy replenishment.
3. Healthy Dessert:
A satisfying treat that can replace sugary desserts, especially when topped with fruit or a light drizzle of honey.
4. Kids’ Lunchbox Addition:
Their compact size makes them great for lunchboxes. Choose fun toppings to make them more appealing to children.
5. Afternoon Pick-Me-Up:
Ideal for a mid-day snack that curbs hunger without excessive calories.
No matter when you choose to enjoy them, granola yogurt cups deliver balanced nutrition and can be tailored to suit the time of day or your dietary needs.
Common Mistakes and How to Avoid Them
While granola yogurt cups are easy to make, a few common mistakes can affect their texture and flavor. Here’s what to watch out for:
1. Using Thin or Runny Yogurt
Thin yogurt may leak into the granola base, causing it to become soggy. Always use thick Greek yogurt or strain regular yogurt to remove excess liquid.
2. Not Pressing Granola Firmly
If the granola isn’t tightly packed into the muffin tin, it may fall apart when you remove the cups. Use the back of a spoon to press it down firmly.
3. Skipping the Chill or Bake Step
Failing to chill or bake the granola base can result in soft, crumbly cups. Freezing or baking helps set the shape and improves the overall texture.
4. Overloading with Wet Toppings
Too much fruit juice or syrup can compromise structure. Add juicy fruits just before serving or drain them well.
Avoiding these mistakes ensures your yogurt cups stay crisp, flavorful, and visually appealing.
FAQs (Based on “People Also Ask”)
Can you make granola yogurt cups ahead of time?
Yes, granola yogurt cups are ideal for making in advance. You can refrigerate them for up to 5 days or freeze for up to a month. For best results, assemble just before serving if using watery fruits.
Do granola cups get soggy in the fridge?
They can become soggy if made with thin yogurt or high-moisture fruits. To prevent this, use thick yogurt and keep toppings like fruit or syrup minimal until serving.
Can I use regular yogurt instead of Greek yogurt?
Yes, but regular yogurt tends to be thinner. If using it, consider straining it with a cheesecloth or coffee filter to achieve a thicker consistency, which helps maintain the structure of the cups.
What are the best fruits for yogurt cups?
Berries (blueberries, strawberries, raspberries), bananas, kiwi, and chopped apples work well. Avoid fruits with too much water content, such as melon or citrus, which can lead to sogginess.
Are granola yogurt cups good for weight loss?
They can be, especially when portion-controlled and made with low-sugar granola and plain yogurt. Including high-protein and high-fiber ingredients helps promote fullness and reduce cravings.
These answers address the most common concerns and help first-time makers get the best results with minimal trial and error.
Conclusion & Final Tips
Granola yogurt cups are an easy, customizable, and nutritious way to enjoy a healthy meal or snack with minimal effort. Whether you’re preparing them for your family, storing them for the week, or serving them at a brunch gathering, they offer the perfect balance of flavor, texture, and nutrition.
To recap:
-
Use thick yogurt and firm granola for best results
-
Freeze or chill the cups to improve structure
-
Experiment with toppings to keep things interesting
-
Prep in advance to save time throughout the week
These simple treats are as fun to make as they are to eat. Once you’ve mastered the basic recipe, feel free to mix and match flavors to suit the season, dietary needs, or your mood. Granola yogurt cups are proof that eating healthy can be both satisfying and delicious.
Print
Easy Granola Yogurt Cups
Description
These easy granola yogurt cups are a quick, healthy, and customizable snack or breakfast option. Made with a simple granola base and filled with creamy yogurt and fresh toppings, they’re perfect for make-ahead mornings, meal prepping, or a refreshing dessert. Great for both kids and adults, these yogurt cups are ready in minutes and can be stored in the fridge or freezer for grab-and-go convenience. No baking required (unless you prefer an extra crunch). Whether you’re fueling up post-workout or looking for a portion-controlled sweet treat, these granola yogurt cups check all the boxes.
Ingredients
- 1 ½ cups rolled oats
- ½ cup peanut butter, runny consistency
- ⅓ cup maple syrup
- ½ tsp vanilla extract, optional but recommended
- ½ tsp cinnamon, optional but recommended
- pinch salt, optional but recommended
- yogurt, for topping
- fresh fruit, for topping
- chia seeds, for topping
Instructions
-
Preheat the oven to 350ºF and grease 6 cavities of a muffin pan with coconut oil.
-
Add the rolled oats, peanut butter, maple syrup, vanilla extract, cinnamon and salt to a bowl and mix until combined.
-
Equally divide the mixture in the greased muffin pan, then make a well in the center of each cup using your fingers or the back of a tablespoon.
-
Bake for 12-15 minutes, or until they start to turn golden brown. Let them cool in the muffin pan for 5 minutes, then use a knife to remove them from the pan. Set them on a wire rack to continue cooling.
-
Now, it’s time to assemble! Add your favorite yogurt into each granola cup, then top with fruit, chia seeds and other desired toppings.
Notes
- Use thick yogurt (like Greek yogurt or strained regular yogurt) to prevent the granola from becoming soggy.
- To help the granola base stick together, mix it with nut butter or coconut oil before pressing it into the molds.
- For baked cups: Pre-bake the granola base at 325°F (165°C) for 10–12 minutes for extra firmness, then cool before adding yogurt.
- Storage: Refrigerate for up to 5 days or freeze for up to 1 month. Thaw frozen cups in the fridge or at room temperature before eating.
- Avoid overly juicy fruit if freezing, as it can release water and alter the texture.
- Silicone muffin molds or liners make removal and cleanup easier.
- Customize with toppings like berries, sliced bananas, shredded coconut, or a drizzle of honey.


