

Refrigerator pickling is one of the easiest and most effective ways to preserve fresh vegetables while adding bold, tangy flavor. Unlike traditional canning or fermentation, refrigerator pickles are made using a vinegar-based brine and stored cold, eliminating the need for sterilization or fermentation time. This technique keeps vegetables crisp and vibrant, making it ideal for home cooks seeking a simple, low-effort method to enjoy pickled produce year-round.
The process is quick—usually taking just 10 to 15 minutes of prep—followed by a short resting period in the fridge. Because it doesn’t require a canner or special equipment, refrigerator pickling is perfect for beginners or anyone looking for a fast, fresh way to add flavor and crunch to their meals. Best of all, you can easily customize the flavor profile by changing up the herbs, spices, and vegetables. It’s a modern, flexible take on a classic preservation method.
Why You’ll Love This Recipe
This refrigerator pickled vegetable recipe delivers a perfect balance of crunch and tang without the hassle of traditional canning. It’s quick to prepare, endlessly customizable, and requires no special skills or tools. The vegetables stay crisp and fresh-tasting, with a bright, zippy flavor that pairs well with a wide range of dishes. Whether you’re looking to add a punch of acidity to your salads, sandwiches, or grain bowls, these pickles are a game-changer. Plus, you can make small batches using whatever vegetables are in season, helping to reduce food waste and elevate everyday meals with minimal effort.
Essential Ingredients for Pickling
Creating flavorful refrigerator pickled vegetables starts with a handful of essential ingredients. Here’s what you’ll need:
Vegetables: The fresher, the better. Popular choices include cucumbers, carrots, radishes, cauliflower, bell peppers, green beans, and red onions. Choose firm, blemish-free vegetables for the best texture.
Vinegar: This is the backbone of the brine. White distilled vinegar is a neutral, classic choice. Apple cider vinegar adds a touch of sweetness, while rice vinegar gives a milder, slightly floral flavor. Always use vinegar with at least 5% acidity.
Salt: Pickling salt or kosher salt is preferred because it dissolves well and doesn’t contain additives like iodine or anti-caking agents, which can cloud the brine.
Sweetener: Sugar balances the acidity and enhances flavor. You can also use honey, maple syrup, or agave for natural alternatives.
Water: Used to dilute the vinegar for a more balanced taste. Filtered water is best.
Flavor enhancers (optional): Garlic, dill, mustard seeds, black peppercorns, bay leaves, coriander, and red pepper flakes can all be added to customize the flavor of your pickles.
These ingredients form a basic brine that can be adjusted to suit your taste or dietary preferences.

Equipment You’ll Need
Refrigerator pickling doesn’t require any special tools, but having the right equipment can make the process smoother and more efficient.
Glass jars with lids: Mason jars are ideal, but any clean, airtight glass container will work.
Saucepan: Used for heating the brine if making a hot pour. Some recipes also allow cold brining.
Cutting board and sharp knife or mandoline: For slicing vegetables evenly and quickly.
Measuring cups and spoons: To accurately portion your brine ingredients.
Funnel (optional): Helps transfer the brine into jars without spills, especially with narrow-mouthed jars.
With these basic tools, you’re ready to start pickling.
Best Vegetables to Use for Crunchy Pickles
Choosing the right vegetables is key to getting that satisfying crunch in every bite. Firm, water-low vegetables are ideal for refrigerator pickling.
Cucumbers: The go-to for traditional pickles. Use pickling varieties like Kirby or Persian cucumbers for the best texture.
Carrots: Sweet and sturdy, they hold their crunch well and absorb brine flavors beautifully.
Cauliflower: Adds a satisfying bite and soaks up spices easily.
Green beans: Crisp and easy to pack into jars, they’re a great option for mixed veggie pickles.
Bell peppers: Offer sweetness and a snappy texture, especially when sliced into strips.
Radishes: Add color and spice, and stay crisp in the fridge.
Avoid vegetables with high water content like tomatoes or zucchini, which can turn mushy. For maximum crunch, slice vegetables uniformly and consider brining them cold to preserve their firmness. The fresher your produce, the better your pickles will turn out.
Step-by-Step: How to Make Refrigerator Pickled Vegetables
Making refrigerator pickled vegetables is a straightforward process. Follow these simple steps for tangy, crisp results:
Step 1: Prep the Vegetables
Wash all vegetables thoroughly and peel or trim as needed. Slice them uniformly so they fit neatly into your jars and pickle evenly. Use a mandoline for even, thin slices if desired.
Step 2: Sterilize the Jars
While not strictly necessary for refrigerator pickling, it’s a good idea to wash jars and lids in hot, soapy water and let them air dry. This helps ensure your pickles stay fresh longer.
Step 3: Pack the Jars
Place any herbs, garlic, or spices at the bottom of each jar. Tightly pack the prepared vegetables into the jars, leaving about 1/2 inch of space at the top.
Step 4: Make the Brine
In a saucepan, combine vinegar, water, salt, and sugar. Bring the mixture to a simmer, stirring to dissolve the salt and sugar completely. Once dissolved, remove from heat. For a crisper result, some recipes allow for a cold brine, mixing ingredients without heating.
Step 5: Add the Brine to the Jars
Using a funnel, carefully pour the hot (or cold) brine over the vegetables, ensuring they’re fully submerged. Tap jars gently to release air bubbles and adjust vegetables as needed.
Step 6: Cool and Refrigerate
Let jars cool to room temperature before sealing and refrigerating. The pickles will develop flavor over 24 to 48 hours and can be stored for up to four weeks.
Flavor Variations to Try
One of the best parts about refrigerator pickling is how easy it is to customize the flavor to suit your taste. Whether you prefer something sweet, spicy, or herbaceous, these variations are simple to create using the same base method.
Sweet and Spicy: Add a tablespoon of honey or sugar along with chili flakes, sliced jalapeños, or a dash of hot sauce. Great for carrots, cucumbers, and green beans.
Classic Dill: A traditional option using fresh dill sprigs, garlic cloves, black peppercorns, and mustard seeds. This works well with cucumbers and cauliflower.
Asian-Inspired: Use rice vinegar, ginger slices, a touch of sesame oil, and toasted sesame seeds. Add daikon radish or julienned carrots for a crisp, tangy side dish.
Mediterranean: Add oregano, thyme, rosemary, and sliced garlic to your brine. Try this variation with red onions, bell peppers, and zucchini.
Curry-Spiced: Stir in turmeric, coriander seeds, and cumin for a golden, aromatic blend. Cauliflower and carrots are perfect matches.
Feel free to experiment with your own combinations. Start small and adjust seasonings after the first 24 hours of refrigeration to achieve the exact flavor profile you like.
How to Keep Pickles Extra Crunchy
Crunch is one of the most desired qualities in a good pickle. Here are a few key tips to maintain that satisfying bite:
Start with fresh, firm produce: The fresher the vegetables, the more likely they’ll stay crisp. Avoid overripe or soft vegetables.
Slice strategically: Thicker slices tend to hold up better, especially with cucumbers and carrots.
Use a cold brine: If you’re not in a rush, pouring a room-temperature or cold brine over raw vegetables can help maintain their crunch.
Avoid over-brining or long exposure to heat: Don’t simmer vegetables in brine. Always add brine over raw veggies, not the other way around.
Add tannin-rich leaves: A traditional method is adding a grape leaf, horseradish leaf, or oak leaf to each jar. These natural tannins help preserve crunch.
These techniques help ensure your pickled vegetables retain their firmness for as long as possible in the refrigerator.
How Long Do Refrigerator Pickles Last?
Refrigerator pickles typically last between 2 to 4 weeks when stored properly in an airtight glass container. Their texture and flavor are at their peak within the first two weeks but can remain safe and tasty longer if kept cold and uncontaminated. Always use clean utensils to remove pickles from the jar to prevent introducing bacteria. If you notice cloudiness, sliminess, or an off smell, it’s time to discard them. While these pickles are not shelf-stable like canned versions, their short prep time and flexible storage make them ideal for small batches enjoyed over several weeks.
Best Ways to Use Refrigerator Pickled Vegetables
Refrigerator pickled vegetables are more than just a side dish—they’re a flavor-packed addition to countless meals. Here are some of the best ways to enjoy them:
On sandwiches and burgers: Add a layer of crunch and acidity to cut through rich meats or creamy sauces.
As a salad topper: Pickled carrots, radishes, or onions bring brightness and texture to leafy greens and grain bowls.
With charcuterie or cheese boards: Their tang complements salty meats and rich cheeses beautifully.
In wraps and tacos: Add quick pickles for a refreshing bite in soft tacos, pita wraps, or spring rolls.
Straight from the jar: Sometimes the simplest option is best—these pickles make a perfect snack.
These versatile vegetables can enhance almost any dish, turning ordinary meals into something memorable with just a spoonful.
Storing and Reusing Pickling Brine
Once you’ve eaten all the vegetables, don’t toss the brine right away—it can be reused for a second round of pickling. Simply strain the brine, bring it to a boil, and pour it over a new batch of vegetables. Note that reused brine may lose some potency, so consider refreshing it with a splash of new vinegar or additional spices.
You can also use leftover brine as a flavorful addition to salad dressings, marinades, or even cocktails like Bloody Marys. However, if the brine appears cloudy, smells off, or contains floating debris, it’s safest to discard it.
Common Mistakes to Avoid
Even though refrigerator pickling is simple, a few common missteps can affect the outcome:
Using the wrong salt: Iodized table salt can cloud your brine and alter the flavor. Use kosher or pickling salt.
Skipping sterilization: While full sterilization isn’t required, failing to wash jars properly can shorten shelf life and affect safety.
Overpacking jars: Vegetables need room for the brine to circulate. Don’t cram too tightly.
Using too little vinegar: The vinegar-to-water ratio is key for safe, tangy pickles. Stick to recipes that use at least 50% vinegar.
Not covering veggies fully with brine: Exposed vegetables can spoil quickly or develop an off taste.
Adding wet vegetables: Water on the surface of your produce can dilute the brine. Pat everything dry before packing.
Avoiding these mistakes helps ensure your pickled vegetables are safe, flavorful, and crunchy every time.
Frequently Asked Questions (FAQ)
How long do refrigerator pickled vegetables need before eating?
Typically 24 to 48 hours is enough for flavor to develop. Some vegetables like carrots or cauliflower may benefit from 3 days of marinating.
What vegetables should not be pickled?
Avoid high-moisture vegetables like tomatoes, lettuce, or zucchini, as they can become soggy and spoil quickly.
Can I pickle without sugar?
Yes, sugar is optional. It balances acidity but can be omitted or substituted with natural sweeteners like honey or maple syrup.
Do refrigerator pickles get more sour over time?
Yes, they often become tangier the longer they sit. However, this is due to brine absorption, not fermentation.
Can I freeze pickled vegetables?
Freezing is not recommended. It destroys the texture and causes pickles to become mushy upon thawing.

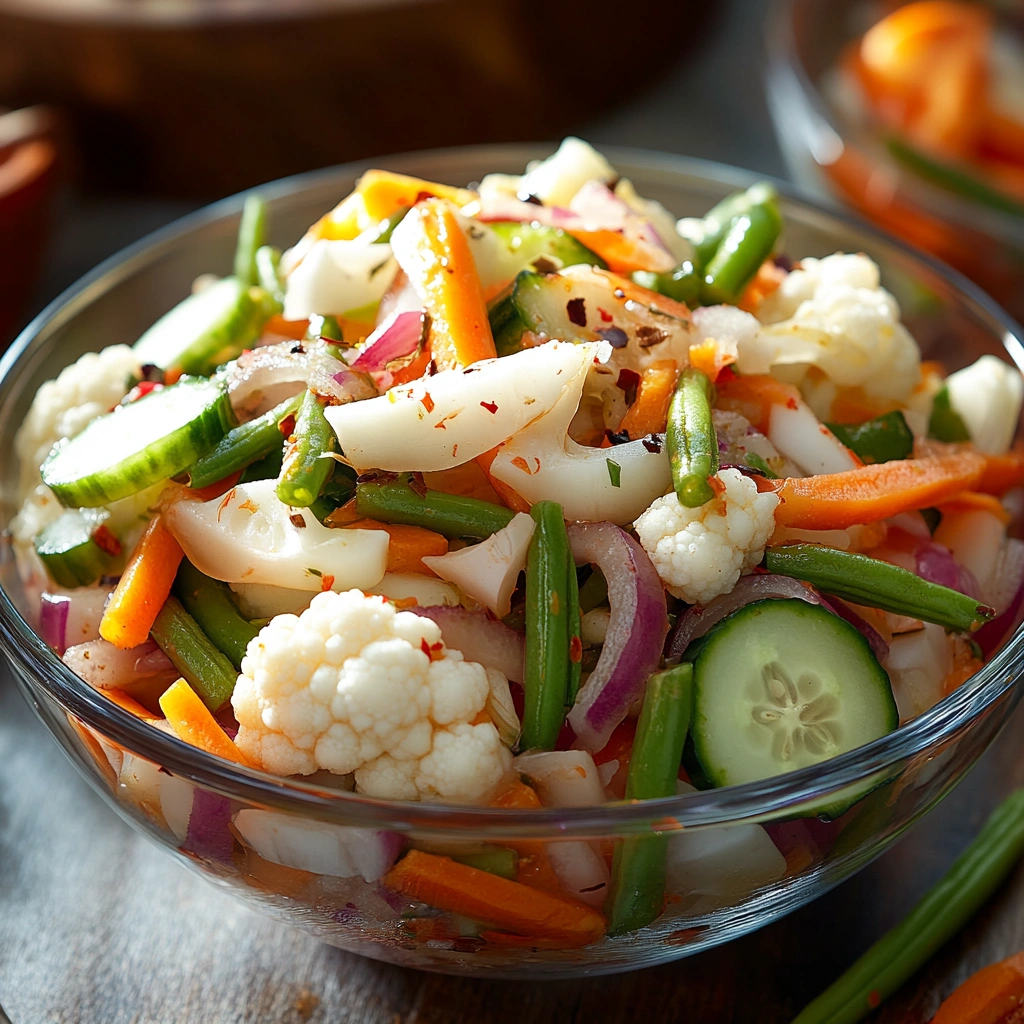
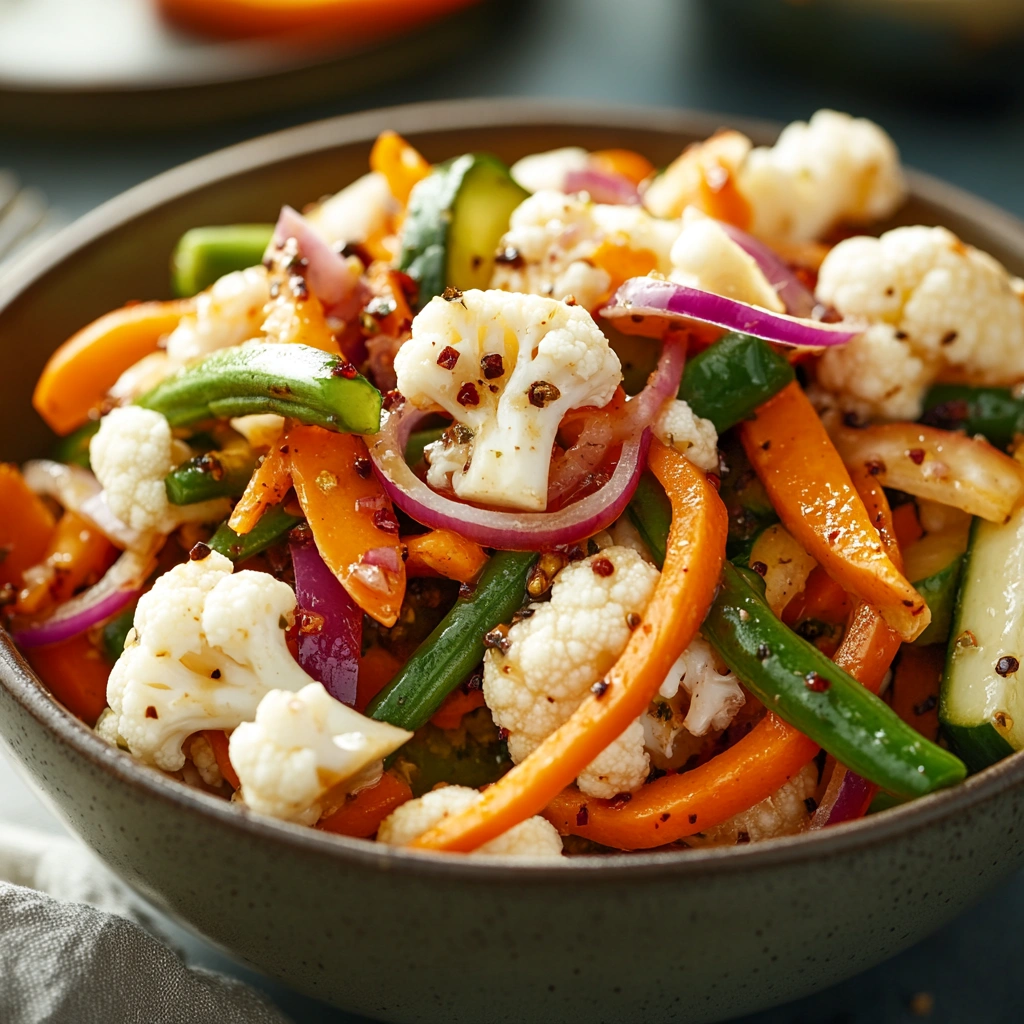
Crunchy Tangy Refrigerator Pickled Vegetables
Description
These Crunchy Tangy Refrigerator Pickled Vegetables are the perfect quick-pickle solution—no canning required. Made with a simple vinegar brine and your choice of fresh vegetables, this recipe delivers bold flavor and satisfying crunch in just 24 hours. Customize your mix with seasonal produce and pantry spices to create a flavor-packed snack, side dish, or sandwich topping. Ideal for beginners and busy home cooks, these pickles stay crisp and tangy for weeks in the refrigerator.
Ingredients
2 cups cauliflower florets
1 cup sliced carrots
1 cup sliced cucumbers
1 red bell pepper, sliced into strips
1 cup green beans, trimmed
3 cloves garlic, minced
2 cups white vinegar
2 cups water
2 tablespoons salt
1 tablespoon sugar
2 teaspoons mustard seeds
1 teaspoon black peppercorns
1/2 teaspoon red pepper flakes (optional for heat)
Instructions
In a large bowl, combine cauliflower, carrots, cucumbers, red bell pepper, and green beans.
In a medium saucepan, bring vinegar, water, salt, sugar, mustard seeds, peppercorns, and red pepper flakes to a boil. Stir until salt and sugar are dissolved.
Pour the hot pickling liquid over the vegetables, ensuring they are completely submerged. Allow to cool to room temperature.
Once cooled, transfer the vegetables and liquid into jars, ensuring the vegetables are fully submerged. Seal the jars tightly.
Refrigerate for at least 24 hours before serving. The pickled vegetables will keep in the refrigerator for up to 1 month.
Notes
-
Pickling Salt: Use kosher or pickling salt—avoid iodized salt, which can cloud the brine and affect flavor.
-
Vinegar Options: White vinegar provides classic sharpness. Apple cider vinegar adds sweetness, while rice vinegar offers a milder tang.
-
Sweeteners: Feel free to adjust or omit sugar depending on your taste. Honey and maple syrup work well as natural alternatives.
-
Crunch Tip: For maximum crunch, use very fresh vegetables and chill the brine before pouring it over the veggies.
-
Storage: Store pickles in an airtight glass jar in the fridge. Best consumed within 2–4 weeks.
-
Reusing Brine: You can reuse the brine once by reheating and adding fresh vegetables. Discard if cloudy or off-smelling.
-
Spice Ideas: Try garlic, mustard seeds, dill, red chili flakes, or black peppercorns for added flavor.


")