

Introduction & First Steps
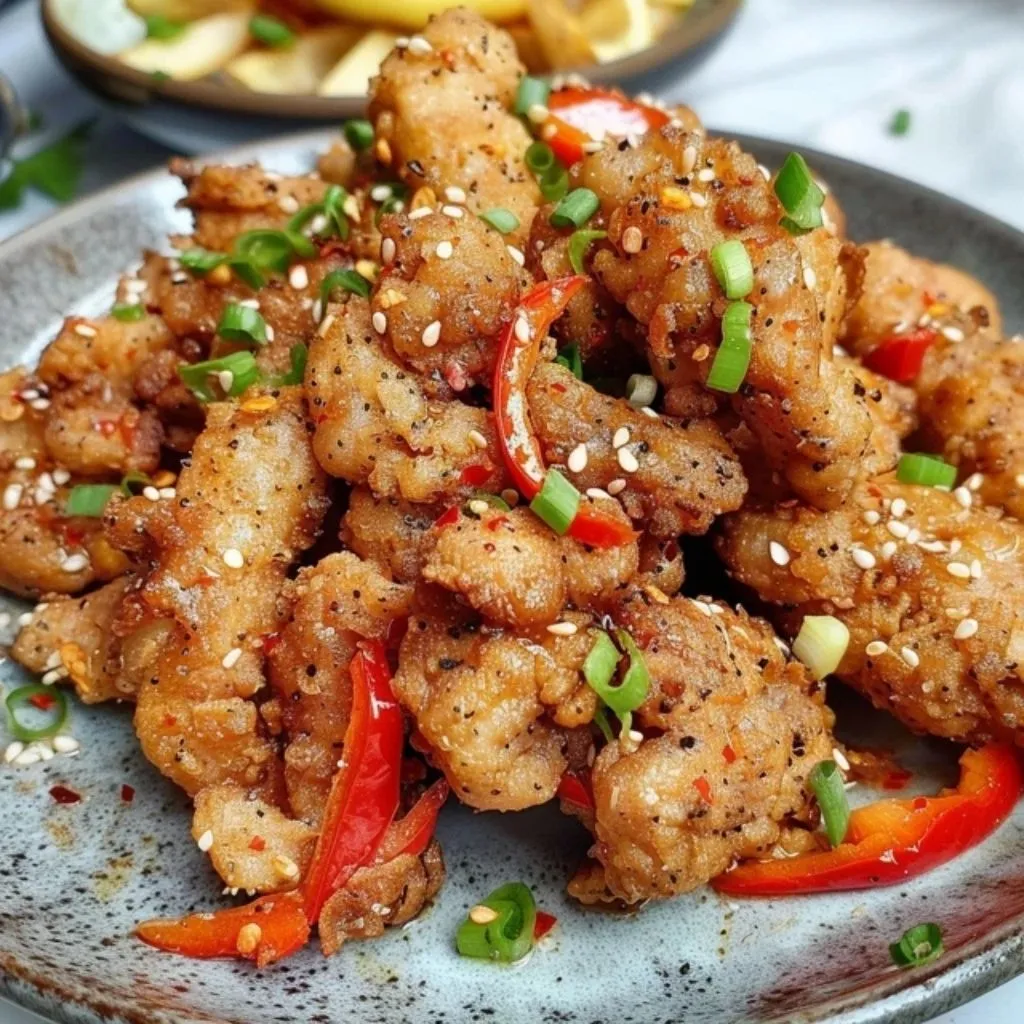
If you’ve ever ordered a Chinese-style takeaway in the UK, chances are you’ve come across salt and pepper chicken. It’s one of those dishes that instantly wins everyone over — golden, crunchy chicken bites tossed with just the right amount of spice, garlic, and veggies. Honestly, it’s comfort food at its finest.
The best part? You don’t have to wait for delivery to enjoy it. This crispy salt and pepper chicken can be made right in your kitchen in under 30 minutes. You’ll get all the takeaway vibes without the wait time or the price tag. And let’s be real, homemade always tastes better because you can tweak it to your liking — whether that’s more garlic, a bit of extra chilli, or keeping it mild for the kids.
Now, I’ll admit, the first time I tried making this at home, I thought it was going to be one of those fiddly recipes where you end up with flour everywhere and half-burnt chicken pieces. But nope! Once you get the hang of it, it’s ridiculously straightforward. The trick is a simple cornflour coating that makes the chicken super crisp on the outside while staying juicy inside. After that, it’s just a quick toss in a hot wok with garlic, onions, and peppers.
Let’s get into the recipe so you can see just how easy it is to recreate this classic dish at home.
Ingredients You’ll Need

For the chicken coating:
-
500g chicken breast, cut into bite-sized strips
-
100g cornflour
-
1 tsp sea salt
-
1 tsp ground black pepper
-
Sunflower oil (for shallow or deep frying)
For the stir-fry mix:
-
1 small onion, thinly sliced
-
1 small green pepper, thinly sliced
-
1 red chilli, finely sliced (add more if you like extra heat!)
-
2 garlic cloves, minced
-
½ tsp sea salt
-
½ tsp cracked black pepper
-
2 spring onions, sliced (for garnish)
Step 1: Coat the Chicken
Start by mixing your cornflour, salt, and pepper in a bowl. This mixture is going to give your chicken that signature crispiness. Toss in the chicken strips and make sure they’re fully coated — don’t rush this step because that coating is what makes the magic happen once it hits the hot oil.
Step 2: Fry Until Golden
Heat your oil in a deep pan or wok over medium-high heat. To check if it’s ready, drop in a tiny piece of coated chicken. If it sizzles straight away, you’re good to go. Fry the chicken in small batches (about 4–5 minutes each) until golden and crispy. Make sure not to overcrowd the pan because that can cause the chicken to steam instead of crisp. Once done, transfer to kitchen paper to drain off excess oil.
At this point, your kitchen will already smell amazing, and I guarantee a few people will wander in asking when dinner’s ready!
Recipe Continuation & Helpful Tips
With the chicken crispy and resting, it’s time to bring everything together with the stir-fry. This part is super quick — just a few minutes in the wok — so make sure all your ingredients are prepped before you start.
Step 3: Stir-Fry the Veggies
In a clean pan or wok, heat 1 tablespoon of oil. Add in your onion, garlic, chilli, and green pepper. Stir-fry over high heat for 2–3 minutes until softened but still a little crisp. You want the vegetables to keep some bite because they add a lovely contrast to the chicken.
Step 4: Bring It All Together
Add the cooked chicken to the wok and sprinkle in the extra salt and cracked black pepper. Toss everything together for 1–2 minutes until well combined and piping hot. Finally, garnish with fresh spring onions for a pop of color and freshness.
And there you have it — crispy salt and pepper chicken, ready to serve!
Serving Suggestions
This dish is super versatile. You can:
-
Serve it over a big bowl of egg fried rice.
-
Pair it with chow mein noodles for a proper fakeaway night.
-
Pop it into a warm flatbread with some chilli sauce for a street-food style wrap.
-
Or simply enjoy it on its own with a cold lemonade or even a cheeky beer.
Tips for Success
-
Don’t overcrowd the pan – Frying too many pieces at once drops the oil temperature and makes the chicken soggy.
-
Cornflour is key – Regular flour won’t give you the same light, crispy coating. Stick with cornflour for the best results.
-
Adjust the heat – Love it fiery? Add chilli flakes or use two fresh chillies instead of one. Prefer it mild? Skip the chilli altogether and let the garlic and pepper shine.
-
Reheating – If you do have leftovers, reheat them in a hot oven (about 200°C / 400°F) for 5–10 minutes. They’ll crisp back up nicely.
This recipe is one of those that’s guaranteed to disappear fast. Honestly, every time I’ve made it for family or friends, the plate’s been cleared in minutes. The combination of crunchy coating, savoury seasoning, and that little kick of heat is just too irresistible.
FAQs & Conclusion
Frequently Asked Questions
1. Can I use chicken thighs instead of chicken breast?
Yes! Chicken thighs work brilliantly because they stay extra juicy. Just trim off any excess fat and cut them into bite-sized pieces before coating.
2. Do I have to deep fry the chicken?
Not at all. Shallow frying in about 1–2 cm of oil works perfectly. Just make sure to turn the chicken pieces halfway through for even cooking.
3. How do I make it gluten-free?
This recipe is naturally gluten-free if you stick with cornflour. Just double-check your seasonings and sauces if you decide to add extras.
4. Can I bake the chicken instead of frying?
You can, but it won’t be quite as crispy. Coat the chicken, spray with oil, and bake at 200°C (400°F) for about 20 minutes, flipping halfway through.
5. Is it spicy?
It has a gentle kick from the chilli, but you can easily adjust it to suit your taste. For mild, leave out the chilli. For extra heat, add more fresh chilli or chilli flakes.
6. Can I prep this ahead of time?
You can cut and coat the chicken a few hours in advance and keep it chilled. Just fry when you’re ready to serve for the best crunch.
7. What oil is best for frying?
Sunflower or vegetable oil are ideal because they have a neutral taste and a high smoke point. Avoid olive oil for this recipe.
Wrapping It Up
There you have it — a crispy salt and pepper chicken recipe that tastes just like your favourite takeaway, but fresher, lighter, and a little bit healthier. It’s quick enough for a weeknight dinner but impressive enough to serve when you’ve got friends round.
Next time you’re craving a takeaway classic, skip the delivery app and give this homemade version a go. Trust me, once you’ve made it yourself, you’ll never look back.
If you do try it, I’d love to hear how it turns out for you. Did you go heavy on the chilli? Serve it with rice, noodles, or wrap it up? Drop a comment and share your twist — I’m always excited to see how you make recipes your own!


")