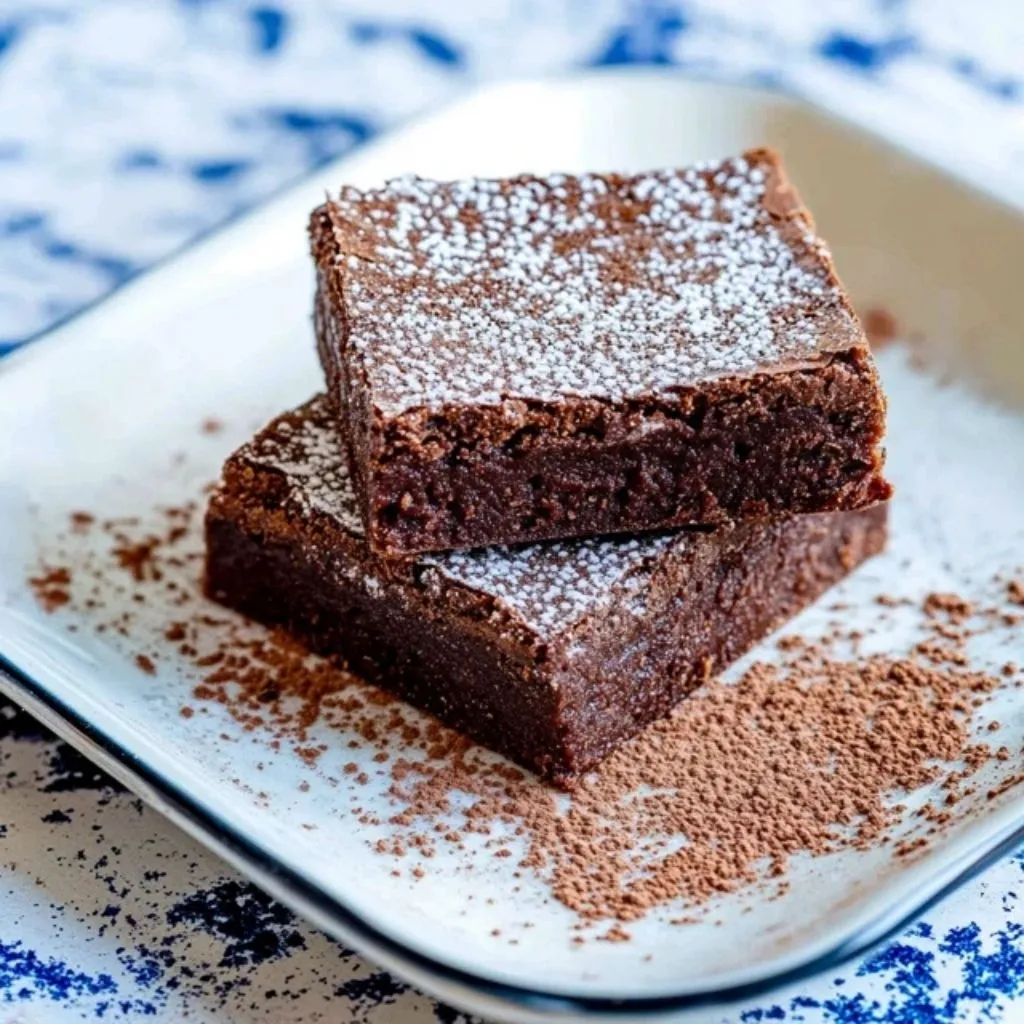
A Taste of School Days – Chocolate Concrete & Mint Custard Magic
If you ever went to a British primary school, you’ll probably remember this one — that dense, crunchy slice of chocolate concrete served with a generous drizzle (or, let’s be honest, flood) of mint-green custard. It wasn’t fancy, it wasn’t delicate, but oh, it was pure comfort. There’s something about the simplicity — that rich cocoa flavor and cool, creamy custard — that takes you right back to those lunch hall days, where dessert was the highlight of the afternoon.
I remember standing in line with my tray, hoping to get the corner piece — the crunchiest bit! That unmistakable sound of the spoon cracking through the top of the concrete before diving into the soft, chocolatey middle still makes me smile. So today, we’re bringing that nostalgic classic back to life in your kitchen — with a little grown-up twist: fresh mint-infused custard.
This Chocolate Concrete & Mint Custard recipe is simple, budget-friendly, and perfect for when you’re craving something homemade and heartwarming. Let’s get right into it.
🍪 Step 1: Prepare the Concrete Base
Start by preheating your oven to 180°C (fan) and lining a 20cm square baking tin with parchment paper. This ensures your concrete won’t stick and makes it easy to lift out once baked.
In a large mixing bowl, sift together:
-
250g plain flour
-
25g cocoa powder
-
1 tsp baking powder
-
A pinch of salt
This creates that perfect balance of structure and flavor. The baking powder gives it a subtle lift, so it’s not rock hard — just the right amount of “concrete crunch.”
🧈 Step 2: Mix the Wet Ingredients
In a separate bowl, whisk together:
-
100g melted butter
-
100g caster sugar
Stir until smooth and glossy. Then beat in:
-
1 egg
-
1 tsp vanilla extract
This adds richness and a lovely warmth to the flavor — that classic chocolate pudding taste we all love.
🍫 Step 3: Combine & Bake
Now, pour your wet ingredients into the dry mix. Stir well until everything is combined — the mixture will be thick, almost dough-like. Don’t worry if it feels a little firm; that’s exactly what gives chocolate concrete its signature bite.
Transfer the dough to your lined tin and press it down evenly. Pop it in the oven for 20–25 minutes, until the top is set and slightly crisp, but the inside still feels soft when pressed. Once baked, let it cool completely in the tin — it firms up as it cools, creating that irresistible crunchy edge.
🌿 Step 4: Infuse the Milk for the Mint Custard
While your concrete is cooling, let’s move on to that beautifully fresh mint custard.
In a saucepan, gently heat 600ml full-fat milk along with a handful of fresh mint leaves. Let it infuse over low heat for about 5 minutes. This step fills your kitchen with that refreshing aroma and gives the custard a naturally subtle mint flavor.
After it’s infused, remove it from the heat and strain out the mint leaves. You’ll be left with smooth, aromatic milk ready for the next step.
Creamy Mint Custard & The Perfect Concrete Texture
Now that your milk is beautifully infused with mint, it’s time to turn it into that luscious custard that pairs so perfectly with the chocolate base.
🍚 Step 5: Make the Custard Base
In a small bowl, combine:
-
1 tbsp cornflour
-
50g caster sugar
-
A splash of the warm mint-infused milk
Stir this into a smooth paste — it’ll prevent lumps later when you combine it with the rest of the milk.
Now, gradually pour the remaining warm milk into this mixture, whisking constantly. This helps create a smooth, velvety custard without any curdling.
🍮 Step 6: Thicken the Custard
Return the mixture to the saucepan and heat it gently, stirring continuously. Within a few minutes, it will start to thicken — keep whisking to avoid any clumps. Once it reaches that lovely custard consistency (thick enough to coat the back of a spoon), remove from the heat and stir in a few drops of mint essence or peppermint extract.
You can adjust this to taste — if you prefer a stronger mint flavor (and a hint of that classic green color), go ahead and add an extra drop or two. For an authentic school-dinner look, you can even stir in a touch of green food coloring!
🍽 Step 7: Serve & Enjoy
Cut your cooled chocolate concrete into squares — or triangles if you want to be fancy. Pour the warm mint custard generously over each piece, and there you have it: the ultimate school pudding revival.
The texture is everything here — crunchy edges, soft middle, and that creamy custard soaking into the cracks. Every bite feels like a hug from your childhood.
💡 Tips for the Perfect Chocolate Concrete
-
Use melted butter, not softened. It helps give that crisp, biscuit-like texture.
-
Don’t overbake. It should be firm on top but soft inside — it hardens as it cools.
-
Want extra indulgence? Add chocolate chips or chunks to the mix before baking for melty pockets of chocolate.
-
Make-ahead magic: You can bake the concrete a day in advance and store it in an airtight container. The mint custard can also be made ahead and reheated gently when ready to serve.
There’s something so satisfying about how simple this recipe is. A few pantry staples, a handful of mint, and you’ve got a dessert that’s both nostalgic and utterly comforting.
FAQs & Final Thoughts
Before we wrap up, let’s answer a few common questions about this classic school pudding so you can get it just right every time.
❓ FAQ Section
1. Can I make this without mint custard?
Absolutely! You can serve chocolate concrete with plain vanilla custard, or even with a scoop of ice cream if you prefer. The mint version just adds that nostalgic twist.
2. How do I store leftovers?
Store the concrete in an airtight container at room temperature for up to 3 days. The custard should be refrigerated and reheated gently on the stove or in the microwave.
3. My concrete turned out too hard — what went wrong?
It was probably baked a bit too long. Try reducing the baking time by 3–5 minutes next time, and remember it firms up as it cools.
4. Can I use margarine instead of butter?
Yes, but the flavor won’t be quite as rich. Butter gives that classic, comforting taste that makes this recipe special.
5. Do I need to use fresh mint for the custard?
Fresh mint gives the best flavor, but if you don’t have it, just use peppermint extract. Start with a few drops and adjust to taste.
6. Can I make this gluten-free?
Definitely. Substitute the plain flour with a good-quality gluten-free blend, and you’ll get the same delicious results.
7. How do I get that green color in the custard like at school?
A drop or two of green food coloring will do the trick. It’s not essential, but it adds that nostalgic school-dinner touch!
💭 Final Thoughts
There’s something magical about bringing back those simple, nostalgic desserts. Chocolate concrete and mint custard might have humble roots, but it’s the kind of recipe that reminds you food doesn’t have to be complicated to be memorable. It’s about comfort, childhood memories, and a little bit of sweetness on an ordinary day.
Whether you’re making this for your kids, for a themed dinner night, or just for yourself (because honestly, you deserve it), this classic dessert never fails to satisfy. The rich chocolate base, the creamy mint custard, and that unmistakable crunch — it’s old-school comfort at its best.
So go ahead — bake a batch, pour that minty goodness on top, and enjoy a spoonful of nostalgia.
Print
Classic School Chocolate Concrete with Mint Custard – A Nostalgic British Dessert You’ll Love!
- Total Time: 45 minutes
Description
This Chocolate Concrete with Mint Custard is a nostalgic British school pudding that’s simple, comforting, and utterly delicious. The chocolate concrete has that perfect balance of crunch and softness, while the smooth mint custard adds a cool, creamy touch that takes you straight back to your school canteen days. It’s budget-friendly, easy to make, and perfect for anyone craving a taste of childhood comfort.
Ingredients
For the Chocolate Concrete:
-
250g plain flour
-
100g caster sugar
-
100g butter, melted
-
25g cocoa powder
-
1 tsp baking powder
-
Pinch of salt
-
1 egg
-
1 tsp vanilla extract
For the Mint Custard:
-
600ml full-fat milk
-
A handful of fresh mint leaves
-
1 tbsp cornflour
-
50g caster sugar
-
A few drops of mint essence or peppermint extract
-
(Optional) A drop or two of green food coloring
Instructions
1. Prepare the Chocolate Concrete Base
-
Preheat the oven to 180°C (fan) and line a 20cm square baking tin with parchment paper.
-
In a large bowl, sift together flour, cocoa powder, baking powder, and salt.
-
In another bowl, whisk melted butter and sugar until smooth. Add the egg and vanilla extract and mix well.
-
Combine the wet and dry ingredients to form a thick, dough-like mixture.
-
Press the mixture evenly into the prepared tin and bake for 20–25 minutes, until firm on top but still soft in the center.
-
Allow it to cool completely in the tin before slicing into squares.
2. Make the Mint Custard
-
In a saucepan, gently heat milk with the fresh mint leaves for about 5 minutes to infuse the flavor.
-
Strain out the mint leaves and set the milk aside.
-
In a bowl, mix cornflour, caster sugar, and a splash of the warm milk into a smooth paste.
-
Gradually whisk in the rest of the warm milk.
-
Return the mixture to the saucepan and heat gently, stirring until thickened.
-
Add mint essence or peppermint extract (and food coloring if desired), then stir to combine.
3. Serve
-
Slice the cooled chocolate concrete and serve warm or at room temperature.
-
Pour the hot mint custard generously over the top and enjoy immediately.
Notes
-
Texture tip: Don’t overbake the concrete — it firms up as it cools.
-
Flavor variation: Add chocolate chips to the concrete mix for extra indulgence.
-
Custard shortcut: If you’re short on time, use ready-made custard and stir in peppermint extract.
-
Make ahead: Store the baked concrete in an airtight container for up to 3 days. The custard can be made ahead and reheated gently before serving.
-
Serving suggestion: Top with grated chocolate or a dollop of whipped cream for a fun twist.
- Prep Time: 15 minutes
- Cook Time: 30 minutes


