Introduction and First Recipe Steps
There’s something irresistibly charming about desserts that come in small, perfectly portioned sizes. They’re easy to serve, no slicing is required, and they feel like a personal treat crafted just for you. That’s exactly why I’m obsessed with these Cherry Cheesecake Cupcakes! Imagine the creamy decadence of cheesecake paired with a buttery graham cracker crust, all topped with a dollop of tangy-sweet cherry pie filling. The best part? They’re as easy to make as they are to eat.
Why You’ll Fall in Love with Cherry Cheesecake Cupcakes
These little bites of heaven are perfect for so many occasions—holidays, birthdays, family get-togethers, or even a casual dessert to brighten up your day. I made these for a neighborhood potluck last week, and they were gone within minutes. Even the kids couldn’t get enough, and let’s be honest, that’s saying something when there’s chocolate cake on the table, too!
But what makes these cupcakes truly magical is how simple they are to prepare. Even if you’re new to baking, this recipe is a guaranteed success. You’ll impress your family and friends with a dessert that looks like it came straight from a bakery.
Let’s Gather the Ingredients
Here’s what you’ll need to whip up these delightful cherry cheesecake cupcakes:
- 1 cup graham cracker crumbs
- 2 tbsp granulated sugar
- 3 tbsp unsalted butter, melted
- 16 oz cream cheese, softened
- 1/2 cup granulated sugar
- 1 tsp vanilla extract
- 2 large eggs
- 1 can cherry pie filling
Step 1: Preheat the Oven
The first step in this sweet adventure is to preheat your oven to 325°F (163°C). This temperature ensures the cheesecake sets perfectly while remaining creamy and luscious. While your oven is warming up, grab a muffin tin and line it with cupcake liners. Not only do the liners make serving easier, but they also keep your pan mess-free.
Pro Tip: If you’re feeling fancy, use decorative liners to make your cupcakes even more eye-catching!
Step 2: Create the Graham Cracker Crust
The foundation of these mini cheesecakes is the buttery graham cracker crust. In a small mixing bowl, combine the graham cracker crumbs, 2 tablespoons of sugar, and melted butter. Stir until the mixture resembles wet sand.
Next, spoon about a tablespoon of the crust mixture into each cupcake liner. Press it down firmly to create a compact base. You can use the back of a spoon, your fingers, or even the bottom of a small glass to get the job done.
Quick Tip: For an extra layer of flavor, try using cinnamon graham crackers or adding a pinch of ground cinnamon to the crust mixture.
Set your crust-filled tin aside—it’s time to whip up the creamy cheesecake filling!
A Quick Word on Cheesecake Baking
Before diving into the next steps, let me share a little nugget of wisdom: baking cheesecake is all about patience and precision. It’s not difficult, but a few simple techniques (like starting with softened cream cheese) make a world of difference in achieving that silky-smooth texture. Trust me, it’s worth the effort!
Continuation of the Recipe and Helpful Tips
Now that you’ve set the stage with the perfect graham cracker crust, it’s time to bring the magic to life with a rich, creamy cheesecake batter. This step is where the real indulgence begins, so let’s get mixing!
Step 3: Make the Cheesecake Batter

In a large mixing bowl, combine the cream cheese, sugar, and vanilla extract. Using a hand or stand mixer, beat the mixture on medium speed until it’s completely smooth and creamy. This step is crucial because any lumps in your batter can transfer into your baked cupcakes, and nobody wants that.
Pro Tip: Make sure your cream cheese is at room temperature. Cold cream cheese is harder to mix and more likely to leave lumps. If you forgot to take it out in advance, no worries! Microwave it for 10-15 seconds to soften it up.
Once the cream cheese mixture is smooth, add the eggs, one at a time. Mix on low speed just until each egg is incorporated. Overmixing can introduce too much air into the batter, which might cause cracks during baking. Keep it gentle for the creamiest results.
Step 4: Assemble the Cupcakes

Now comes the fun part—assembling your little cheesecakes! Spoon the cheesecake batter over the prepared graham cracker crusts, filling each cupcake liner about 3/4 full. This gives the batter enough room to rise slightly without overflowing.
Helpful Tip: Use a cookie scoop or measuring cup for even portions. This ensures all your cupcakes bake at the same rate and look uniform. It’s these little details that make your dessert feel extra special.
Once you’ve filled all the liners, give the pan a gentle tap on the counter to release any air bubbles trapped in the batter. This step helps keep the texture smooth and consistent.
Step 5: Bake to Perfection

Slide your cupcake tin into the preheated oven and bake for 20-25 minutes. Keep an eye on them during the final minutes—when the centers are set and slightly jiggly, they’re ready to come out.
Baking Tip: Every oven is a little different, so start checking around the 20-minute mark. If you’re unsure, insert a toothpick about 1 inch from the center of a cupcake. If it comes out clean, they’re done.
Once baked, allow the cupcakes to cool in the pan for about 30 minutes. This initial cooling phase helps them set and prevents them from collapsing. Afterward, transfer them to the refrigerator to chill for at least 2 hours. This step is non-negotiable for achieving that signature creamy, dense cheesecake texture.
Step 6: The Cherry on Top
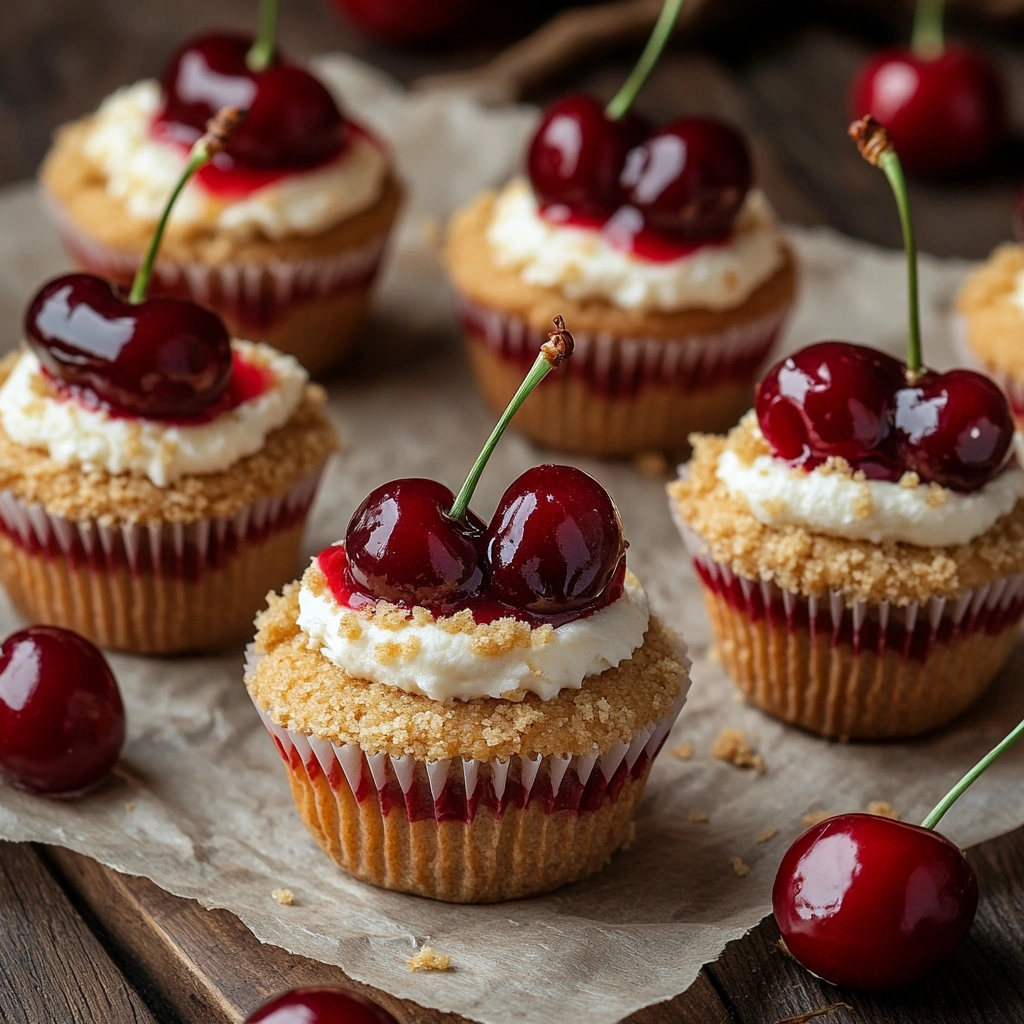
After your cupcakes are fully chilled, it’s time for the grand finale—adding the cherry topping. Open a can of cherry pie filling and spoon a generous dollop onto each cupcake. The vibrant red cherries not only add a burst of flavor but also make these treats look absolutely stunning.
Pro Tip: Want to customize? Swap out cherry pie filling for blueberry, raspberry, or even fresh fruit. You can also drizzle some chocolate syrup over the cherries for an extra touch of decadence.
Extra Tips for Success
- Prevent Cracking: Cheesecake can sometimes crack during baking due to sudden temperature changes. To avoid this, let the cupcakes cool slowly at room temperature before refrigerating.
- Line Your Pan Carefully: Use cupcake liners that fit snugly in your tin to prevent any batter from seeping through. This keeps your crust intact and your cleanup minimal.
- Chill for Best Flavor: While chilling for two hours is the minimum, letting the cupcakes sit overnight enhances their flavor and texture.
FAQ Section and Conclusion
By now, your kitchen smells divine, and those cherry cheesecake cupcakes are chilling in the fridge, just waiting to impress. Before you dive into enjoying these little bites of joy, let’s answer some common questions to ensure your experience is smooth and stress-free.
FAQ: Your Cherry Cheesecake Cupcake Questions Answered
1. Can I use a different crust instead of graham crackers? Yes! While the graham cracker crust is a classic, you can experiment with crushed Oreos, vanilla wafers, or even gingersnaps for a fun twist. Just make sure to follow the same steps to bind the crumbs with butter and press them firmly into the liners.
2. What if I don’t have cupcake liners? No problem! You can grease the muffin tin thoroughly with non-stick spray or butter. However, liners make serving and cleanup much easier, so they’re worth grabbing if you plan to make these often.
3. Can I make these cupcakes in advance? Absolutely! These cupcakes are perfect for preparing ahead of time. You can make them up to 2 days in advance and store them in the refrigerator. Just wait to add the cherry topping until you’re ready to serve for the freshest presentation.
4. How do I store leftover cupcakes? Store any leftovers in an airtight container in the fridge for up to 3 days. They taste just as delicious chilled, making them a fantastic make-ahead dessert.
5. Can I freeze these cupcakes? Yes! You can freeze the cupcakes without the cherry topping for up to 2 months. Wrap each one tightly in plastic wrap, then place them in a freezer-safe container. Thaw in the fridge overnight before adding the cherry topping and serving.
6. How do I prevent cracks in the cheesecake? Cracks can happen if the batter is overmixed or the oven temperature fluctuates. To minimize this, mix the ingredients just until combined, bake at a steady temperature, and let the cupcakes cool gradually.
7. Can I customize the toppings? Of course! While cherry pie filling is a classic, you can switch it up with fresh fruit, whipped cream, chocolate ganache, or caramel drizzle. Let your creativity shine!
Conclusion: Why These Cherry Cheesecake Cupcakes Deserve a Spot on Your Dessert Table
Cherry cheesecake cupcakes are more than just a dessert—they’re a delightful experience in every bite. With their buttery graham cracker crust, luscious cheesecake filling, and vibrant cherry topping, they deliver the perfect combination of textures and flavors. Whether you’re serving them at a party or treating yourself to a little indulgence, these cupcakes are sure to be a hit.
The best part? They’re simple enough for beginner bakers yet impressive enough to wow a crowd. Plus, their bite-sized format makes them fun, portable, and shareable.
So, grab your ingredients and give this recipe a try! I’d love to hear how your cupcakes turn out. Did you stick with the classic cherry topping, or did you add your own twist? Drop a comment below and share your creations. Happy baking, and enjoy every sweet, creamy bite! 🍒🧁
Now that you’re armed with everything you need to know, it’s time to whip up a batch of these irresistible cherry cheesecake cupcakes. Trust me—they won’t last long once they hit the table!
Print
Cherry Cheesecake Cupcakes: Your Perfect Bite-Sized Dessert Delight!
- Total Time: 40 minutes
Description
These Cherry Cheesecake Cupcakes are a delightful, bite-sized twist on the classic dessert. Featuring a buttery graham cracker crust, smooth and creamy cheesecake filling, and a sweet-tangy cherry topping, they’re perfect for parties, holidays, or a sweet indulgence at home. Easy to make and impossible to resist, this recipe is a crowd-pleaser that looks as good as it tastes.
Ingredients
For the Crust:
- 1 cup graham cracker crumbs
- 2 tbsp granulated sugar
- 3 tbsp unsalted butter, melted
For the Cheesecake Filling:
- 16 oz cream cheese, softened
- 1/2 cup granulated sugar
- 1 tsp vanilla extract
- 2 large eggs
For the Topping:
- 1 can cherry pie filling
Instructions
- Preheat Oven: Preheat your oven to 325°F (163°C). Line a muffin tin with cupcake liners.
- Prepare the Crust: In a small bowl, mix the graham cracker crumbs, sugar, and melted butter until combined. Press about 1 tablespoon of the mixture into the bottom of each cupcake liner.
- Make the Cheesecake Batter: In a large bowl, beat the cream cheese, sugar, and vanilla extract until smooth. Add the eggs one at a time, mixing just until combined.
- Assemble the Cupcakes: Spoon the cheesecake batter over the crusts, filling each liner about 3/4 full.
- Bake: Bake for 20-25 minutes, or until the centers are set. Let them cool in the pan for 30 minutes, then refrigerate for at least 2 hours.
- Add Cherry Topping: Once the cupcakes are chilled, top each one with a spoonful of cherry pie filling before serving.
Notes
- For a twist, use blueberry or raspberry pie filling as an alternative topping.
- To prevent cracks in the cheesecake, mix the batter just until smooth and avoid overbaking.
- Store in an airtight container in the fridge for up to 3 days, or freeze without the topping for up to 2 months.
- Prep Time: 15
- Cook Time: 25


