

Introduction & Beginning of the Recipe
There’s just something magical about a Cherry Bakewell. The combination of soft almond sponge, a sweet layer of jam, smooth icing, and of course, that signature cherry on top — it’s the very definition of a classic British bake. Growing up, it wasn’t unusual to find a tray of these at school fairs, family gatherings, or even just sitting proudly on the kitchen counter for afternoon tea. And honestly, I still get a little nostalgic every time I bake one.
The traybake version is especially handy. Instead of fiddling with individual tart cases, this method gives you all the flavours of a traditional Cherry Bakewell in an easy-to-make, easy-to-slice cake. It’s perfect if you’re feeding a crowd, or if you simply want a cake that looks beautiful without too much fuss.
What I love most about this Cherry Bakewell Traybake Cake is its versatility. It feels just as at home on a tea table as it does at a birthday party, and it stores beautifully if you want to make it ahead. Plus, the swirl of jam through the sponge gives each slice a little surprise — no two squares are exactly the same, which makes it fun when sharing.
Before we dive in, here’s a quick snapshot of what you’ll need:
Ingredients at a Glance
-
🧈 Unsalted butter: 225g, softened
-
🍬 Caster sugar: 225g
-
🥚 Free-range eggs: 4, medium
-
🌾 Self-raising flour: 225g, sifted
-
🌰 Ground almonds: 100g
-
🍋 Almond extract: 1 tsp
-
🍒 Raspberry jam: 4 tbsp
-
🍭 Icing sugar: 300g, sifted
-
💦 Water: 3–4 tbsp (for icing)
-
🍒 Glacé cherries: 12, whole or halved
-
🌸 Pink food colouring: a few drops (optional, for marbled effect)
Now, let’s get into the baking!

Step 1: Prepare Your Tin & Oven
Preheat your oven to 180°C (160°C fan) / Gas Mark 4. Grease and line a 20cm x 30cm traybake tin with baking paper. This might sound like a small step, but it’s essential. A properly lined tin makes lifting the cake out so much easier later — and it keeps the sponge edges nice and neat.
Step 2: Cream Butter & Sugar
Take your softened unsalted butter and caster sugar, and cream them together until pale and fluffy. This step is what gives the sponge that light texture we all love. If you have a stand mixer, let it do the work, but if not, a wooden spoon and a bit of elbow grease will get the job done just as well.
Step 3: Add the Eggs
Crack in the eggs one at a time, mixing well after each addition. To stop the mixture from curdling, add a spoonful of self-raising flour along with each egg. It’s a little trick that makes all the difference for a smooth batter.
Step 4: Fold in the Dry Ingredients
Now, gently fold in the remaining flour along with the ground almonds and almond extract. Take your time here — folding instead of beating keeps the air in the mixture, which helps the sponge stay light and fluffy.
Step 5: Add to the Tin & Swirl in the Jam
Spoon the mixture into your prepared traybake tin, spreading it evenly with a spatula. Then, take your 4 tablespoons of raspberry jam and gently dot it over the surface. Using the tip of a knife, swirl the jam lightly through the batter. Don’t overmix — you want pretty ripples, not a full blend.
At this point, your kitchen already smells like something wonderful is about to happen.
Baking, Icing & Helpful Tips
Now that your Cherry Bakewell traybake is swirled with jam and ready for the oven, it’s time for the part that always makes me the most impatient — waiting for it to bake! But trust me, this cake is worth every minute.
Step 6: Bake to Golden Perfection
Pop your tin into the preheated oven and bake for 35–40 minutes. You’ll know it’s ready when the sponge is golden on top, and a skewer inserted into the centre comes out clean. Every oven is a little different, so keep an eye on it around the 30-minute mark.
When the cake is done, resist the temptation to dive in straight away. Instead, let it cool completely in the tin. This is one of those times where patience really pays off — icing a warm cake will only lead to a runny, sticky mess, and nobody wants that.
Step 7: Make the Icing
Once your sponge has cooled, it’s time to whip up the icing. In a bowl, sift 300g of icing sugar and gradually stir in 3–4 tablespoons of water until you get a thick but spreadable consistency. You don’t want it too runny, otherwise it won’t set properly.
If you’re a big almond fan, here’s a little trick: add just a tiny splash of almond extract to the icing. It really amps up the Bakewell flavour and ties everything together beautifully.
Step 8: Ice the Cake
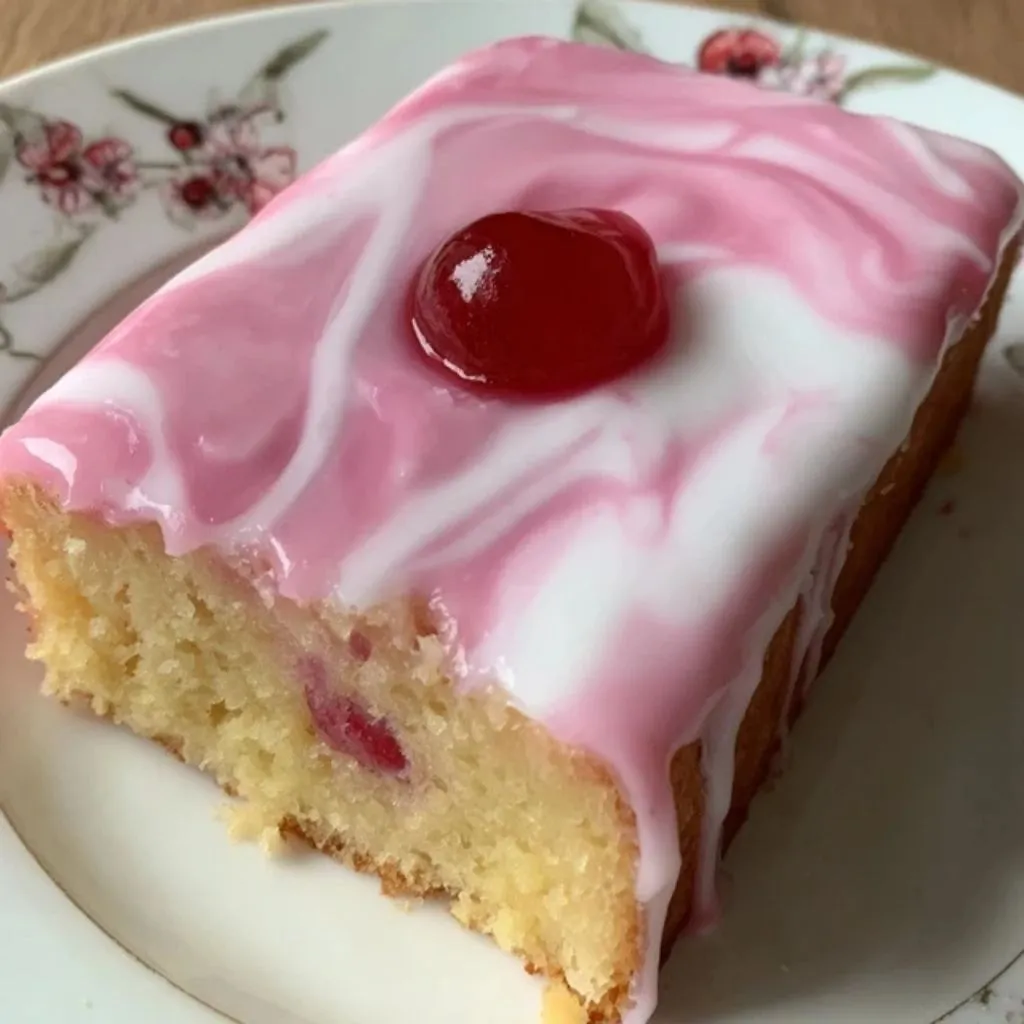
Spread the icing evenly over the cooled sponge with the back of a spoon or a palette knife. If you’re feeling a little creative, add a few drops of pink food colouring and swirl it through with a skewer for that marbled effect. It looks stunning on a tea table and adds just a hint of playfulness to the cake.
Step 9: The Signature Cherry on Top
What’s a Cherry Bakewell without cherries? Place a glacé cherry on top of each slice, pressing gently into the icing before it sets. You can keep them whole or halve them if you prefer smaller bites. Not only does this give the traybake that classic Bakewell look, but it also makes serving super easy — you’ll know exactly where to cut.
Step 10: Slice & Enjoy
Once the icing has set, slice the traybake into 12 generous squares (or smaller if you’re serving lots of people). Each square has that perfect combination of almond sponge, jammy swirls, glossy icing, and a cherry right on top.
Tips for the Best Cherry Bakewell Traybake

Even though this recipe is wonderfully simple, a few little tips can help you get the best results every time:
-
Cool Before Icing
I can’t stress this enough. Let the sponge cool completely before you even think about adding icing. This ensures a smooth, even finish that sets beautifully. -
Don’t Over-Swirl the Jam
When you add the jam, just a light swirl is enough. Too much mixing will blend it into the batter and you’ll lose those pretty ripples. -
Make Ahead Friendly
You can bake the sponge a day in advance and store it (well wrapped) at room temperature. Just add the icing and cherries before serving. -
Freezer Tip
This traybake freezes really well — just leave off the icing and cherries. Wrap the sponge tightly and freeze for up to a month. When you’re ready to serve, defrost fully and finish with the icing. -
Swap the Jam
Raspberry is traditional, but don’t be afraid to switch it up. Strawberry, cherry, or even apricot jam all work beautifully here. -
For a Crowd
If you’re serving a large gathering, cut smaller squares or even bite-sized pieces. The flavour is rich enough that a little goes a long way.
At this point, your Cherry Bakewell Traybake Cake is ready to share — or, if you’re anything like me, ready to keep all to yourself with a cup of tea.
FAQs & Conclusion
By now, you’ve got a beautifully baked, iced, and cherry-topped traybake that looks like it came straight out of a bakery window. But before we wrap up, let’s take a moment to tackle a few of the most common questions people ask about Cherry Bakewell Traybake Cake. These little tips can help you troubleshoot or make tweaks depending on your needs.
Frequently Asked Questions
1. Can I use a different type of jam instead of raspberry?
Absolutely! Raspberry jam is traditional, but strawberry, cherry, or even apricot jam work just as well. If you like things a little tart, blackcurrant jam is also a great choice.
2. How do I store Cherry Bakewell Traybake Cake?
Keep the traybake in an airtight container at room temperature for up to 4 days. If your kitchen runs warm, you can refrigerate it, but be sure to bring it back to room temperature before serving for the best texture.
3. Can I freeze this cake?
Yes — but it’s best to freeze the sponge before icing. Wrap it tightly in cling film (plastic wrap) and then in foil, and freeze for up to 1 month. When you’re ready, defrost completely at room temperature, then add the icing and cherries.
4. What if I don’t have ground almonds?
Ground almonds are key to that Bakewell flavour, but if you don’t have them, you can use almond flour as a substitute. If you’re nut-free, you can replace the ground almonds with the same weight of self-raising flour, but it won’t quite have the same flavour.
5. Can I make this recipe gluten-free?
Yes! Simply swap the self-raising flour for a gluten-free self-raising blend. Just check the jam and icing sugar packaging to make sure they’re certified gluten-free.
6. My icing turned runny. How can I fix it?
If your icing is too thin, just add more sifted icing sugar a little at a time until it thickens. If it’s too thick, stir in tiny amounts of water (literally drops) until you reach a smooth, spreadable consistency.
7. Do I have to use glacé cherries on top?
Tradition says yes, but you don’t have to! If you’re not a fan, try toasted flaked almonds for a more rustic finish, or even a sprinkle of freeze-dried raspberries for a modern twist.
Wrapping It All Up
The Cherry Bakewell Traybake Cake is one of those recipes that never goes out of style. It’s simple enough for a weekday bake but elegant enough to serve at special occasions. Between the buttery almond sponge, the bright swirls of jam, and that sweet glossy icing topped with cherries, every bite feels comforting and nostalgic.
Whether you’re making it for a tea party, a school bake sale, or just because you fancy a slice with your afternoon cuppa, this traybake is guaranteed to make people smile. And honestly, isn’t that what baking is all about?
So go ahead — preheat your oven, grab your cherries, and treat yourself to a slice (or two). And when you do, I’d love to hear how it turned out. Did you stick with the classic raspberry jam, or try something new? Maybe you went all out with marbled icing? Share your version, and let’s keep this much-loved British bake alive and well.
Print
Cherry Bakewell Traybake Cake – A Classic British Bake with Jam, Almonds & Cherries
- Total Time: 1 hour
Description
This Cherry Bakewell Traybake Cake brings together all the nostalgic flavours of a British favourite in one easy bake. With a soft almond sponge rippled with fruity jam, topped with smooth icing and a cherry on every slice, it’s the perfect cake to share with friends, bring to a gathering, or enjoy with a cup of tea. Simple, delicious, and guaranteed to please!
Ingredients
-
Unsalted butter – 225g, softened
-
Caster sugar – 225g
-
Free-range eggs – 4, medium
-
Self-raising flour – 225g, sifted
-
Ground almonds – 100g
-
Almond extract – 1 tsp
-
Raspberry jam – 4 tbsp
-
Icing sugar – 300g, sifted
-
Water – 3–4 tbsp (for icing)
-
Glacé cherries – 12, whole or halved
-
Pink food colouring – a few drops (optional, for marbled effect)
Instructions
-
Preheat the oven to 180°C (160°C fan) / Gas Mark 4. Grease and line a 20cm x 30cm traybake tin with baking paper.
-
Cream the softened butter and caster sugar together until light and fluffy.
-
Beat in the eggs one at a time, adding a spoonful of flour with each to prevent curdling.
-
Gently fold in the remaining flour, ground almonds, and almond extract until smooth.
-
Spoon the batter into the prepared tin, spreading evenly.
-
Dot the raspberry jam over the top and swirl lightly with a knife for a ripple effect.
-
Bake for 35–40 minutes, until golden and a skewer inserted into the centre comes out clean.
-
Allow the cake to cool completely in the tin before icing.
-
For the icing: mix the icing sugar with enough water to make a thick, spreadable icing.
-
Spread evenly over the cooled cake. Add a few drops of pink food colouring and swirl for a marbled look, if desired.
-
Top each slice with a glacé cherry, pressing gently into the icing.
-
Once set, cut into 12 generous squares and enjoy.
Notes
-
Always let the sponge cool completely before icing to avoid melting and mess.
-
Add a touch of almond extract to the icing for an extra flavour boost.
-
Raspberry jam is traditional, but strawberry, cherry, or apricot jam all work beautifully.
-
Freeze the un-iced sponge for up to 1 month. Defrost, then ice before serving.
-
For a rustic finish, replace cherries with toasted flaked almonds.
- Prep Time: 20 minutes
- Cook Time: 40 minutes


")