


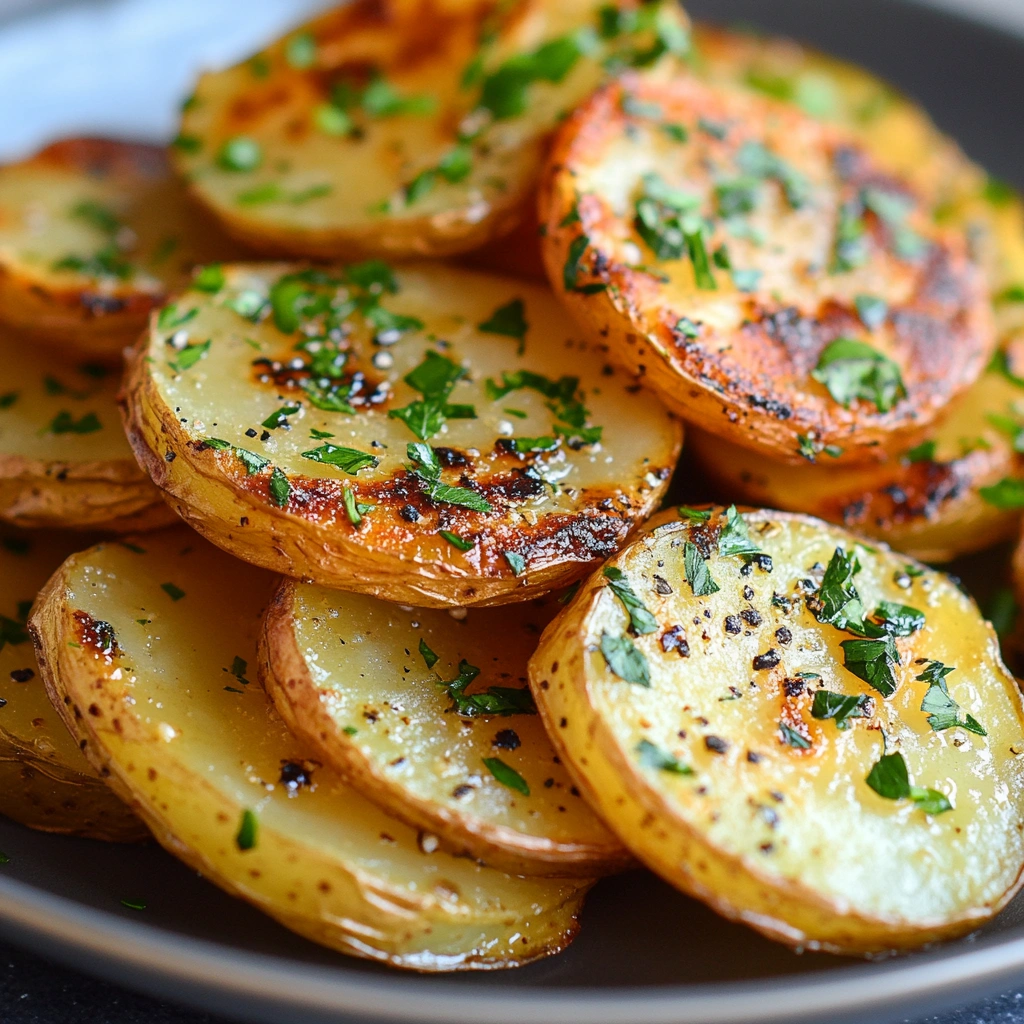
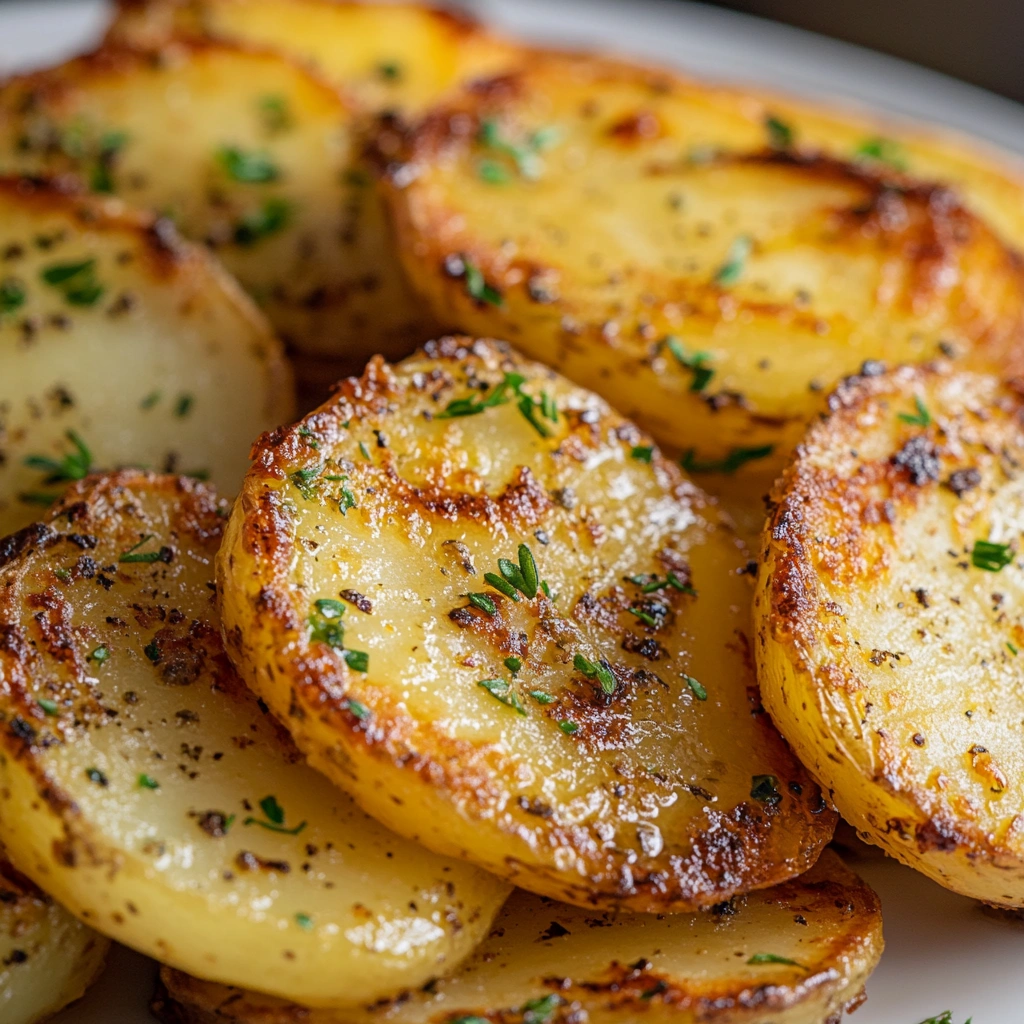
Cheesy garlic snacks are a delicious and easy-to-make appetizer that combines the rich, savory flavors of garlic and melted cheese with the crispy texture of toasted bread or dough. Whether you’re hosting a party, looking for a quick evening snack, or preparing a side dish for an Italian meal, these flavorful bites are always a crowd-pleaser.
One of the best things about cheesy garlic snacks is their versatility. You can make them using a variety of breads, such as French baguettes, ciabatta, or even pizza dough. The type of cheese you use also influences the taste—mozzarella provides a stretchy, gooey texture, while cheddar adds a sharp and tangy bite. Parmesan, on the other hand, enhances the dish with a rich umami flavor.
Garlic plays a key role in elevating the taste of these snacks. Fresh minced garlic, roasted garlic, or even garlic powder can be used to infuse the dish with its signature aroma and depth of flavor. When mixed with butter and herbs like parsley or oregano, it creates a delicious garlic butter spread that enhances the overall taste.
These snacks are not only quick to prepare but also highly customizable. You can add extra toppings like crispy bacon bits, sliced jalapeños for heat, or sun-dried tomatoes for a Mediterranean twist. If you’re looking for a healthier version, gluten-free or keto-friendly bread alternatives can be used, and vegan cheese substitutes make it suitable for a plant-based diet.
In just a few simple steps, you can create a warm, cheesy, garlicky snack that pairs well with dips like marinara sauce, ranch dressing, or garlic aioli. Whether baked in the oven, air-fried, or pan-fried, these cheesy garlic snacks are guaranteed to satisfy your cravings!
Ingredients & Variations
Cheesy garlic snacks require just a few simple ingredients, but the combination of flavors makes them an irresistible treat. Below is a list of essential ingredients along with variations to suit different dietary needs and taste preferences.
Essential Ingredients:
- Bread – Choose from a French baguette, ciabatta, sourdough, or regular sandwich bread. Thicker bread holds up well under the cheese and garlic butter.
- Butter or Olive Oil – Butter adds richness, while olive oil offers a slightly lighter alternative.
- Garlic – Fresh minced garlic provides the strongest flavor, but roasted garlic gives a milder, sweeter taste. Garlic powder can also be used for convenience.
- Cheese – Mozzarella melts beautifully, cheddar adds sharpness, and parmesan brings a salty, nutty depth. Mixing cheeses enhances the flavor.
- Herbs & Seasonings – Parsley, oregano, and basil add freshness. Red pepper flakes or black pepper can provide a spicy kick.
Ingredient Variations:
- Gluten-Free Option: Use gluten-free bread or low-carb almond flour-based bread.
- Vegan Alternative: Replace butter with dairy-free margarine or olive oil. Use vegan cheese made from cashews, almonds, or soy.
- Low-Carb/Keto-Friendly: Opt for almond flour or coconut flour bread and use high-fat cheeses like cheddar or cream cheese.
- Extra Flavor Enhancements: Add crumbled bacon, caramelized onions, or sun-dried tomatoes for a twist on the classic recipe.
Step-by-Step Cooking Instructions
Making cheesy garlic snacks is a simple process that requires only a few steps. Below is a detailed guide to ensure the best results.
Step 1: Prepare the Ingredients
- Preheat the oven to 375°F (190°C) if using an oven. If air frying, preheat to 350°F (175°C).
- Chop or mince the garlic finely for an even distribution of flavor. Roasting the garlic beforehand can mellow its sharpness.
- Grate the cheese if using block cheese for better melting. Pre-shredded cheese contains anti-caking agents that may affect texture.
- Slice the bread into even pieces—thick slices for a chewy texture or thin slices for extra crispiness.
Step 2: Make the Garlic Butter Mixture
- Melt the butter in a small saucepan or microwave. If using olive oil, mix it at room temperature.
- Stir in the garlic and cook for 1-2 minutes if using fresh garlic. This helps release the aroma.
- Add herbs and seasonings, such as parsley, oregano, and a pinch of salt. Mix well.
Step 3: Assemble the Cheesy Garlic Snacks
- Lay out the bread slices on a baking sheet lined with parchment paper.
- Spread the garlic butter evenly on each slice, ensuring full coverage for maximum flavor.
- Sprinkle a generous amount of cheese on top of each piece. If using a mix of cheeses, layer them for the best melt.
Step 4: Bake, Air Fry, or Pan-Fry
Oven Method:
- Bake at 375°F (190°C) for 10-12 minutes until the cheese is bubbly and slightly golden.
- For extra crispiness, broil for 1-2 minutes, but watch closely to prevent burning.
Air Fryer Method:
- Preheat the air fryer to 350°F (175°C).
- Place bread slices in a single layer in the basket.
- Air fry for 5-7 minutes until the cheese is melted and edges are crispy.
Pan-Frying Method:
- Heat a non-stick pan over medium heat.
- Place the bread slices buttered side down and cover with a lid to help the cheese melt.
- Cook for 3-5 minutes, checking frequently to prevent burning.
Step 5: Final Touches and Serving
- Let the snacks cool slightly before serving to avoid burning your mouth.
- Garnish with extra herbs like chopped parsley or a sprinkle of parmesan for added flavor.
- Serve warm with dips such as marinara sauce, garlic aioli, or ranch dressing.

Serving Suggestions & Pairings
Cheesy garlic snacks are best enjoyed fresh out of the oven, air fryer, or pan when the cheese is gooey and the bread is crisp. However, they also shine when paired with complementary dips, beverages, and side dishes.
Best Dips to Serve with Cheesy Garlic Snacks
Pairing your snacks with a flavorful dip enhances their taste and adds variety:
- Marinara Sauce – A tangy tomato-based sauce that complements the richness of the cheese and butter.
- Garlic Aioli – A creamy and garlicky dip that intensifies the garlic flavor.
- Ranch Dressing – The cool and herby notes contrast beautifully with the warm, cheesy snack.
- Spicy Sriracha Mayo – Adds a creamy heat for those who love a bit of spice.
- Pesto Sauce – A basil and garlic-infused sauce that enhances the flavors of the herbs in the snack.
Beverage Pairings
Cheesy garlic snacks can be served with a variety of drinks that complement their flavors:
- Wine – A crisp white wine (like Sauvignon Blanc) or a light red wine (like Pinot Noir) balances the richness of cheese and butter.
- Beer – A refreshing lager or a hoppy pale ale works well with the salty, cheesy flavors.
- Mocktails & Non-Alcoholic Drinks – Lemonade, iced tea, or sparkling water with lemon provide a refreshing contrast.
Adding Proteins for a More Filling Snack
If you want to turn your cheesy garlic snack into a more substantial meal, consider adding:
- Pepperoni or Salami – A classic topping for extra savory goodness.
- Grilled Chicken – Adds lean protein and pairs well with the cheesy, garlicky flavors.
- Bacon Bits – Crispy bacon provides a smoky, crunchy contrast.
- Sautéed Mushrooms – For an earthy, umami-packed variation.
Storage & Reheating Tips
While cheesy garlic snacks are best enjoyed fresh, they can be stored and reheated for later consumption without losing too much flavor and texture.
How to Store Leftovers
If you have leftovers, proper storage is essential to maintain their quality:
- Refrigeration: Store in an airtight container for up to 3 days.
- Freezing: Wrap individually in plastic wrap or foil, then place in a freezer-safe bag. They can be stored for up to 2 months.
Best Methods to Reheat Cheesy Garlic Snacks
Reheating correctly ensures that the bread stays crispy and the cheese remains gooey rather than turning rubbery.
Oven Reheating (Best for Maintaining Texture)
- Preheat oven to 350°F (175°C).
- Place snacks on a baking sheet and cover loosely with foil to prevent excessive browning.
- Bake for 8-10 minutes or until the cheese is melted and the bread is crispy again.
Air Fryer Reheating (Quick & Crispy)
- Preheat the air fryer to 350°F (175°C).
- Place snacks in a single layer and reheat for 4-5 minutes.
- Check frequently to avoid over-crisping.
Pan Reheating (Best for Softening While Keeping Crispy Edges)
- Heat a pan over low to medium heat.
- Place snacks in the pan and cover with a lid to help the cheese melt evenly.
- Heat for 5 minutes, flipping halfway for even crispiness.
Microwave Reheating (Not Recommended for Crispiness)
- Place snacks on a microwave-safe plate.
- Cover with a damp paper towel to prevent them from drying out.
- Heat in 15-second intervals until the cheese is melted.
FAQs
1. How do I make cheesy garlic snacks without an oven?
You can use an air fryer or a stovetop method. The air fryer crisps the bread quickly, while pan-frying gives a golden crust. Both methods take less than 10 minutes.
2. Can I prepare the garlic butter mixture in advance?
Yes! You can make the garlic butter ahead of time and store it in the refrigerator for up to a week. When ready to use, let it soften at room temperature or microwave it for a few seconds.
3. What’s the best cheese for a gooey texture?
Mozzarella is the best for stretchiness, while provolone also melts well. Mixing mozzarella with cheddar or parmesan enhances both texture and flavor.
4. Can I make these snacks gluten-free?
Absolutely! Use gluten-free bread or low-carb alternatives like almond flour-based bread. Most cheeses and butters are naturally gluten-free.
5. How do I prevent garlic from burning in the oven?
Garlic burns quickly at high temperatures. To avoid this, mix it with butter before spreading it on the bread, use roasted garlic for a milder taste, or cover the bread with cheese to protect the garlic from direct heat.
Print
Cheesy Garlic Snack Recipe: A Simple and Flavorful Appetizer
Description
This cheesy garlic snack recipe is a quick and delicious appetizer perfect for any occasion. Made with crispy bread, rich garlic butter, and gooey melted cheese, these snacks are packed with flavor and easy to prepare. Whether baked, air-fried, or pan-fried, they turn out golden, crunchy, and irresistibly cheesy every time.
Perfect for parties, game nights, or as a side dish, these snacks pair well with dips like marinara sauce, garlic aioli, or ranch dressing. With customizable variations, including gluten-free, vegan, and keto-friendly options, this recipe can be adapted to suit different dietary needs.
Ingredients
-
4 slices of low-calorie bread (whole wheat or multigrain for added fiber)
-
1/2 cup part-skim mozzarella cheese, shredded
-
2 tablespoons Parmesan cheese, grated
-
2 tablespoons light butter or olive oil spread
-
3 cloves garlic, minced
-
1/2 teaspoon dried oregano
-
1/2 teaspoon dried parsley (plus extra for garnish)
-
Pinch of salt and pepper
Instructions
- Prepare the Garlic Butter
In a small bowl, mix the light butter, minced garlic, oregano, parsley, and a pinch of salt and pepper. Stir until well combined. - Preheat the Oven
Preheat your oven to 375°F (190°C).
Line a baking sheet with parchment paper or lightly spray it with nonstick cooking spray. - Assemble the Snack
Spread a thin layer of the garlic butter mixture evenly over each slice of bread.
Sprinkle the shredded mozzarella cheese over the top of the bread slices.
Finish with a light sprinkle of Parmesan cheese for extra flavor. - Bake
Place the bread slices on the prepared baking sheet.
Bake in the preheated oven for 8-10 minutes, or until the cheese is melted and bubbly, and the edges of the bread are golden brown.
For a slightly crispier texture, broil for an additional 1-2 minutes, but watch closely to prevent burning. - Garnish and Serve
Remove from the oven and sprinkle with extra dried parsley or fresh chopped parsley for a pop of color.
Cut each slice into smaller pieces for easy snacking, or serve whole as an open-faced treat.
Notes
1. Best Ingredients for Maximum Flavor
- Bread: Use crusty bread like a baguette, ciabatta, or sourdough for the best texture. Soft sandwich bread can work but may be less crispy.
- Cheese: Mozzarella gives a gooey texture, while parmesan and cheddar add sharpness. Mixing different cheeses enhances flavor.
- Garlic: Fresh minced garlic provides the boldest flavor, but roasted garlic offers a milder, slightly sweet taste. Garlic powder is a quick alternative.
2. Tips for Perfect Texture
- Prevent Garlic from Burning: Mix garlic with butter before spreading or place cheese on top to protect it from direct heat.
- Crispy vs. Soft Texture: Bake or air-fry uncovered for a crispy finish. Cover with foil for a softer bite.
- Serving Tip: Let the snacks cool slightly before serving to prevent burning your mouth while still enjoying the melted cheese.
3. Customization Ideas
- For Extra Flavor: Add red pepper flakes, smoked paprika, or caramelized onions.
- For a Protein Boost: Top with pepperoni, bacon bits, or sautéed mushrooms.
- For a Healthier Option: Use whole grain, gluten-free, or keto-friendly bread. Try dairy-free cheese for a vegan version.
4. Make-Ahead & Storage
- Prepare in Advance: The garlic butter mixture can be made days ahead and stored in the fridge.
- Freezing Option: Assemble the snacks and freeze unbaked. Bake directly from frozen when needed.
- Best Reheating Method: Use an oven or air fryer for crispy results. Avoid microwaving to prevent sogginess.


")