Comfort Food Wrapped in a Tortilla
Let me just say—these Cheesy Garlic Chicken Wraps are everything. You know those nights when you’re craving something cozy and flavorful, but you also really don’t want to spend more than 30 minutes in the kitchen? That’s exactly where this recipe comes in and totally saves the day.
I first made these on one of those “I have chicken but no clue what to do with it” kind of nights. A quick peek into my fridge revealed tortillas, shredded cheese, a bit of heavy cream, and some garlic. And let me tell you, the combo that came out of that was downright dreamy.
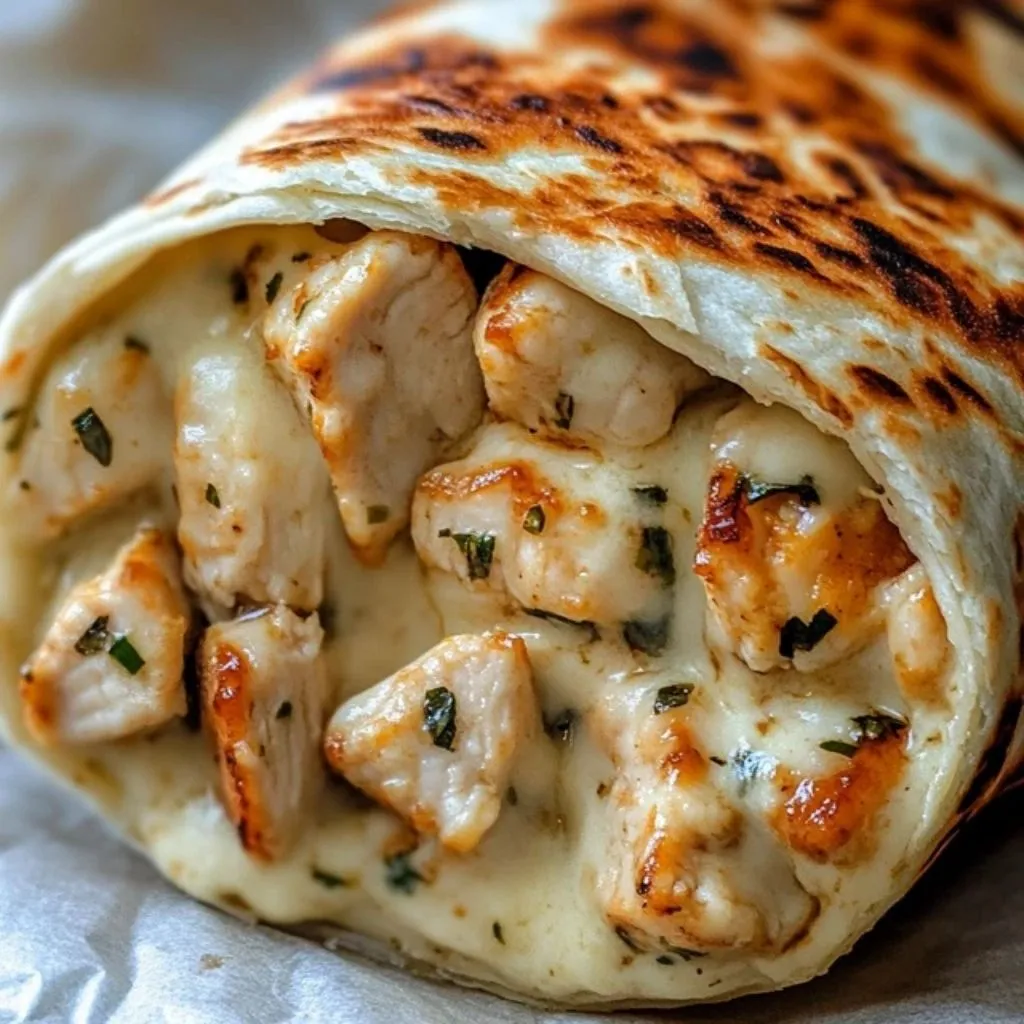
These wraps are loaded with juicy, golden-brown chicken, a garlicky cream sauce that’s rich and flavorful without being too heavy, and melty cheese that pulls everything together in the most comforting way. Plus, the toasted wrap adds that little bit of crispiness on the outside that just makes it all sing. 🙌
Alright, let’s dive into how to make them. I promise—it’s easier than you think!
Ingredients You’ll Need:
Here’s everything you’ll need to pull these wraps together:
-
2 large chicken breasts, diced
-
4 large flour tortillas
-
2 cups shredded cheddar and mozzarella cheese blend
-
3 garlic cloves, minced
-
2 tbsp butter, divided
-
1 tbsp olive oil
-
120ml heavy cream (about ½ cup)
-
¼ tsp garlic powder
-
Salt and pepper, to taste
-
Fresh parsley (optional, for garnish)
Step-by-Step Instructions:
Step 1: Cook the Chicken
Heat the olive oil and 1 tablespoon of butter in a large skillet over medium heat. Once the butter melts and starts to sizzle a bit, go ahead and toss in the diced chicken.
Season the chicken right in the skillet with a good pinch of salt, pepper, and garlic powder. Cook for about 6–8 minutes, stirring every couple of minutes, until the chicken is beautifully golden and cooked through. Once done, transfer the chicken to a plate and set it aside.
Step 2: Make the Garlic Cream Sauce
Don’t clean the skillet—you want to keep all those yummy bits at the bottom for flavor! Add the remaining tablespoon of butter and the minced garlic. Cook for 1–2 minutes, just until the garlic is nice and fragrant. Be careful not to let it brown too much.
Now, pour in the heavy cream, stirring as you go. Let the mixture simmer gently for about 2–3 minutes, so it thickens just slightly. This is where the magic starts to happen.
Step 3: Add the Cheese
Once the cream has thickened a little, stir in 1½ cups of the shredded cheese. Keep stirring until everything is melted, smooth, and creamy. If it seems a bit thick, you can loosen it up with a splash more cream or a tablespoon of water. You want a nice pourable consistency—not too runny, not too thick.
Assembling and Toasting the Cheesy Garlic Chicken Wraps
Okay, so now that we’ve got our cheesy garlic sauce ready and that chicken is cooked to juicy perfection, it’s time to pull everything together and create some seriously delicious wraps. This part is where the whole dish really comes to life—and honestly, it’s my favorite step because you’re so close to digging in!
Let’s jump back into it and finish up these Cheesy Garlic Chicken Wraps.
Step-by-Step Instructions :
Step 4: Warm the Tortillas
Before we build our wraps, let’s make sure the tortillas are soft and pliable. If they’ve been in the fridge or pantry for a while, they can get a little stiff and hard to fold without cracking.
You’ve got a couple of easy options here:
-
Microwave method: Stack the tortillas on a plate, cover them with a damp paper towel, and microwave for about 20–30 seconds.
-
Skillet method: Warm each tortilla for about 10 seconds on each side in a clean, dry skillet over medium heat.
This makes them easier to wrap—and they’ll hold together much better once we toast them.
Step 5: Assemble the Wraps
Now for the fun part: building your wraps!
Lay out a warm tortilla and spoon a portion of the cooked chicken into the center. Make sure you spread it out a bit so each bite is packed with flavor.
Next, drizzle the cheesy garlic sauce right over the chicken. Don’t be shy—this is the good stuff! Then sprinkle on a little bit of the remaining shredded cheese (remember, we saved ½ cup for this step). The extra cheese melts as we toast the wrap and creates this gooey, cheesy layer that’s completely irresistible.
Once everything’s in the middle of the tortilla, fold in the sides, then roll it up from the bottom into a snug wrap.
Repeat with the other tortillas.
Step 6: Toast the Wraps
Place each wrap seam-side down into a clean skillet over medium heat. Let them cook for about 1–2 minutes per side, or until they’re golden brown and lightly crispy. The cheese inside gets even meltier, and the outside develops that perfect toasted finish.
This step seriously levels up the texture—don’t skip it!
Step 7: Serve and Enjoy
Once toasted, slice the wraps in half on a diagonal (because it looks fancy 😄), and serve them hot. You can sprinkle with a little fresh parsley for color if you’ve got it on hand.
Pair them with a light salad, some roasted veggies, or even a handful of chips for a quick and satisfying meal.
Helpful Tips & Variations
I’ve made these wraps quite a few times now, and here are a few tips that’ll help you customize them or switch things up:
➤ Add Some Veggies
Want to sneak in a little extra nutrition? Go for it! Add some sautéed bell peppers, spinach, or even mushrooms to the wraps before toasting. Just cook them up ahead of time and mix them in with the chicken.
➤ Spice It Up
If you like a little heat, toss a pinch of red pepper flakes into the garlic sauce, or add a few dashes of hot sauce to the wrap before folding.
➤ Try Different Cheeses
The cheddar–mozzarella combo is a classic, but feel free to swap in pepper jack, provolone, or even a bit of feta if you’re feeling adventurous.
➤ Make It Low-Carb
If you’re cutting back on carbs, you can serve the cheesy garlic chicken mixture over a bed of greens or cauliflower rice. Skip the wrap and make it a bowl instead!
➤ Make-Ahead Friendly
You can prep the chicken and sauce in advance and store them separately in the fridge. When you’re ready to eat, just warm them up, assemble the wraps, and toast.
FAQ + Final Thoughts on These Dreamy Cheesy Garlic Chicken Wraps
At this point, you’re probably already picturing yourself biting into one of these melty, cheesy, garlicky chicken wraps—and I don’t blame you one bit. But before you head off to the kitchen, I wanted to quickly tackle some common questions that tend to pop up when people make this recipe. Then we’ll wrap things up (pun totally still intended) with a little encouragement to get cooking.
Frequently Asked Questions
1. Can I use pre-cooked or rotisserie chicken?
Absolutely! If you’ve got leftover rotisserie chicken in the fridge, this is a perfect way to use it up. Just shred it and warm it in the garlic sauce before assembling your wraps. It’s a great time-saver and still tastes amazing.
2. What kind of tortillas work best?
Large flour tortillas are ideal because they’re soft, flexible, and easy to wrap. But if you prefer whole wheat, spinach, or low-carb tortillas, those work too—just make sure they’re big enough to hold all the delicious fillings.
3. Can I make these wraps ahead of time?
Yes, with a small tweak. You can prep and assemble the wraps in advance, then store them in the fridge (wrapped in foil or an airtight container). When you’re ready to eat, just toast them in a skillet to crisp them up and melt the cheese again. Perfect for meal prep!
4. How do I store leftovers?
If you’ve already toasted the wraps, store them in the fridge for up to 2 days. To reheat, pop them back in the skillet or toaster oven until warmed through. Microwaving works in a pinch, but the texture will be softer.
5. Can I freeze these wraps?
You can freeze the assembled (but un-toasted) wraps! Wrap each one tightly in foil or plastic wrap, then place in a freezer-safe bag. When you’re ready to eat, thaw overnight in the fridge and toast as usual.
6. What can I serve with these wraps?
These wraps are pretty filling on their own, but they go great with a side salad, some roasted veggies, or even crispy potato wedges. If you’re serving them for lunch, a small soup on the side is perfect too!
7. Can I make this recipe dairy-free?
Yes, with a few substitutions! Use a dairy-free butter alternative, your favorite plant-based cream (like cashew or coconut cream), and a vegan cheese that melts well. Just note the flavor will be slightly different but still delicious.
Final Thoughts: Why These Wraps Are a Weeknight Winner
There’s just something about warm, cheesy wraps that hits the spot every single time. Whether it’s a crazy weekday dinner, a lazy Sunday lunch, or something quick before heading out the door, these Cheesy Garlic Chicken Wraps check all the boxes.
They’re:
-
Quick to make (ready in just 25 minutes!)
-
Made with simple, everyday ingredients
-
Packed with bold flavor from the garlic cream sauce
-
Super versatile—great for using up leftovers or tweaking to your tastes
I love how they turn a handful of pantry and fridge staples into something that feels indulgent and comforting without being fussy. Plus, toasting them in the skillet at the end gives them that irresistible crunch on the outside while keeping all that cheesy goodness warm and melty on the inside.
Whether you’re making dinner for the family or just want something cozy for yourself, I highly recommend giving these wraps a try. And if you do, I’d love to hear how it went! Drop a comment below, let me know if you tried any fun variations, or share a photo—because cheesy wrap wins are always worth celebrating.
Thanks for hanging out in the kitchen with me! Let me know what recipe you’d love to see next—maybe a spicy version of this wrap or a creamy veggie-packed one?
Happy cooking, and don’t forget: when in doubt, add more cheese. 😉
Print
Cheesy Garlic Chicken Wraps – Easy 25-Minute Dinner Recipe Loaded with Flavor
- Total Time: 25 minutes
Description
These Cheesy Garlic Chicken Wraps are the ultimate weeknight comfort food! Made with tender, seasoned chicken, a creamy garlic cheese sauce, and wrapped in warm tortillas, this quick recipe is loaded with flavor and melty goodness. Toasted to golden perfection, they’re perfect for lunch, dinner, or a delicious on-the-go meal.
Ingredients
-
2 large chicken breasts, diced
-
4 large flour tortillas
-
2 cups shredded cheddar and mozzarella cheese blend
-
3 garlic cloves, minced
-
2 tablespoons butter, divided
-
1 tablespoon olive oil
-
120ml (½ cup) heavy cream
-
¼ teaspoon garlic powder
-
Salt and pepper, to taste
-
Fresh parsley (optional, for garnish)
Instructions
-
Cook the Chicken:
In a large skillet, heat olive oil and 1 tablespoon butter over medium heat. Add diced chicken, season with salt, pepper, and garlic powder. Cook for 6–8 minutes until golden and cooked through. Remove from skillet and set aside. -
Make the Garlic Cheese Sauce:
In the same skillet, melt the remaining tablespoon of butter. Add minced garlic and sauté for 1–2 minutes until fragrant. Pour in the heavy cream and simmer for 2–3 minutes to thicken slightly. -
Add Cheese:
Stir in 1½ cups of the shredded cheese until melted and smooth. If the sauce is too thick, add a splash of cream or water to loosen it. -
Warm the Tortillas:
Warm tortillas in the microwave (covered with a damp paper towel for 20–30 seconds) or heat individually in a dry skillet for about 10 seconds per side. -
Assemble the Wraps:
Add a portion of cooked chicken to the center of each tortilla. Drizzle with cheesy garlic sauce and sprinkle with remaining shredded cheese. -
Wrap and Toast:
Fold the sides in, roll up the tortillas tightly, and place seam-side down in a clean skillet. Toast for 1–2 minutes on each side until golden and crispy. -
Serve:
Slice wraps in half, garnish with parsley (optional), and serve hot.
Notes
-
Make-Ahead Option: Prep the chicken and sauce in advance and store separately. Assemble and toast when ready to serve.
-
Use Rotisserie Chicken: Great for saving time—just reheat and mix with the sauce.
-
Add Veggies: Sautéed peppers, spinach, or mushrooms make great add-ins.
-
Cheese Variations: Swap in pepper jack, provolone, or feta for different flavors.
-
Freezing Tips: Assemble (but don’t toast) and freeze. Thaw overnight, then toast when ready.
- Prep Time: 10 minutes
- Cook Time: 15 minutes


