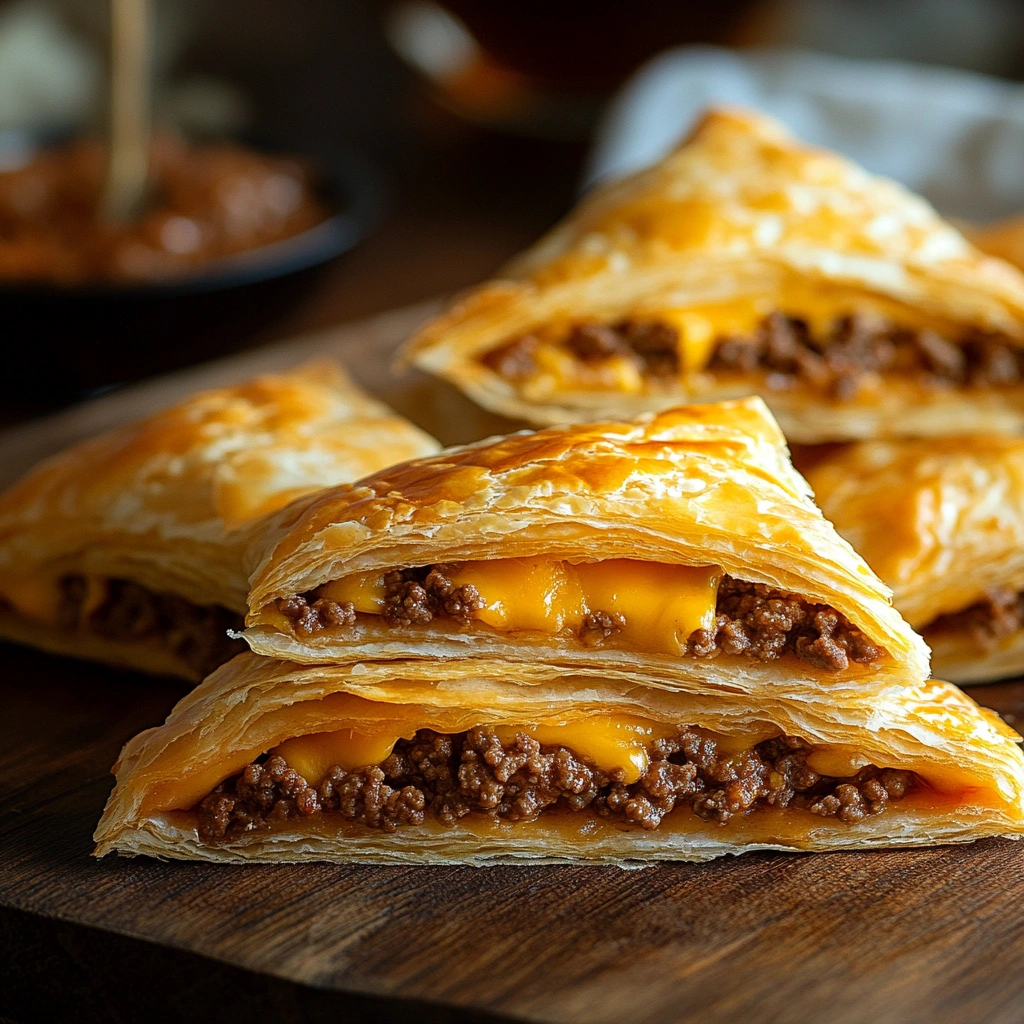
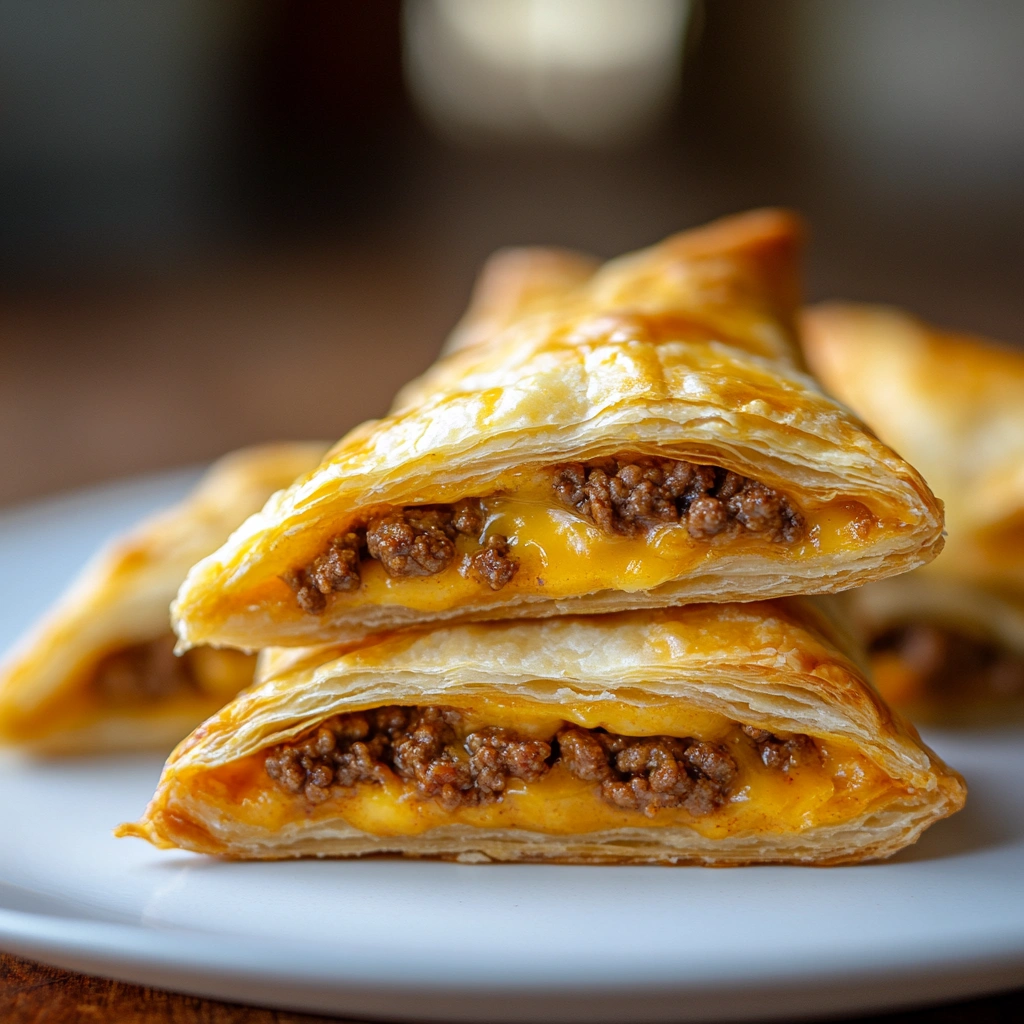
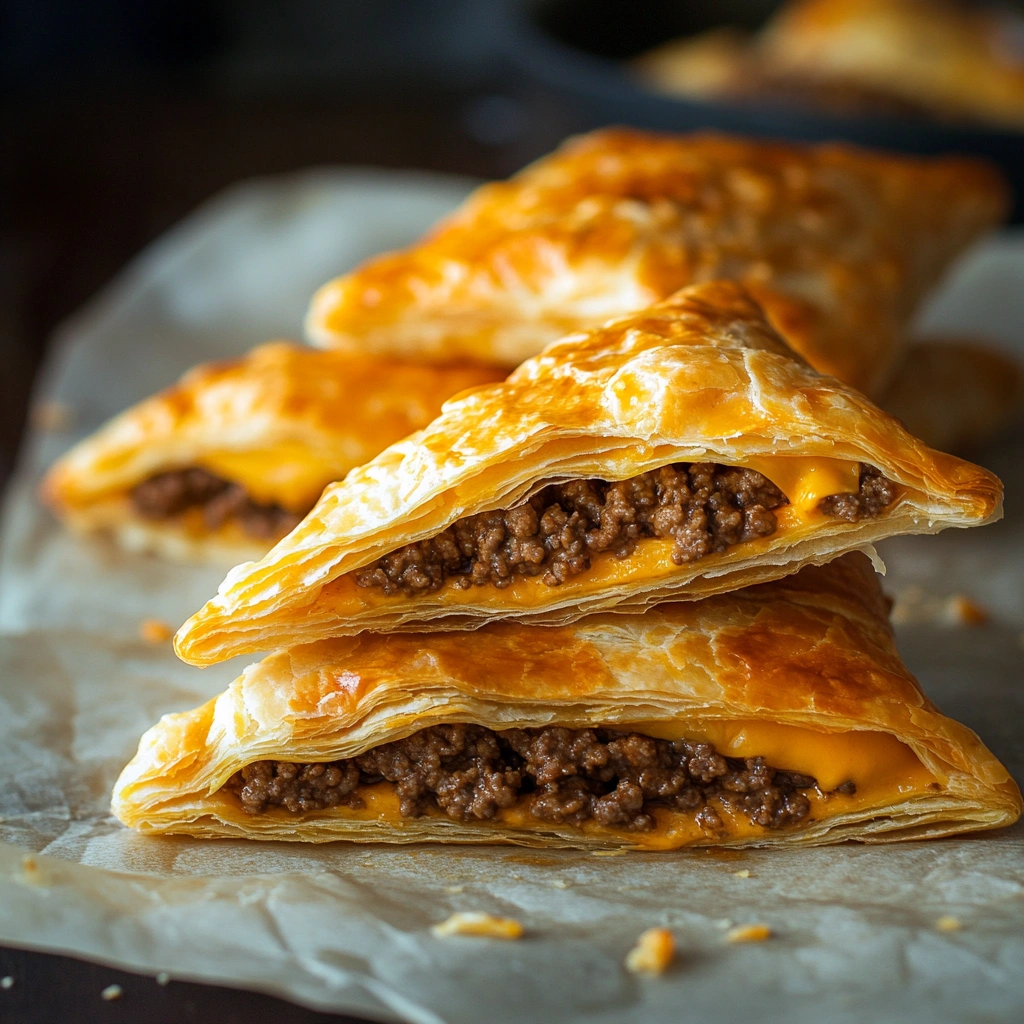
If you’re looking for a fun, delicious twist on a classic cheeseburger, cheeseburger pockets are about to become your new favorite meal. Imagine all the juicy, savory flavors of a traditional cheeseburger—ground beef, melty cheese, and all your favorite toppings—wrapped inside a soft, golden-brown dough. Cheeseburger pockets combine the best parts of comfort food with the convenience of a handheld snack, making them perfect for busy weeknights, weekend gatherings, or even packed lunches.
Cheeseburger pockets are not only incredibly satisfying but also highly customizable. Whether you stick to the basics with beef and cheddar, or you get creative with ingredients like bacon, sautéed onions, or spicy peppers, these pockets can be tailored to fit any taste preference. Plus, they’re a great way to sneak in some veggies for picky eaters or use up leftovers in the fridge. The sealed dough locks in all the flavors and juices, ensuring every bite is packed with cheesy, savory goodness.
Another big bonus? Cheeseburger pockets are easy to make ahead and freeze, which means you can have a hearty, homemade meal ready to go anytime you need it. You can bake them fresh for a hot meal or reheat them for a quick and satisfying snack. Whether you’re feeding a hungry family or prepping for the week, cheeseburger pockets offer a no-fuss, kid-friendly option that adults love just as much.
In this article, we’ll walk you through everything you need to know to make the perfect cheeseburger pockets at home, from the basic ingredients and step-by-step instructions to creative variations and storage tips. Get ready to discover a new go-to recipe that’s bound to become a staple in your kitchen!
Why You’ll Love This Recipe
Cheeseburger pockets offer the perfect combination of convenience, flavor, and versatility. If you love a classic cheeseburger but want something a little more portable and mess-free, these pockets are the answer. They take all the best parts of a cheeseburger—seasoned beef, gooey cheese, and soft bread—and package them into a neat, hand-held meal.
One of the greatest things about cheeseburger pockets is how easy they are to customize. You can keep them classic with simple beef and cheddar or experiment with different cheeses, fillings, and even sauces inside. They are also perfect for accommodating different dietary needs, such as making vegetarian versions with plant-based meat or low-carb versions using alternative doughs.
Beyond their flexibility, cheeseburger pockets are excellent for meal prep. They freeze and reheat beautifully, meaning you can make a large batch in advance and always have a quick meal on hand. This makes them ideal for busy families, students, or anyone who needs a satisfying option on hectic days.
Additionally, kids absolutely love cheeseburger pockets. Their small, portable size and familiar flavors make them a huge hit with picky eaters. You can even involve the whole family in the cooking process, letting everyone customize their pockets with their favorite toppings.
Whether you serve them as a hearty lunch, a game-day snack, or a casual dinner, cheeseburger pockets are guaranteed to become a regular request in your kitchen.
Ingredients You’ll Need
To make cheeseburger pockets at home, you will need a handful of basic ingredients, many of which you may already have on hand. Here is a full list:
Ground Beef: Choose lean ground beef for a less greasy filling, or substitute with ground turkey, chicken, or plant-based alternatives.
Cheese: Cheddar cheese is the classic choice, but American, mozzarella, provolone, or pepper jack also work well. Shredded cheese melts evenly.
Dough: You can use refrigerated biscuit dough, pizza dough, crescent roll dough, or homemade bread dough, depending on your preference and time constraints.
Onions: Finely chopped onions add flavor and texture to the beef mixture. You can sauté them for a sweeter taste.
Pickles: Chopped pickles give a tangy bite that mimics the flavors of a traditional cheeseburger.
Ketchup and Mustard: Adding these condiments into the beef mixture or spreading them on the dough enhances the burger flavor.
Seasonings: A simple blend of salt, pepper, garlic powder, and onion powder brings out the best in the beef.
Optional Add-ins: Bacon bits, sautéed mushrooms, or jalapeños can add more depth and interest to your pockets.
Egg Wash: Beaten egg brushed over the top before baking helps create a shiny, golden crust.
Having these ingredients prepped and ready makes the assembly process quick and straightforward.

Equipment Needed
Making cheeseburger pockets does not require any special equipment, but having the right tools on hand will make the process smoother:
Skillet: Essential for browning and seasoning the ground beef filling.
Baking Sheet: Used to bake the assembled pockets in the oven. Line it with parchment paper to prevent sticking.
Rolling Pin: Helps roll out the dough evenly to the correct thickness. If you do not have one, a clean wine bottle can substitute.
Parchment Paper: Keeps the pockets from sticking to the baking sheet and makes cleanup easier.
Pastry Brush: For applying the egg wash to give the pockets a shiny, appetizing finish.
Knife or Pizza Cutter: To trim the dough if necessary and create even shapes.
Mixing Bowl: For combining the beef, cheese, and any add-ins.
With these basic tools, you will be well-equipped to create perfect cheeseburger pockets at home.
Step-by-Step Instructions
Follow these detailed steps to make perfect cheeseburger pockets every time:
Step 1: Prepare the Filling
-
In a skillet over medium heat, cook the ground beef until no longer pink.
-
Drain any excess grease.
-
Add chopped onions, pickles, ketchup, mustard, and seasonings (salt, pepper, garlic powder, onion powder).
-
Stir until everything is well combined and heated through.
-
Remove from heat and let cool slightly.
Step 2: Prepare the Dough
-
Roll out your chosen dough on a lightly floured surface.
-
Aim for dough pieces about 5–6 inches in diameter if making individual pockets.
-
If using biscuit or crescent dough, flatten slightly to widen the surface area.
Step 3: Assemble the Pockets
-
Place a spoonful of the cooled beef mixture in the center of each piece of dough.
-
Add a generous amount of shredded cheese on top of the beef.
-
Fold the dough over the filling to create a sealed pocket.
-
Pinch the edges tightly or press with a fork to ensure a good seal.
Step 4: Prepare for Baking
-
Preheat your oven to 375°F (190°C).
-
Line a baking sheet with parchment paper.
-
Place the assembled pockets on the baking sheet, leaving space between them.
-
Brush each pocket with beaten egg to promote browning and shine.
Step 5: Baking
-
Bake for 15–18 minutes, or until the pockets are golden brown and puffed.
-
Check the bottom of the pockets to ensure they are fully baked.
-
Remove from the oven and let cool slightly before serving.
Optional Step: Air Fryer Method
-
Preheat your air fryer to 350°F (175°C).
-
Place pockets in a single layer in the basket.
-
Air fry for 8–10 minutes, flipping halfway through, until golden brown and crispy.
Tips for the Best Cheeseburger Pockets
Creating cheeseburger pockets is simple, but a few pro tips can make them even better:
Do Not Overfill: It is tempting to load up the dough with filling, but too much will make it difficult to seal and may cause the pockets to burst open during baking. Aim for about two tablespoons of filling per pocket, depending on size.
Seal Properly: Take the time to pinch or crimp the edges tightly. Pressing the edges with a fork creates a stronger seal and gives a professional appearance.
Cool the Filling Slightly: Let the beef mixture cool for a few minutes before placing it on the dough. Hot filling can weaken the dough, making it tear more easily.
Use an Egg Wash: Brushing the tops with an egg wash before baking will help the pockets develop a golden, glossy crust.
Even Dough Thickness: Roll the dough evenly to avoid thin spots that can tear or burn during baking.
Line the Baking Sheet: Always use parchment paper to prevent sticking and to make cleanup easier.
Watch the Bake Time: Ovens can vary, so start checking a few minutes before the suggested baking time. The pockets should be a deep golden color when done.
By following these tips, you can achieve cheeseburger pockets that are not only delicious but also visually appealing.
Variations and Add-Ons
Cheeseburger pockets are incredibly versatile, and you can easily customize them to suit your preferences or dietary needs. Here are some popular variations:
Bacon Cheeseburger Pockets: Add cooked, crumbled bacon to the beef mixture for a smoky, savory boost.
BBQ Cheeseburger Pockets: Mix in a few tablespoons of barbecue sauce instead of ketchup for a sweet and tangy flavor twist.
Spicy Cheeseburger Pockets: Add diced jalapeños, a sprinkle of crushed red pepper, or use pepper jack cheese for some heat.
Vegetarian Cheeseburger Pockets: Substitute the ground beef with a plant-based ground meat alternative. Add extra vegetables like mushrooms, peppers, or spinach.
Breakfast Cheeseburger Pockets: Incorporate scrambled eggs and cooked breakfast sausage with cheese for a morning version.
Double Cheese Pockets: Use a combination of cheeses like mozzarella and cheddar for extra gooeyness.
Mini Cheeseburger Bites: Use smaller pieces of dough and make bite-sized versions, perfect for parties and appetizers.
Feel free to mix and match ingredients based on what you have available. These pockets are a great way to get creative in the kitchen.
How to Store and Reheat
Storing cheeseburger pockets properly ensures they stay fresh and delicious.
To Store in the Refrigerator: Place fully cooled pockets in an airtight container. They will keep for up to 4 days.
To Freeze: After cooling, wrap each pocket individually in plastic wrap, then place them in a freezer-safe bag or container. They can be frozen for up to 2 months.
To Reheat:
-
Oven: Preheat to 350°F (175°C), place pockets on a baking sheet, and heat for 10–15 minutes.
-
Microwave: Wrap a pocket in a damp paper towel and microwave for about 1–2 minutes, but note the crust may not stay as crisp.
-
Air Fryer: Reheat at 350°F (175°C) for about 5 minutes for a crispy texture.
Reheating in the oven or air fryer is recommended for the best texture.

What to Serve With Cheeseburger Pockets
Cheeseburger pockets pair well with a variety of sides and dipping sauces. Here are a few ideas:
Dipping Sauces:
-
Classic ketchup
-
Yellow or spicy mustard
-
Ranch dressing
-
Barbecue sauce
-
Special burger sauce
Sides:
-
French fries or sweet potato fries
-
Potato salad
-
Coleslaw
-
Pickles and olives
-
Fresh side salad
For a heartier meal, serve cheeseburger pockets with a side of roasted vegetables or a bowl of tomato soup. They are versatile enough to fit into both casual and more filling meals, depending on the occasion.
Common Mistakes to Avoid
Avoid these common mistakes to make sure your cheeseburger pockets turn out perfectly:
Overfilling: Too much filling can cause the dough to split open during baking, leading to a messy result.
Skipping the Egg Wash: Egg wash gives the pockets their beautiful golden color and slight crunch. Without it, they may look pale and unappetizing.
Not Sealing Properly: If the edges are not sealed well, the cheese can leak out during baking. Press firmly and consider crimping with a fork.
Using Hot Filling: If the beef mixture is too hot when placed on the dough, it can weaken the dough and cause tears.
Underbaking: Make sure the dough is fully cooked; pale, doughy pockets are less enjoyable. Always check the bottom for doneness.
Attention to these details will ensure a successful and tasty batch every time.
Cheeseburger Pockets for Meal Prep
Cheeseburger pockets are an excellent meal prep option because they freeze and reheat beautifully.
How to Prepare for Meal Prep:
-
Make a double batch when cooking.
-
Allow the baked pockets to cool completely before freezing.
Freezing Instructions:
-
Wrap each pocket individually in plastic wrap and place them in a freezer-safe bag or container.
-
Label the bag with the date and type of filling.
Reheating for Meal Prep:
-
Remove a pocket from the freezer and thaw in the refrigerator overnight or reheat directly from frozen.
-
For best results, reheat in an oven or air fryer to maintain crispness.
These pockets are perfect for busy weekdays, school lunches, or quick dinners when you are short on time.
FAQs (From People Also Ask)
What dough is best for cheeseburger pockets?
Refrigerated biscuit dough, pizza dough, or crescent roll dough all work well. Homemade bread dough is an excellent option if you prefer a more traditional, fluffy texture.
Can you make cheeseburger pockets in advance?
Yes, you can prepare the pockets ahead of time. Assemble and refrigerate them for up to a day before baking, or bake them completely and store for future meals.
Can you air fry cheeseburger pockets?
Absolutely. Air frying is a fast and effective method. Preheat the air fryer to 350°F (175°C) and cook the pockets for about 8–10 minutes, flipping once, until golden and crispy.
How do you keep cheeseburger pockets from getting soggy?
Make sure the beef mixture is not overly greasy and allow it to cool slightly before assembling. Baking on parchment paper and reheating properly also help maintain crispness.
What kind of cheese melts best inside pockets?
Cheddar is a favorite for its sharp flavor and good melting quality. American cheese melts smoothly and adds creaminess, while mozzarella offers a stringy, gooey texture.
Conclusion
Cheeseburger pockets are a simple yet incredibly satisfying twist on a traditional favorite. With a crisp golden crust and a rich, cheesy filling, they are ideal for everything from busy weeknight dinners to party snacks. The beauty of this recipe lies in its versatility, allowing endless customization to suit any taste. Easy to make, store, and reheat, cheeseburger pockets are a true kitchen staple. Whether you stick with a classic version or experiment with exciting variations, these pockets are sure to please both kids and adults alike. Try making a batch today and enjoy homemade comfort food at its best.
Print
Cheeseburger Pockets Recipe
Description
These homemade cheeseburger pockets are the ultimate comfort food. Featuring seasoned ground beef, gooey melted cheese, and all your favorite burger flavors wrapped inside soft, golden dough, they are perfect for easy dinners, meal prep, or party snacks. Quick to make and endlessly customizable with different fillings and cheeses, these pockets are kid-approved, freezer-friendly, and sure to become a family favorite. Whether you bake them fresh or reheat them for a fast meal, cheeseburger pockets bring the deliciousness of a classic cheeseburger into a fun, portable form.
Ingredients
-
1 lb ground beef – The heart and soul of it all.
-
1 small onion, finely chopped – For a little sweetness and a lot of flavor.
-
1 cup shredded cheddar – Melted cheese inside a warm dough pocket? Yes, please.
-
1 (8 oz) can crescent roll dough – The unsung hero of weeknight dinners.
-
2 tbsp ketchup + 1 tbsp mustard – The flavor combo that screams “burger.”
-
1 tbsp Worcestershire sauce – Adds that something extra.
-
Salt and pepper – Don’t skip this. Seasoning matters.
-
1 tbsp olive oil – To get the beef party started.
Instructions
1. Fire Up the Oven
Preheat to 375°F. While it warms, let’s get that filling going.
2. Sizzle and Simmer
Heat the olive oil in a skillet. Toss in the onions—let them soften up for a few minutes.
Add the beef and break it up as it browns. Cook until fully done, then drain off the excess grease.
Now for the flavor: stir in ketchup, mustard, Worcestershire, salt, and pepper. Let it all mingle on low heat for a couple minutes. Then, set aside to cool slightly. Warm filling + cold dough = not great.
3. Stuff, Fold, Seal
Unroll the crescent dough and separate it into triangles.
Scoop a spoonful of the beef mix onto the wide end of each triangle, sprinkle on the cheese, then fold the tip over and pinch those edges shut. Like sealing a tiny, delicious envelope.
4. Bake ‘Em Up
Place on a parchment-lined baking sheet.
Pop into the oven for 12–15 minutes, or until golden and puffed.
Let them cool for a few before digging in—burnt tongues are no fun.
Notes
-
Dough Options: You can use refrigerated biscuit dough, pizza dough, crescent dough, or homemade bread dough based on preference and availability.
-
Cheese Tips: Cheddar, American, mozzarella, or pepper jack cheese work best for a melty center.
-
Freezing Instructions: After baking and cooling, wrap pockets individually in plastic wrap and freeze for up to 2 months.
-
Reheating: For the best texture, reheat frozen pockets in the oven at 350°F (175°C) for 10–15 minutes, or in an air fryer at 350°F for about 5 minutes.
-
Air Fryer Option: Air fry unbaked pockets at 350°F (175°C) for 8–10 minutes, flipping halfway through.
-
Customization Ideas: Try adding bacon, sautéed onions, jalapeños, or BBQ sauce for delicious variations.
-
Prevent Sogginess: Let the beef mixture cool slightly before assembling and avoid overfilling the pockets.
-
Meal Prep Tip: Make a double batch and freeze extras for quick grab-and-go meals.


