Description
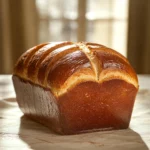
This classic sourdough bread recipe is perfect for beginners and seasoned bakers alike. Made with just flour, water, salt, and a bubbly sourdough starter, it yields a tangy, crusty artisan loaf with a chewy interior and beautiful open crumb. Whether you’re using your own homemade starter or one shared by a friend, this step-by-step recipe guides you through the entire sourdough process—from mixing and fermentation to shaping, cold proofing, and baking. No commercial yeast required!
Great for toast, sandwiches, or just slathered with butter straight out of the oven.
Ingredients
-
500g (3 ¾ cups) bread flour (or all-purpose flour)
-
100g (½ cup) active sourdough starter
-
10g (2 teaspoons) salt
-
350g (1 ½ cups) water (room temperature)
Instructions
Step 1: Feed Your Sourdough Starter (If Needed)
If your starter has been in the fridge, feed it 4-6 hours before baking. Make sure it’s active, bubbly, and has doubled in size before using it in your dough.
Step 2: Mix the Dough (Autolyse Stage)
- In a large bowl, mix flour and water until fully combined.
- Let it rest for 30-45 minutes to allow the flour to absorb the water.
Step 3: Add the Sourdough Starter and Salt
- Mix in the sourdough starter and salt.
- Use your hands or a dough whisk to fully incorporate the ingredients.
Step 4: Stretch and Fold the Dough
- Instead of kneading, use the stretch and fold method:
- Stretch one side of the dough and fold it over.
- Turn the bowl and repeat 4-6 times.
- Repeat this process every 30 minutes for 2 hours to develop gluten structure.
Step 5: Bulk Fermentation (First Rise)
- Cover the dough with a damp towel and let it rest at room temperature for 6-8 hours (or overnight in the fridge).
- The dough should double in size.
Step 6: Shape the Dough
- Gently remove the dough from the bowl.
- Shape it into a round or oval loaf by folding the edges toward the center.
- Place the dough into a floured proofing basket or bowl.
Step 7: Second Rise (Proofing)
- Cover and let it rise for 1-2 more hours at room temperature.
- If you prefer, refrigerate the dough overnight for a deeper flavor.
Step 8: Preheat the Oven
- Preheat your oven to 475°F (245°C).
- Place a Dutch oven or baking stone inside to heat up.
Step 9: Score the Dough
- Turn the dough onto parchment paper.
- Use a sharp knife or bread lame to make a deep slash across the surface.
Step 10: Bake the Sourdough Bread
- Place the dough into the preheated Dutch oven.
- Cover and bake for 20 minutes.
- Remove the lid and bake for another 20-25 minutes until golden brown.
Step 11: Cool and Enjoy
- Let the bread cool on a wire rack for at least 1 hour before slicing.
Notes
-
Sourdough Starter: Make sure your starter is active and bubbly before using. It should have been fed 4–6 hours prior and passed the float test.
-
Flour Options: Bread flour provides the best structure, but you can experiment with whole wheat or rye for added flavor and texture.
-
Proofing Times: Always adjust fermentation times based on your room temperature—warmer kitchens ferment faster.
-
Cold Proofing: Overnight cold fermentation (8–12 hours) enhances flavor and makes the dough easier to handle.
-
Shaping Tip: Handle the dough gently to preserve gas bubbles and achieve an airy crumb.
-
Storage: Store at room temperature wrapped in a linen bag or towel. Freeze sliced for quick access.
-
Variations: Try adding olives, herbs, cheese, or seeds during bulk fermentation for extra flavor.
